
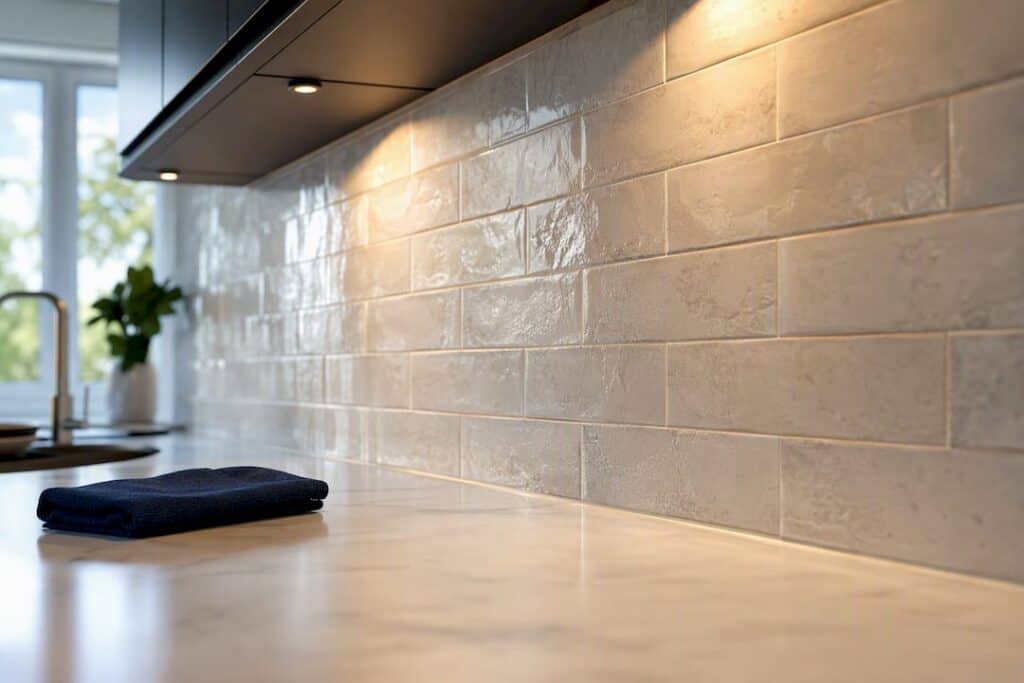
For most homeowners, the best balance of durability and low upkeep comes from large-format porcelain or glazed ceramic subway tile. Glass and natural stone deliver more visual drama, but both demand more installation care and ongoing maintenance. The decision rule is simple: rank performance and cleaning tolerance above pure looks, pick your material family first, then choose a layout pattern.
TL;DR:
- Large-format porcelain tiles are the most low-maintenance option, with fewer grout lines and stain resistance that suits busy households.
- Natural stone offers a luxury look but requires regular sealing and more careful maintenance to prevent staining from acidic spills.
- Pattern selection impacts labor and waste, with subway being the easiest and most cost-effective, while herringbone and other complex layouts increase install time and expense.
- Proper substrate preparation and mortar coverage are critical to prevent backsplash failure, especially for large tiles and stone, requiring professional installation.
- Costs vary from under $10 per square foot for peel-and-stick to premium natural stone, with pattern complexity and substrate work driving overall project expenses.
Table of Contents
- Kitchen Backsplash Ideas by Material: What Works Where
- How to Choose a Backsplash Material: Performance Before Looks
- Backsplash Patterns: Subway, Herringbone, Hexagon, and Beyond
- Installation Fundamentals: What Separates a Pro Job From a DIY Mistake
- Grout and Sealing: A Realistic Maintenance Plan by Material
- Budgeting and Timeline for a Backsplash Project
- How to Plan Your Backsplash Project Step by Step
- Lighting Considerations for Your Backsplash
- Environmental and Sustainability Considerations
- Why Elite Builder Renovation Is a Strong Choice for Your Backsplash Project
- Sources
- FAQ
Kitchen Backsplash Ideas by Material: What Works Where
Choosing among kitchen backsplash ideas starts with materials, not colors. Every material handles heat, grease, and moisture differently, and that performance gap matters more once the tile is on the wall than it does in the showroom. Here’s how the major options actually behave in daily use.
Ceramic tile remains the workhorse of American kitchens for good reason.
- Look: available in nearly unlimited colors, finishes, and shapes, including handmade-looking zellige styles trending for 2026.
- Durability: solid for everyday splatter, but glossy glazes can chip if struck by a heavy pan.
- Best locations: anywhere in the kitchen, including behind the range with a heat-rated glaze.
- Pairing idea: a soft white subway ceramic with brass hardware reads timeless against nearly any cabinet color.
Porcelain tile, including large-format panels, has become the default recommendation for busy households.
- Look: mimics marble, concrete, or stone with far less maintenance than the real thing.
- Durability: denser and less porous than ceramic, so it resists staining and moisture better.
- Best locations: full-height installations, wet sink walls, and anywhere grout lines are the enemy.
- Pairing idea: large-format porcelain slabs behind a range hood create a seamless, almost architectural focal wall.
Large-format porcelain deserves its own callout because it’s reshaping how remodelers approach backsplashes. Fewer grout lines mean less scrubbing, and large-format porcelain panels reduce visible seams for a cleaner, more modern look that pairs naturally with white or navy cabinetry. The tradeoff is installation complexity. Full slabs often require templating and specialized handling equipment like suction cups and dedicated delivery trucks, which stretches lead times and generally requires a professional installer rather than a DIY weekend.
Glass tile brings light and reflection that no other material matches.
- Look: available in subway shapes, mosaics, and iridescent finishes that bounce light around a dim kitchen.
- Durability: scratch-resistant and easy to wipe, but grout lines show dirt faster because the tile itself stays spotless.
- Best locations: works well as an accent strip or behind a sink, less ideal directly behind an open-flame range.
- Pairing idea: pair glass subway tile with under-cabinet lighting to amplify the reflective effect, and see our kitchen lighting ideas for placement guidance.
Glass tile is one of the materials that genuinely needs a specialist installer. It requires white thinset (dark mortar shadows through the glass) and careful back-buttering to avoid trapped air pockets that show as dark spots.
Natural stone, including marble, travertine, and slate, offers a luxury look no manufactured product fully replicates.
- Look: unique veining and texture; every slab is different.
- Durability: porous stone like marble stains from acidic spills (wine, citrus, tomato sauce) unless sealed regularly.
- Best locations: better as an accent behind a range hood than as a full wet-wall application near the sink.
- Pairing idea: honed marble with matte black fixtures gives a moody, high-end feel that photographs beautifully.
Metal tile (stainless steel, copper, brass) shows up increasingly in residential and commercial kitchen designs for 2026.
- Look: industrial or warm, depending on the finish; copper and brushed brass are current favorites.
- Durability: extremely heat resistant, making it a genuine choice directly behind a range.
- Best locations: cooking zones and accent strips.
- Pairing idea: a copper metal accent strip above a stainless range hood ties the appliance and wall together.
Engineered stone (quartz, sintered surfaces) bridges the gap between natural stone looks and porcelain-level performance. It resists staining without sealing, making it a strong match for kitchens that already have quartz countertops. Homeowners extending a quartz counter up the wall as a backsplash should review our guide to quartz countertop installation in Tampa, since the fabrication and seaming process is similar for both applications.
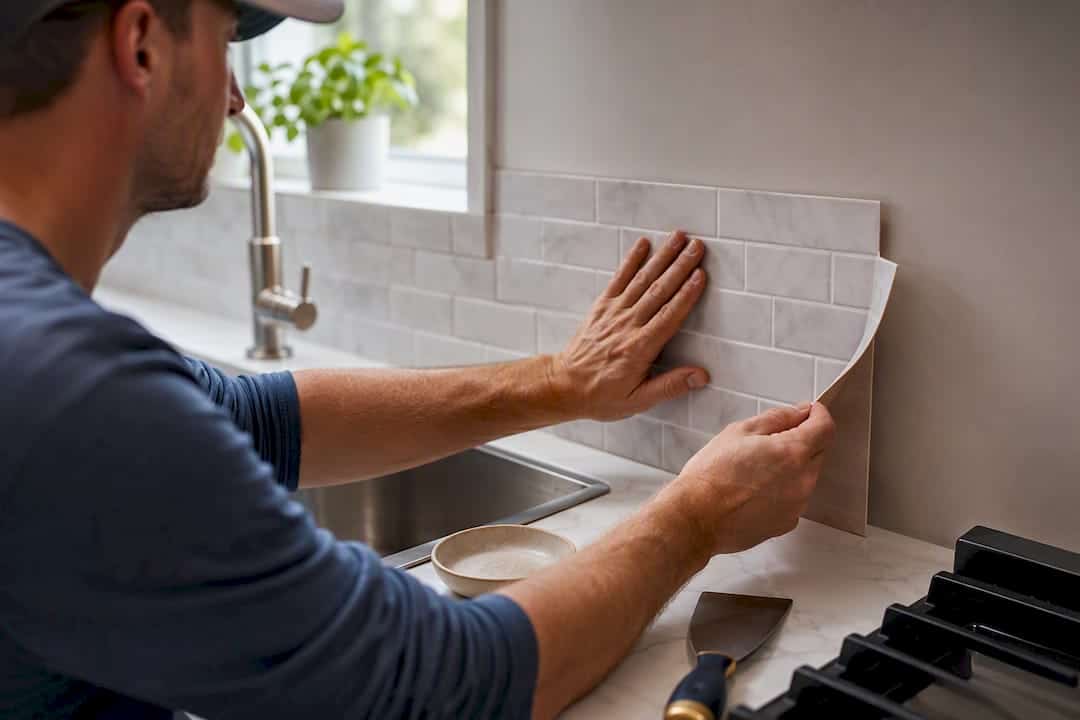
Peel-and-stick backsplash tile fills a specific niche: renters, short-term budgets, or a quick refresh before a home sale. It installs in an afternoon with no mortar or grout. The tradeoff is real. Peel-and-stick products often fail near heat sources or lift over time, so treat it as a temporary solution rather than a permanent kitchen upgrade.
How to Choose a Backsplash Material: Performance Before Looks
Pick performance first, maintenance second, and appearance third. That order feels backward to a lot of homeowners flipping through inspiration photos, but it’s the sequence that prevents regret two years into ownership. Choosing a material based on performance rather than appearance alone reduces the risk of staining, mold, or a costly replacement down the road.
Three questions narrow the field fast:
- Does this wall face regular grease and steam (behind a range) or occasional splashes (behind a sink)?
- How often will this household actually clean grout lines, realistically?
- Is this a forever kitchen or a five-year hold before resale?
Tile size and grout line count drive most of your long-term cleaning effort. Smaller tiles like penny rounds or mosaics look charming but multiply the linear feet of grout that needs scrubbing. Reducing grout lines by choosing larger tiles or slabs is one of the simplest ways to lower long-term cleaning demands for a busy household, which is exactly why large-format porcelain keeps showing up on 2026 trend lists.
Natural stone earns its place in kitchens where the homeowner accepts a maintenance routine, whether that’s an annual sealing habit or hand-drying the countertop nightly. Porcelain is the better call for a family kitchen that sees three meals a day, teenagers, and minimal patience for upkeep.
Statistic Callout: Professional installers aim for roughly 95% mortar coverage on stone and large-format tile, versus 80% coverage on standard smaller tile in dry areas. That extra coverage isn’t cosmetic. It’s what keeps a 24-inch porcelain slab from cracking under thermal stress near a range.
Backsplash Patterns: Subway, Herringbone, Hexagon, and Beyond
Pattern choice affects labor cost, material waste, and how a kitchen photographs just as much as material choice does. Here’s how the most common layouts stack up:
- Classic subway (3×6, running bond) remains the safest resale bet. It’s affordable, fast to install, and reads clean in nearly any kitchen style. Offset variations (one-third or brick-joint) add subtle texture without raising cost.
- Herringbone or chevron delivers the strongest visual impact of any pattern, especially behind a range as a focal point. It also carries the highest labor cost because every piece requires angled cuts. Budget for a higher waste factor here, since herringbone and diagonal layouts typically need a 20 to 25% waste allowance rather than the standard 10 to 15%.
- Hexagon tile works especially well in smaller kitchens or as an accent wall behind open shelving, giving a modern-organic feel without overwhelming the space.
- Penny rounds and small mosaics add texture and are best used sparingly, as a border or accent rather than covering an entire wall, since grout density climbs fast at this scale.
- Full-height slabs or large-format tile minimize grout almost entirely and read as the most contemporary option for 2026 kitchens, particularly paired with handleless cabinetry.
One rule saves nearly every kitchen remodel from looking busy: limit the palette to two or three tile types across the whole space. A subway field tile with one metal or mosaic accent strip almost always outperforms three competing patterns fighting for attention. For more on how these patterns are trending locally, our breakdown of kitchen renovation trends in Florida covers what’s showing up in real projects across the region.
Installation Fundamentals: What Separates a Pro Job From a DIY Mistake
Substrate matters more than most homeowners realize. Painted drywall can work behind a sink as a dry-area accent, but any wall exposed to steam, splashes, or heavy scrubbing needs cement backer board or a properly primed, moisture-resistant substrate. Skipping this step is one of the most common reasons a backsplash fails within a year or two.
A dry layout, sometimes called a story pole layout, is the step DIYers skip most often and regret most. Laying tiles out on the floor or counter before mixing any mortar reveals sliver cuts at the ends, outlet misalignment, and pattern issues while they’re still cheap to fix. A careful dry layout prevents avoidable visible mistakes and costs nothing but planning time, yet it’s the corner most rushed installs cut.
Mortar coverage rules change by material:
- Standard ceramic or small-format tile in a dry area: roughly 80% coverage is acceptable.
- Large-format tile, porcelain slabs, and natural stone: aim for 95% coverage, achieved by back-buttering each piece in addition to troweling the wall.
- Glass tile: always use white thinset, never gray, since dark mortar shadows through translucent glass.
Trowel notch size should match tile size. A larger notch and back-buttering technique work together for anything over 12 inches, while smaller subway and mosaic tile can use a standard 1/4 inch notch. Movement joints (flexible caulk, not rigid grout) belong at inside corners, where the backsplash meets the countertop, and anywhere the tile field meets a different material.
The most common installer mistakes are rushing the dry layout, using the wrong trowel notch for tile size, and failing to check bond coverage before the mortar sets. Install skill often matters more than material choice; even glass or stone can look amateurish if the substrate and layout aren’t handled correctly.
Pro Tip: Pull one or two tiles off the wall within the first 15 minutes of setting them, before the mortar skins over. If you see less than 80 to 95% coverage on the back (depending on tile type), adjust your trowel angle or notch size immediately rather than finding out after the whole wall is set.
Grout and Sealing: A Realistic Maintenance Plan by Material
Grout choice affects daily life more than most homeowners expect walking into a showroom. Use sanded grout for joints wider than 1/8 inch, and unsanded for tight joints, always for glass tile, since sand can scratch the glass surface during installation.
Epoxy grout costs more upfront but resists staining far better than standard cement grout, making it worth the premium behind a range or on a white grout line that shows every coffee splash. Darker grout or epoxy grout reduces visible discoloration and cleaning frequency compared to standard white cement grout, which is the single biggest maintenance win most homeowners overlook.
Natural stone tile and grout typically need sealing every one to two years to stay stain resistant. Porcelain and glass need no sealing at all, which is a major point in their favor for busy households. For a deeper look at grout-specific care routines, the pool and tile grout guide from Classic Marcite offers useful upkeep parallels for grout in wet, high-use environments.
- Wipe splatters within a day, not a week, to prevent grease from setting into grout pores.
- Use a pH-neutral cleaner weekly; avoid vinegar or bleach on natural stone.
- Reseal stone on schedule, not just when staining appears.
Budgeting and Timeline for a Backsplash Project
Installed cost bands vary widely by material and labor. Peel-and-stick runs the lowest, often under $10 per square foot including materials, but carries the durability tradeoffs covered earlier. Basic ceramic subway tile with standard installation typically lands in a moderate mid-range, while porcelain and large-format tile push costs higher due to specialized handling. Premium natural stone slabs and metal tile sit at the top of the range, especially with intricate patterns.
Several factors push costs up beyond the base material: complex patterns like herringbone that increase labor hours, full slab installations requiring templating, multiple outlets and switches that need tile cut around them, and any substrate repair discovered once old tile comes down.
Timeline realities matter for kitchen planning:
- Ordering lead time: 1 to 4 weeks depending on material, longer for custom slabs.
- Site prep and substrate work: half a day to two days.
- Tile installation: one to three days depending on pattern complexity.
- Grout cure and final caulk: 24 to 72 hours before the kitchen sees normal use again.
Order 10 to 15% extra material for straightforward layouts like running-bond subway, and closer to 20 to 25% for herringbone, hexagon, or natural stone with heavy veining variation. Since the kitchen is partially unusable during installation, review our guide on setting up a temporary kitchen during a remodel to plan meals and cleanup around the work window.
How to Plan Your Backsplash Project Step by Step
- Measure the full wall area, including the standard 18-inch band height from countertop to the underside of upper cabinets, or the full height if you’re going for a statement wall.
- Note every obstacle: outlets, switches, window trim, and any inside or outside corners that will need special tile cuts.
- Calculate total square footage, then add your waste factor (10 to 15% for simple patterns, 20 to 25% for herringbone or natural stone).
- Get itemized quotes that specify substrate prep, who handles electrical outlet trim work, grout type, and sealing responsibility.
- Vet your contractor by asking for references, confirming a written warranty, and requesting a clear scope of work in writing before signing anything.
Red flags include a verbal-only quote, no mention of substrate condition, or pressure to skip the dry layout step to save time. A reputable installer walks you through material tradeoffs and shows you the layout before mixing a single batch of mortar.
Lighting Considerations for Your Backsplash
Lighting changes how every backsplash material reads on the wall, sometimes more dramatically than the tile choice itself. Under-cabinet LED strips are the single most effective upgrade for task lighting and visual depth, since they wash light directly across the tile surface and highlight texture in handmade ceramic or zellige finishes.
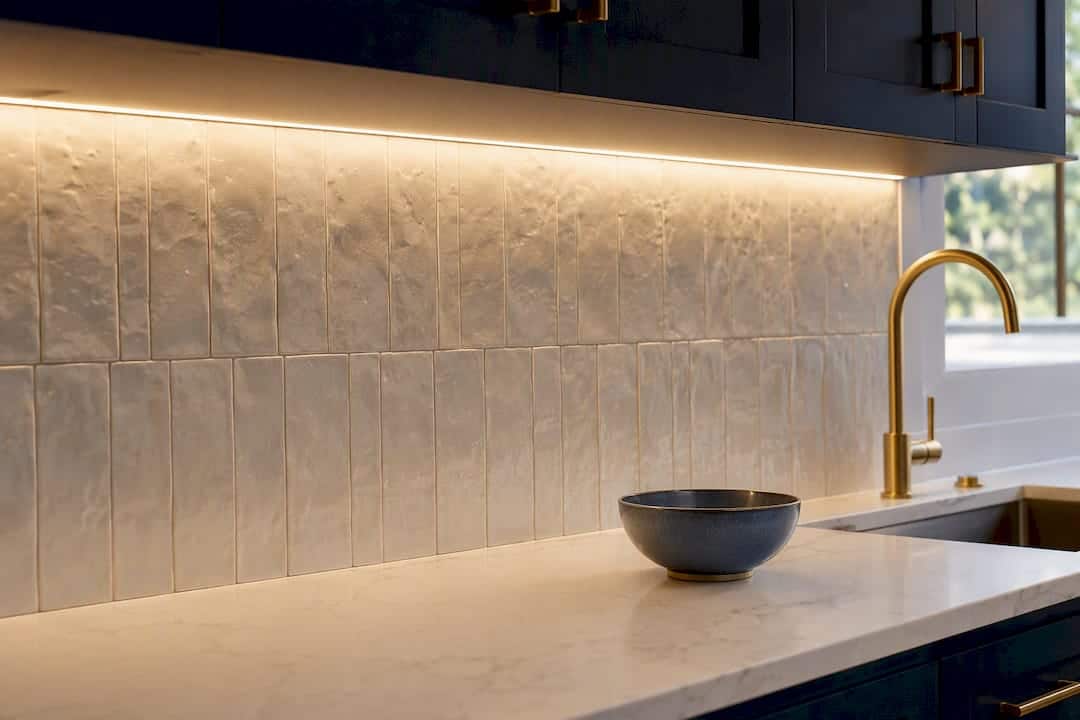
Glossy and glass tile bounce light aggressively, which can help brighten a dim galley kitchen but also shows fingerprints and water spots faster under direct downlighting. Matte porcelain and honed stone diffuse light more evenly, hiding minor smudges between cleanings.
Warm white light (around 2700 to 3000 Kelvin) flatters warm tile tones like terracotta and brass accents, while a cooler 3500 to 4000 Kelvin reads better against navy, sage green, or stainless finishes trending for 2026. Placement matters too: mount under-cabinet fixtures toward the front edge of the cabinet rather than the back, so light grazes the tile surface instead of washing out flat against the wall. For a full walkthrough of fixture types and placement strategy, see our guide to kitchen lighting ideas for a brighter home.
Environmental and Sustainability Considerations
Material choice affects a kitchen’s environmental footprint in ways that go beyond the obvious. Ceramic and porcelain tile are made largely from clay and mineral compounds, and many manufacturers now produce lines with recycled content without sacrificing durability. Glass tile in particular often comes from recycled glass, giving it a lower embodied footprint than quarried stone.
Natural stone carries a heavier environmental cost upfront, since quarrying, cutting, and transporting slabs consumes more energy than manufacturing tile. Its offsetting advantage is longevity. A well-sealed stone backsplash can last decades without replacement, which spreads that initial footprint over a long service life.
Peel-and-stick products, while convenient, typically use vinyl or PVC-based materials that aren’t easily recyclable and often end up replaced within a few years, generating more waste over time relative to their lifespan. Choosing a durable material the first time, whether porcelain, ceramic, or stone, generally beats a cycle of cheaper replacements from a lifecycle waste standpoint. Homeowners prioritizing sustainability should also ask installers about low-VOC mortar and grout options, which reduce indoor air quality impact during and after installation.
Why Elite Builder Renovation Is a Strong Choice for Your Backsplash Project
Choosing the right material is only half the job. Getting it installed correctly, on schedule, and within budget is where most kitchen backsplash projects actually go sideways. Elite Builder Renovation handles the full process from design consultation through final install, so homeowners across Tampa, St. Petersburg, Clearwater, Largo, Safety Harbor, and throughout Pinellas County and Hillsborough County aren’t left coordinating tile suppliers, substrate repairs, and grout schedules on their own.
If you’re weighing kitchen backsplash ideas against your budget and timeline, the fastest path forward is a free consultation. Elite Builder Renovation’s team walks through material options, substrate condition, and realistic cost bands specific to your kitchen before any contract gets signed. Explore the kitchen remodel services Elite Builder Renovation offers across the Tampa Bay area, or browse remodeling reviews from past clients to see completed projects before requesting your own estimate.
Sources
- How to install tile correctly — get proper mortar coverage
- Tricks to cleaning the grout on your kitchen backsplash
- Best materials for kitchen backsplash
- Backsplash materials | Jaspector
- Tile backsplash installation guide — RemodelCalculators
FAQ
What is the most low-maintenance backsplash material?
Large-format porcelain and glazed ceramic tile require the least upkeep, since porcelain resists staining without sealing and larger tiles mean fewer grout lines to clean.
What is the standard height for a kitchen backsplash?
The standard band height runs 18 inches from the countertop to the underside of the upper cabinets, though full-height installations are increasingly popular for a statement look.
Should I use sanded or unsanded grout for my backsplash?
Use unsanded grout for joints under 1/8 inch and always for glass tile, and sanded grout for wider joints on ceramic, porcelain, or stone.
How much does a kitchen backsplash cost to install?
Costs range from budget-friendly peel-and-stick options to mid-range ceramic and porcelain tile up to premium natural stone slabs, with pattern complexity and substrate repair pushing costs higher.
Is a tile backsplash a DIY-friendly project?
Simple subway patterns on a sound substrate are manageable for an experienced DIYer, but large-format porcelain, natural stone, and glass tile generally call for professional installation given their mortar coverage and handling requirements.
Does Elite Builder Renovation install kitchen backsplashes?
Yes, Elite Builder Renovation provides full-service kitchen backsplash design and installation across Tampa Bay, including material selection, substrate prep, and grout work as part of complete kitchen remodels.