


For most small kitchens, three layouts solve the majority of space and workflow problems: the single-wall, galley, and L-shaped plans. A single-wall layout suits studios and narrow rooms under 80 sq ft. A galley is the most efficient choice for long, tight corridors. An L-shaped plan works well in square or slightly open footprints where you need two work zones without blocking traffic. Before you commit to any of them, three quick fixes deliver the biggest everyday improvement: confirm your work aisles meet NKBA clearance minimums, add vertical storage to reclaim counter space, and choose light finishes to make the room feel larger.
Your practical next step: measure your kitchen’s length, width, and door swings, then match those numbers to the layout profiles below.
- Single-wall: best under 80 sq ft, one cook, open-plan living
- Galley: best for long narrow rooms, highly efficient for one or two cooks
- L-shaped: best for square rooms, flexible for one or two cooks
- U-shaped: best for 150+ sq ft, maximum storage and counter space
- Peninsula/island: best when you want a dining or prep extension without a freestanding island
Key Takeaways
The most effective small-kitchen layouts pair the right footprint match (single-wall, galley, or L-shaped for most homes) with NKBA-backed clearances, vertical storage, and light finishes to maximize both function and perceived space.
| Point | Details |
|---|---|
| Match layout to footprint | Single-wall under 80 sq ft, galley for narrow rooms, L-shaped for square rooms, U-shaped at 150+ sq ft. |
| Follow NKBA clearances | Minimum 42" work aisle (48" for two cooks), 42" around islands, 12–15" landing space beside appliances. |
| Go vertical for storage | Floor-to-ceiling cabinets and pantry towers add capacity without changing the footprint. |
| Use light finishes and layered lighting | Soft neutrals, reflective backsplash, and under-cabinet LED task lighting make compact kitchens feel larger. |
| Elite Builder Renovation | Handles design-to-build small-kitchen remodels across Tampa Bay with permits, financing, and a satisfaction guarantee. |
Table of Contents
- What are the best small kitchen layout ideas for your footprint?
- Must-know measurements and the work triangle
- Storage strategies that actually work in small kitchens
- How do lighting and color choices make a small kitchen feel larger?
- Compact appliance and fixture choices that save space
- Common mistakes that make small kitchens feel cramped
- How to choose the right layout: a step-by-step checklist
- What a small-kitchen remodel looks like in Tampa Bay: timeline and budget
- How long does a small kitchen remodel take from start to finish?
- Elite Builder Renovation handles your small-kitchen remodel from design to done
- Sources
- FAQ
What are the best small kitchen layout ideas for your footprint?
Every small kitchen layout idea starts with the same question: how does traffic move through your space? The five standard plans each answer that question differently, and choosing the wrong one is the most common reason a remodel feels cramped even after new cabinets go in.
Single-wall layout
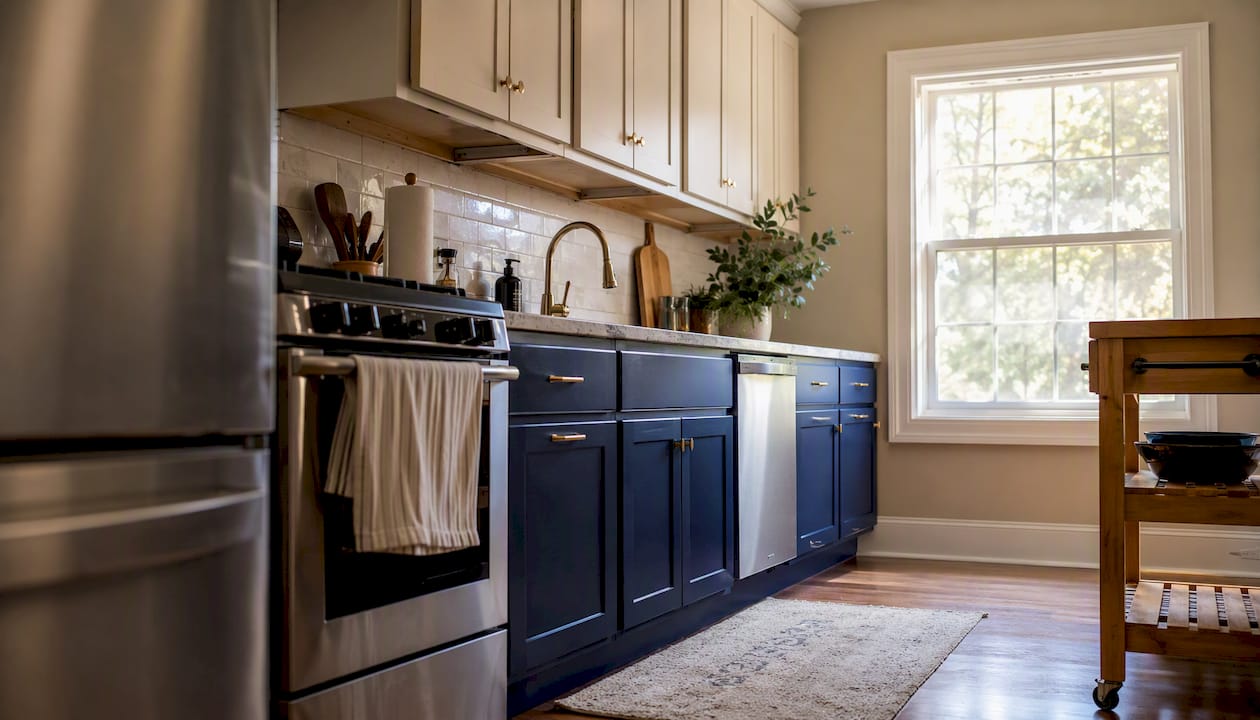
All cabinets, appliances, and counters run along one wall. This is the right call for studio apartments, converted garages, or any room under roughly 80 sq ft where a second run of cabinets would block the only path through. The tradeoff is limited counter space, so a rolling cart or a fold-down table often supplements it.
Galley layout
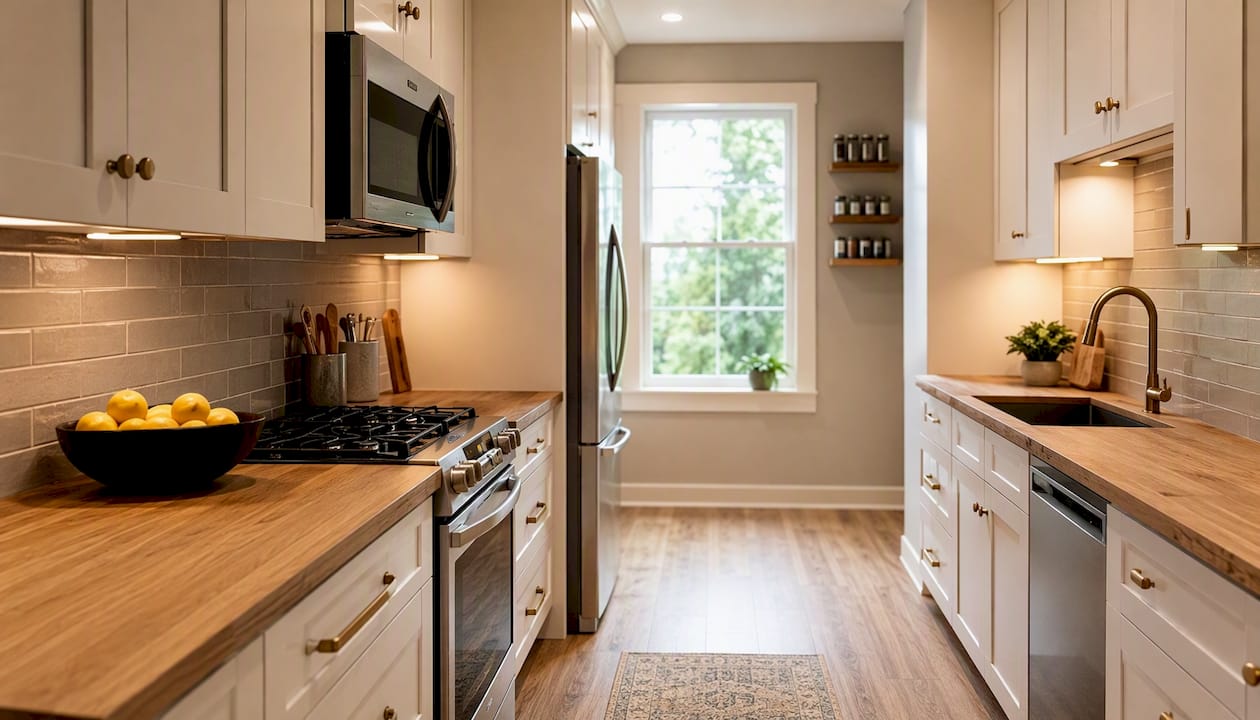
Two parallel runs of cabinets face each other, creating a corridor. Designers consistently call the galley the most efficient small-kitchen layout when planned correctly, because every step between the sink, cooktop, and refrigerator is short. It works best in rooms 7–12 feet wide. The mistake most homeowners make is forcing an island into a galley that doesn’t have the clearance for it.
L-shaped layout
Cabinets run along two adjacent walls, forming an L. This plan fits square or slightly rectangular rooms and naturally separates prep from cooking zones. It also opens the room to a dining area, making it popular in open-plan Tampa Bay homes where the kitchen flows into a living or dining space.
U-shaped layout
Three walls of cabinets create a horseshoe. This is the highest-storage, highest-counter-space option, but it needs at least 150 sq ft and a minimum 60-inch clearance between the two parallel runs to avoid feeling like a tunnel. For a household with two regular cooks, it’s worth the footprint.
Peninsula or island addition
A peninsula attaches to an existing run of cabinets and adds a prep surface, seating, or storage without requiring the clearance a freestanding island demands. It’s the practical middle ground when you want the social function of an island but don’t have 42 inches of clear floor on all sides to spare.
| Layout | Best footprint | Cooks | Key advantage | Key limit |
|---|---|---|---|---|
| Single-wall | Under 80 sq ft | 1 | Keeps traffic path clear | Very limited counter space |
| Galley | 80 sq ft | 1–2 | Maximum efficiency per step | Tight if clearance is under 42" |
| L-shaped | 80 sq ft | 1–2 | Natural zone separation | Corner cabinet can be awkward |
| U-shaped | 150+ sq ft | 2+ | Most storage and counter space | Needs 60" between parallel runs |
| Peninsula | 150+ sq ft | 1–2 | Adds prep/seating without full island | Reduces one traffic path |
Must-know measurements and the work triangle
Getting the layout right on paper means nothing if the clearances don’t work in real life. These numbers come from the NKBA Kitchen & Bath Planning Guidelines, the primary technical reference used by licensed kitchen designers and contractors across the country.
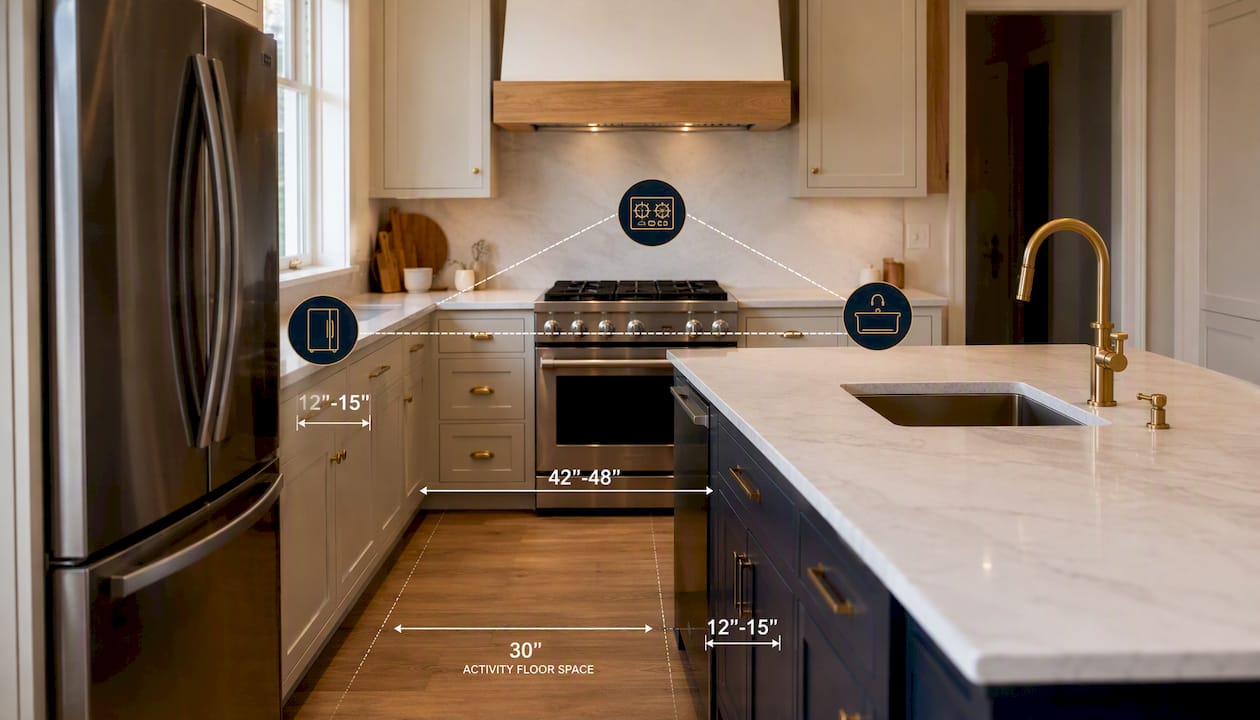
Core clearances to know:
| Measurement | Minimum | Notes |
|---|---|---|
| Work aisle, one cook | 42" | NKBA minimum |
| Work aisle, multiple cooks | 48" | NKBA minimum |
| Island clearance (all sides) | 42" | Less than this and the island becomes an obstacle |
| Passageway (non-work) | 36" | For traffic that doesn’t enter the work zone |
| Activity center clear floor | 30 inches | In front of dishwasher, oven, refrigerator |
| Landing space next to appliances | 12–15" | Designer-recommended minimum on each side |
The work triangle connects the refrigerator, sink, and cooktop. In a small kitchen, the total triangle perimeter should stay between 12 and 26 feet. Below 12 feet, the three zones crowd each other. Above 26 feet, you’re covering too much ground for every meal. In a galley or single-wall plan, the triangle collapses into a straight line, which is fine as long as the three points are within a few steps of each other.
Pro Tip: Before finalizing any layout, tape the footprint on your floor with painter’s tape and walk through your actual cooking routine. Open the oven door, pull out the dishwasher rack, and swing the refrigerator open. If any door hits a cabinet or blocks a path, you’ll catch it before a contractor does.
Quick measurement checklist:
- Measure the room’s full length and width, including any bump-outs or soffits.
- Mark every door swing and window sill height on your floor plan.
- Confirm at least 42" of clear aisle in the work zone (48" if two people cook regularly).
- Check that each appliance has 12–15" of landing space on at least one side.
- Verify the passageway to adjacent rooms is at least 36" wide.
- Note where plumbing and electrical panels are located — moving them adds cost and time.
Storage strategies that actually work in small kitchens
Counter space is the scarcest resource in a compact kitchen. The most effective way to protect it is to move storage up and in, not out onto the counter.
Vertical storage is the highest-impact move available. Floor-to-ceiling cabinetry adds capacity without changing the footprint, and mixing closed uppers with a few glass-front doors keeps the wall from feeling like a solid block. Pantry towers (typically 84–96 inches tall, 18–24 inches deep) pull in more storage than a row of standard 30-inch uppers and use the same wall width.
Pull-outs and inserts recover the dead space inside base cabinets:
- Full-extension pull-out shelves in base cabinets replace fixed shelves and make everything visible.
- Pull-out spice racks beside the range keep seasonings accessible without occupying counter space.
- Appliance garages with a tambour or lift-up door hide stand mixers, toasters, and coffee makers behind a closed face.
- Toe-kick drawers below base cabinets store flat items like baking sheets and cutting boards.
- For corner cabinets, a pull-out shelf system (sometimes called a “magic corner” unit) outperforms a lazy Susan in most small kitchens because it brings items fully into the aisle rather than spinning them in place.
Open vs. closed storage is a real tradeoff. Open shelving looks lighter and is faster to access, but it accumulates grease and dust faster in a kitchen than in any other room. A practical middle ground: closed lower cabinets for pots, pans, and appliances; one or two open shelves or glass-front uppers for everyday dishes and glassware.
Pro Tip: When budgeting storage upgrades, prioritize in this order: (1) floor-to-ceiling uppers or a pantry tower, (2) pull-out base shelves, (3) appliance garage, (4) specialty inserts like spice pull-outs. The first two deliver the most recovered space per dollar.
How do lighting and color choices make a small kitchen feel larger?
Finish and light choices can make a 90-square-foot kitchen feel open or oppressive, and the difference costs far less than a structural change. Designers consistently advise prioritizing visual lightness through light palettes, reflective surfaces, and ceiling-height cabinets to make compact kitchens feel significantly larger.
Layered lighting is the place to start. A single overhead fixture creates flat light that flattens depth. Three layers work better:
- Ambient: recessed LED downlights or a flush-mount fixture for general illumination.
- Task: under-cabinet LED strips aimed at the counter surface. Poor lighting and heavy upper cabinetry are among the most common causes of a cramped feel; under-cabinet task lighting directly addresses both by brightening the work surface and visually separating the counter from the upper cabinets.
- Accent: interior cabinet lighting or a pendant over a peninsula to add warmth and depth.
For color temperature, 2700–3000K (warm white) suits ambient and accent layers; 3000–4000K (neutral to cool white) works better for task lighting where color accuracy matters.
Color and material choices that open up space:
- Soft warm neutrals (off-white, warm gray, greige) on cabinets and walls reflect more light than saturated colors.
- Reflective backsplash materials — subway tile with a gloss glaze, large-format porcelain, or mirrored glass — bounce light across the room.
- Vertical tile patterns (stacked or herringbone set vertically) draw the eye upward and make ceilings feel higher.
- Slim or integrated hardware, or no hardware at all on push-to-open doors, reduces visual noise on cabinet faces.
- Tight color palettes and minimal hardware are a leading 2026 trend precisely because they make compact spaces feel cohesive rather than cluttered.
Contrast works best when it’s intentional and limited: one dark element (a range hood, an island base, a single accent wall) against a light field reads as a design decision. Contrast scattered across multiple surfaces reads as chaos.
Compact appliance and fixture choices that save space
Appliance selection has a direct impact on how much counter and floor space you actually have to work with. The 2026 direction in small kitchens is clear: panel-ready appliances and integrated fronts reduce visual clutter and make cabinetry read as a continuous surface.
Key appliance and fixture decisions:
- Counter-depth refrigerators (typically 24–25 inches deep vs. 30–34 inches for standard) align with the cabinet face and recover several inches of aisle clearance.
- Panel-ready dishwashers accept a custom cabinet panel on the door face, making the appliance disappear into the cabinet line.
- Single-drawer dishwashers work for one- or two-person households and fit under a counter where a full-size unit won’t.
- Compact or slide-in ranges (30-inch wide) keep the standard cooking capacity while fitting the same footprint as a base cabinet.
- Sinks with integrated drainboards eliminate the need for a separate drying rack on the counter.
Furniture and flexible workspace:
Rolling carts priced in the $300–$900 range can function as a prep surface, storage unit, and serving station, then roll out of the work zone when not needed. A narrow peninsula (18–24 inches deep) attached to an existing cabinet run adds seating for two without requiring the full 42-inch clearance a freestanding island demands. Built-in banquette seating along one wall, with storage drawers underneath, handles dining without pulling chairs into the kitchen traffic path.
| Option | Space saved | Function tradeoff |
|---|---|---|
| Counter-depth refrigerator | 42 inches of aisle depth | Slightly less interior capacity |
| Single-drawer dishwasher | Full under-counter bay freed | Half the load capacity of standard |
| Rolling cart vs. fixed island | Full floor plan when stored | Less stable work surface |
| Peninsula vs. freestanding island | One clearance path instead of four | Seating on one side only |
Common mistakes that make small kitchens feel cramped
Most small-kitchen problems trace back to a handful of planning and styling errors that are straightforward to avoid once you know what to look for.
- Oversized island: An island that leaves less than 42 inches of clearance on any side blocks traffic and makes the room feel smaller, not larger. Fix: choose a peninsula attached to a cabinet run, or use a rolling cart instead.
- Ignoring door swings: Appliance doors, cabinet doors, and the room entry door all need clear floor space. A refrigerator door that swings into the aisle or an oven door that blocks the sink path creates daily frustration. Fix: draw every door swing on your floor plan before finalizing cabinet placement.
- Too many upper cabinets: A solid wall of uppers from counter to ceiling on every wall creates a visual tunnel. Fix: break up the upper line with open shelves, glass fronts, or a section of open wall above the counter.
- Dark or heavy finishes throughout: Dark cabinets, dark counters, and dark backsplash on all surfaces absorb light and compress the perceived volume of the room. Fix: use one dark element as an accent against a predominantly light palette.
- No landing space: Placing a cooktop or refrigerator without 12–15 inches of counter on at least one side creates a workflow problem every time you cook. Fix: designers recommend treating landing zones as non-negotiable, even if it means a shorter run of cabinets.
- Skipping pocket or barn doors: A standard swing door into a small kitchen eats 6–8 square feet of usable floor space every time it opens. Replacing it with a pocket door or a sliding panel can recover that area entirely. For guidance on door replacement pitfalls before you commit to a change, it’s worth reviewing what installers see most often.
How to choose the right layout: a step-by-step checklist
The 2026 approach to small-kitchen remodeling is to work smarter within the existing footprint: reorganize zones, add purpose-built storage, and compress tasks rather than expanding square footage. This checklist turns that principle into a concrete decision process.
Step-by-step layout selection:
- Measure everything. Record the room’s full dimensions, ceiling height, door swings, window sill heights, and the location of existing plumbing, gas, and electrical.
- Map your user journeys. Walk through making coffee, unloading groceries, and cooking a full meal. Note where you stop, turn, and reach.
- Identify your non-negotiables. Counter space near the cooktop? Seating for two? A full-size refrigerator? Rank your must-haves before looking at layouts.
- Match footprint to layout. Use the table in Section 2 to shortlist one or two layouts that fit your room dimensions and household size.
- Confirm clearances. Apply NKBA minimums (42" work aisle, 42" island clearance, 12–15" landing zones) to your shortlisted layout. If a layout fails the clearance check, eliminate it.
- Set a realistic budget and timeline. See the budget bands and timeline table in the next section.
- Consult a contractor. Bring your measurements, photos, and a rough sketch to the consultation.
Questions to ask your contractor:
- Does this layout require moving plumbing or electrical? What does that add to the budget and timeline?
- Are permits required in my municipality (Hillsborough or Pinellas County) for this scope of work?
- Are there structural walls or load-bearing elements that limit cabinet placement?
- What is the realistic timeline from permit approval to final walkthrough?
- What is included in your warranty, and how do you handle punch-list items?
Red flags that a layout will fail:
- Any work aisle narrower than 42 inches after cabinets are installed
- Appliance doors that swing into each other or into a cabinet face
- No landing space on either side of the cooktop or refrigerator
- A door swing that blocks more than 50% of the kitchen entry
For broader planning guidance, Elite Builder Renovation’s home renovation best practices guide covers contractor selection and budget planning in detail.
What a small-kitchen remodel looks like in Tampa Bay: timeline and budget
This section reflects the type of project Elite Builder Renovation handles regularly across Hillsborough and Pinellas counties, and the realistic numbers homeowners should plan around.
Project snapshot: A 95-square-foot galley kitchen in a St. Petersburg home. The client’s goals were more counter space, better storage, and a brighter feel. The solution: removed a non-load-bearing peninsula that blocked the aisle, reconfigured to a true galley with 44-inch clearance, added an 84-inch pantry tower at one end, specified a counter-depth panel-ready refrigerator, and installed under-cabinet LED task lighting throughout.
Typical remodel timeline for Tampa Bay small kitchens:
| Phase | Typical duration |
|---|---|
| Design and selections | 2–4 weeks |
| Permit review (Hillsborough/Pinellas) | 2–6 weeks |
| Demo and rough trades | 1–2 weeks |
| Cabinet installation and finishes | 1–2 weeks |
| Total (mid-range remodel) | 6–12 weeks |
Permit timelines vary by municipality. Pinellas County and the City of St. Petersburg tend to run on the shorter end; some Hillsborough County jurisdictions can take closer to the 6-week mark for kitchen permits that involve plumbing or electrical reroutes.
Budget bands for common small-kitchen updates:
- Cosmetic refresh ($5,000–$15,000): New paint, hardware, lighting, backsplash, and appliance upgrades. No structural changes, no permit typically required.
- Mid-range remodel ($20,000–$45,000): New cabinets, countertops, flooring, appliances, and updated plumbing fixtures. May require permits for electrical or plumbing work.
- Full remodel ($50,000+): Layout reconfiguration, structural changes, full plumbing and electrical reroute, custom cabinetry, and premium finishes. Permits required.
For homeowners who want to spread the cost, remodel financing options are available through Elite Builder Renovation. See the kitchen remodel service page for current project examples and service details.
How long does a small kitchen remodel take from start to finish?
A small kitchen remodel in Tampa Bay typically runs 6–12 weeks from the first contractor meeting to final walkthrough, assuming no major structural surprises. The design and selections phase (2–4 weeks) is where most projects lose time, because material lead times for cabinets and countertops can stretch if decisions are delayed. Locking in your cabinet line, countertop material, and appliances before the permit is submitted keeps the schedule tight.
Permit approval adds 2–6 weeks depending on the municipality and the scope of work. Projects that involve moving a gas line, rerouting plumbing, or upgrading the electrical panel sit at the longer end of that range. Once permits are in hand, the physical work moves quickly: demo and rough trades typically wrap in 1–2 weeks, and cabinet installation through final finishes takes another 1–2 weeks.
The most common cause of schedule overruns is a change order after construction starts, usually triggered by discovering existing conditions (outdated wiring, water damage behind walls, or a wall that turns out to be load-bearing) that weren’t visible during the initial walkthrough. A thorough pre-construction assessment, including photos of existing plumbing and electrical, reduces that risk significantly.
Elite Builder Renovation handles your small-kitchen remodel from design to done
Planning a small-kitchen remodel involves more moving parts than most homeowners expect: layout decisions, clearance checks, permit filings, material lead times, and trade coordination all have to line up. Elite Builder Renovation manages every one of those stages for homeowners across Tampa, St. Petersburg, and Clearwater, with a design-to-build process that keeps communication clear from the first site visit to the final walkthrough.
Financing options are available for mid-range and full remodels, so the right layout and finish package doesn’t have to wait. Read what past clients say on the remodeling reviews page, then take the next step.
To get started, request a free consultation through the kitchen remodel page. Bring your room measurements, a few photos of the existing space, and a rough list of your must-haves. Elite Builder Renovation serves homeowners throughout Hillsborough and Pinellas counties, including Tampa, St. Petersburg, Clearwater, Largo, and Safety Harbor.
Sources
- NKBA – Planning Guidelines
- NKBA Kitchen & Bath Planning Guidelines
- 7 Design Mistakes That Make A Small Kitchen Feel Even Smaller
- 2026 Small Kitchen Remodel Trends: Data & Design Guide – Home Renovation and Remodeling Digest
- 7 Things That Always Make Your Kitchen Look Cramped, Designers Say
FAQ
What is the best layout for a small kitchen?
The galley layout is the most efficient choice for most small kitchens, particularly in long, narrow rooms, because it minimizes steps between the sink, cooktop, and refrigerator. An L-shaped plan works better in square rooms or open-plan spaces where traffic flows through the kitchen.
What are the five basic kitchen layouts?
The five standard kitchen layouts are single-wall, galley, L-shaped, U-shaped, and peninsula (or island). Each suits a different room shape and household size, with the single-wall and galley plans best suited to footprints under 150 sq ft.
What mistakes should you avoid in a small kitchen layout?
The most common mistakes are placing an oversized island that reduces clearances below the NKBA minimum of 42 inches, ignoring door swings, and using dark finishes throughout. Fixing these three issues typically has the biggest impact on how functional and spacious the kitchen feels.
What are the key small kitchen trends for 2026?
The leading 2026 trends are panel-ready appliances that integrate with cabinetry, floor-to-ceiling vertical storage, tight warm-neutral color palettes, and a “work smarter” approach that reorganizes zones within the existing footprint rather than expanding square footage.
How much does a small kitchen remodel cost in Tampa Bay?
A cosmetic refresh typically runs $5,000–$15,000, a mid-range remodel $20,000–$45,000, and a full layout reconfiguration $50,000 or more, depending on structural changes, permit requirements, and finish selections. Elite Builder Renovation offers financing options for mid-range and full remodels across Hillsborough and Pinellas counties.
Recommended
- 2025 Kitchen Renovation Trends: What Tampa Bay Homeowners Need to Know – Elite Builder Renovation
- Kitchen Lighting Ideas For A Brighter Home – Elite Builder Renovation
- Smart Small Bathroom Vanity Ideas for Tight Spaces – Elite Builder Renovation
- Kitchen Renovation Trends Florida Homeowners Should Know – Elite Builder Renovation