Welcome to this guide built to help you understand how to build a fireplace surround in FL with clear steps, practical tips, and methods that work well in Florida’s heat and humidity so you can create a clean, durable feature without dealing with guesswork or costly errors; you’ll see what materials make sense for local homes, how to prep the area safely, and what choices give you the best long-term results while still keeping the project simple enough for a homeowner who wants a hands-on upgrade that looks polished and stays strong over time.
But if you would like a pro fireplace builder that can customize your dream fireplace, go to our fireplace remodeling in Tampa bay page.
Why Fireplace Surrounds Work Well In Florida Homes
A good fireplace surround can do more for a Florida home than most people expect. It shapes how the room feels, protects the wall from heat, and adds a clean focal point that fits the style of the space. Even though Florida homes deal with humidity and warm temperatures for most of the year, the right surround can still bring comfort, balance, and visual appeal. Many homeowners use a surround to refresh an outdated fireplace, improve safety, or give their living room a finished look that blends with the rest of the home.
How Design Affects Comfort
The design you choose influences how the room feels day to day. A wide surround can make a small room look open, while a slim profile fits well in tighter spaces. Smooth finishes give the area a calm look, and textured materials add depth without making the room feel heavy. Good design also helps manage heat from the fire by guiding warmth outward instead of trapping it near the wall. When you pick a layout that suits your home’s size and comfort level, the space feels more organized and easier to enjoy.
Common Surround Materials That Hold Up In Florida’s Climate
Florida’s humidity, salt air, and temperature swings can affect certain materials, so choosing reliable options matters. Tile is a strong choice because it resists moisture and stays steady against heat. Stone creates a solid and long-lasting surround that handles humidity well when sealed correctly. Homeowners who prefer wood can still use it as long as it’s sealed and placed at a safe distance from the firebox. Concrete board is useful as a base layer because it doesn’t warp and gives the finish material a sturdy surface to attach to. These materials keep their shape over time, making them dependable for Florida conditions.
Styles That Suit Modern And Traditional Homes
Florida homes come in many designs, so surrounds need to match both modern and traditional looks. Clean tile patterns work well in new builds with simple layouts. Stacked stone fits homes that lean toward a rustic or natural style. Painted wood surrounds blend into both cottage and coastal interiors, giving the room a softer feel. Slim mantels look right in modern spaces, while wider mantels add a classic touch to older homes. When the style aligns with the rest of the room, the surround feels like a natural part of the home instead of a separate feature.
Quick Stories From Local Upgrades
Many Florida homeowners improve their living rooms by reworking their fireplace surrounds. One homeowner in Tampa replaced a worn wooden surround with light stone to handle the humidity better and brighten the room. Another family in Orlando switched to simple white tile, which made the space look larger and easier to clean. A couple in Jacksonville added a slim mantel to their modern home, giving them a place to display photos without making the wall feel crowded. These upgrades show how small changes can make a real difference.
Questions Homeowners Should Ask Before Starting
Before starting the project, homeowners should think about a few simple questions.
- What type of material works best in this home’s climate?
- How much wall space is available for the frame and mantel?
- Does the current layout meet clearance and safety rules?
- Will the style match the rest of the room once the project is done?
Thinking about these points early helps you avoid mistakes and choose a design that fits your home.
A fireplace surround can bring new life to a Florida home when built with care, practical choices, and a design that fits your lifestyle. If you plan your project with these ideas in mind, you set yourself up for a cleaner look and a better living space.

Florida-Specific Factors You Need To Know
Florida’s climate and local rules play a big role in how your fireplace surround performs over time. The heat, moisture, and building requirements in the state shape the materials you choose and the way you install them. Paying attention to these details helps you build a surround that stays strong, safe, and visually clean.
Humidity Concerns
Florida homes deal with steady moisture levels, so your fireplace surround needs materials that can stand up to this environment. Wood can swell if it’s not sealed correctly, and poorly chosen adhesives may weaken over time. Tile and stone hold up better, but they still need the right backing to stay secure. You protect your project by choosing materials rated for humid climates, sealing every exposed edge, and keeping the area dry during installation. Have you checked whether the materials you plan to use handle Florida’s moisture well?
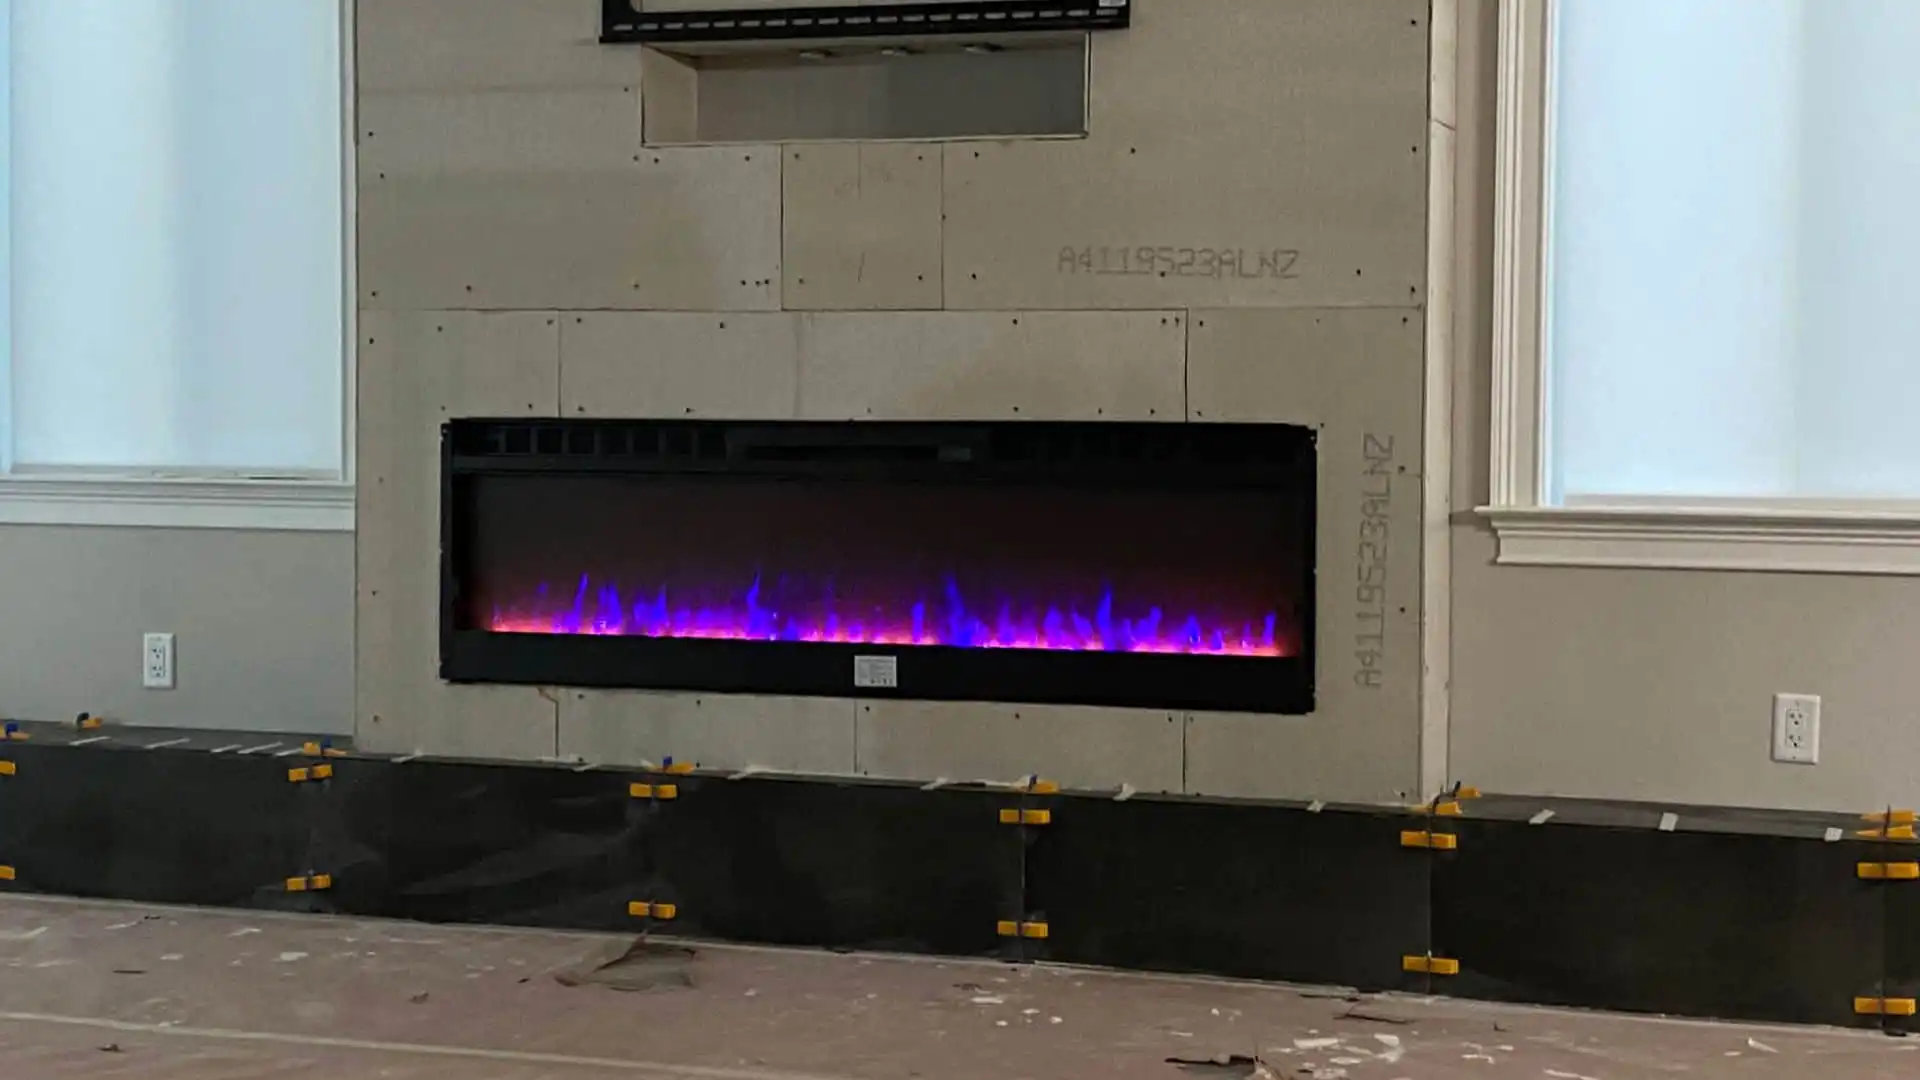
Heat Exposure
A fireplace surround must handle constant changes in temperature. Even in Florida, many homes use electric or gas fireplaces, and these units produce enough heat to damage surfaces when clearances aren’t followed. Materials like backer board, stone, or tile stay stable when the temperature rises. Paints and coatings also need to be heat-safe to prevent peeling or discoloration. When you combine heat-resistant materials with proper spacing, the surround lasts longer and stays safe.
Local Building Guidelines
Florida counties and cities have clear rules for framing, clearances, and fire-resistant surfaces. These guidelines keep the fireplace safe and help prevent problems with insurance or home inspections later. Some areas require specific types of backer board, while others set limits on how close certain materials can sit to the firebox. Taking the time to read local rules helps you avoid costly changes once the project is underway.
When Permits Might Come Into Play
Permits often apply when you change the structure, move electrical lines, or install a new gas unit. If your project involves more than surface updates, it’s best to ask your building office before you begin. A quick check keeps your project compliant and saves frustration later. If you only plan to refresh the surround without touching the mechanical components, a permit may not be needed, but it’s always smart to confirm.
Why Proper Ventilation Matters
Ventilation plays a key role in both safety and performance. A fireplace that doesn’t vent correctly can trap heat, create moisture problems, or affect indoor air. Florida homes already deal with humidity, so poor ventilation can make the surrounding wall more vulnerable to mold or surface damage. Clear airflow helps the fireplace run smoothly and protects the structure around it. Checking vents, gaps, and airflow paths before you install the surround gives you a better final result.
A well-built surround starts with understanding how Florida’s climate and building rules shape every part of the project. When you focus on these details, you set yourself up for a smooth installation and a finish that lasts.

Tools And Materials You’ll Need
Gathering the right tools and materials makes the entire project smoother, safer, and more accurate. Each item on this list serves a specific purpose, and understanding how they work helps you avoid common mistakes and get a clean result you can feel good about. Here’s what you need and how each tool supports the process.
Measuring Tape
A measuring tape is your guide for accuracy. You’ll use it to check the height, width, and depth of the area around the fireplace. This helps you cut panels correctly, space materials evenly, and avoid gaps that can make the surround look uneven. When you measure more than once, you reduce the chance of framing errors and material waste.
Level
A level keeps your surround straight. Whether you’re framing, mounting a backer board, or placing tile, you need this tool to keep everything aligned. A surround that leans or sits unevenly is noticeable right away, and a level helps you avoid that frustration.
Circular Saw
A circular saw lets you cut wood, trim, or backer materials with clean edges. If you’re working with wood panels or building the frame, this tool gives you precise cuts that fit well against the wall. It also saves you time compared to using hand tools, especially when shaping several pieces at once.
Adhesives Or Mortar
You’ll use adhesives or mortar depending on the materials you choose. Adhesive works well for wood and trim pieces, while mortar gives tile and stone a strong bond that holds up to heat. Picking the right bonding product keeps your surround stable and prevents shifting over time.
Concrete Board
Concrete board adds a heat-safe layer between the wall and your surround. It helps protect your home from heat damage and gives tile or stone a solid surface to grip. This board also stands up well to humidity, which is important in Florida homes.
Wood, Tile, Or Stone Options
Your surround material shapes the look of the entire fireplace. Wood creates a warm, clean feel when sealed properly. Tile gives you patterns and colors that stand out without overpowering the space. Stone creates a solid, natural appearance that works well in both modern and traditional homes. Pick a material that fits your style, budget, and maintenance preferences.
Safety Gear
Safety gear protects you while you work. Gloves help you handle sharp edges, goggles protect your eyes when cutting material, and a dust mask keeps debris out of your airway. A project like this involves cutting, drilling, and sanding, so having the right gear keeps you comfortable and safe from start to finish.
This section gives you a clear look at the tools and materials that support a strong fireplace surround. Once you have everything ready, you can move into the building phase with more confidence and fewer surprises.
Prep The Area Before You Build
Getting the space ready is one of the most important steps when building a fireplace surround in Florida homes. Careful prep work protects your safety, helps the materials last longer, and keeps the project running smoothly. When you take time to set up the area the right way, every step that follows becomes easier and more predictable.
Turn Off Any Gas Or Electrical Connections
Start by confirming that any gas or electrical lines connected to the fireplace are turned off. This protects you from accidents and gives you a clear, safe workspace. If you are unsure how your current setup works, check your fireplace manual or call a licensed technician. Taking this step early gives you peace of mind as you move forward.
Clear The Wall And Protect The Surrounding Area
Remove decor, loose items, or furniture near the fireplace. Give yourself enough space to work without bumps or interruptions. Cover the floor with a drop cloth or cardboard to keep dust and debris off your surfaces. This also prevents scratches, paint marks, or stray chips from damaging your flooring. A clean area lets you focus on the build instead of worrying about mess.
Inspect For Moisture Or Structural Issues
Look for signs of moisture, soft spots, cracks, or uneven surfaces. Florida humidity can create hidden problems, so take a close look around the firebox and the wall. If you find moisture or damage, fix it before moving forward. A strong, dry foundation helps your surround stay solid and prevents shifting, warping, or long-term deterioration.
Take Accurate Measurements
Measure the full height and width of the wall around the firebox. Check the depth, clearances, and any uneven angles. Reliable measurements guide your material choices and frame construction. When everything fits the first time, you avoid wasted materials and hours of rework. Double-check your numbers to stay confident in the build.
Mark Layout Lines For Your Surround
Use painter’s tape or a pencil to trace the outline of your future surround on the wall. This gives you a clear visual guide as you build the frame. Marking layout lines helps you see where each piece will sit and makes it easier to catch alignment issues early. You’ll be able to adjust the layout before cutting or installing any materials.
A few minutes spent preparing the area can save you from setbacks later. Once this step is complete, you’re ready to move forward with the build and enjoy a safer, smoother project from start to finish.
Build The Frame
Building the frame sets the structure for your entire fireplace surround, so you want this step to be steady, accurate, and aligned with Florida’s conditions. A well-built frame gives you a solid base for tile, stone, or wood and prevents problems later when you start adding weight or heat-safe panels. When the frame is square and secure, every other step becomes easier.
How To Cut And Assemble The Frame
Start by measuring the exact height and width of your surround. Mark your cuts on each piece of lumber with a pencil rather than eyeballing it. Use a circular saw or miter saw to make clean cuts that fit together without gaps. Attach the vertical and horizontal pieces using screws instead of nails so the frame holds firm when exposed to heat. Check each connection before moving on, and confirm that the frame sits tight against the wall.
Tips For Keeping Everything Straight
Use a level on every section, even the short pieces. Hold the level against the wood before and after securing each screw. Make a habit of stepping back to look at the frame from different angles. If you spot a slight tilt early, it takes only a minute to adjust. If you wait until the end, redoing the frame becomes a much bigger job. Working slowly and checking often prevents wasted time.
Why Using Heat Safe Materials Matters
The frame sits behind the visible parts of your fireplace surround, but it still faces heat from the firebox. Standard materials can weaken or warp when exposed to repeated heat cycles. Lumber rated for high temperatures and fire resistant boards give you a structure that holds up over time. This matters even more in Florida where indoor temperatures rise fast, especially in homes without strong airflow around the fireplace.
How Florida Heat Affects Adhesive Choices
High temperatures and humidity can break down certain adhesives. Products that work well in cooler, dry areas may fail in a Florida living room. Choose adhesives designed for heat exposure and moisture resistance. These stay firm when the room warms up and prevent your surround materials from shifting. Test a small amount of adhesive if you are unsure. A quick test can save you from future repairs.
A Short Anecdote About A Crooked Frame
A homeowner once shared that their first attempt at a fireplace surround looked off even before the finishing materials went up. They measured only once and rushed through the cuts. When they stepped back, the right side leaned inward. Fixing the mistake took hours because the frame had to be taken apart and rebuilt. That experience taught them that slow, careful measuring keeps the entire project on track.
Take your time with this step and keep your tools close. A solid frame gives you the confidence to move forward without second guessing your work.
Add A Concrete Backer Or Heat-Resistant Surface
A concrete backer or heat-resistant surface gives your fireplace surround a solid and safe foundation. You protect the wall behind the surround from heat, moisture, and structural stress, which is especially important in Florida homes where humidity can weaken materials if they are not reinforced properly. This layer acts as a buffer that keeps the framing stable and helps your finish materials stay in place over time. When you install it correctly, you create a base that supports tile, stone, or wood without shifting or warping.
Why This Layer Protects Your Wall
A concrete backer board is designed to handle both moisture and heat. Florida’s climate brings higher humidity, and that moisture can seep into drywall or wood if they are left unprotected. The backer board blocks moisture from reaching those vulnerable layers. It also withstands heat from the fireplace, separating the wall from direct temperature changes. This keeps your wall from cracking, bubbling, or weakening after repeated use.
How To Attach It Safely
Start by cutting the concrete backer board to match the layout you marked earlier. Hold it in place against the frame and use corrosion-resistant screws to secure it. Keep the screws evenly spaced so the board sits tight and flat. Use a level as you work to avoid uneven surfaces. If you plan on installing tile later, add thinset mortar between any seams and apply tape made for concrete board. This combination keeps the surface strong enough to hold your finish material and prevents movement that can lead to cracks.
What Happens If You Skip It
If you skip this step, the surround becomes more vulnerable to damage. Drywall can soften, warp, or crumble when exposed to heat or humidity. Tiles may pull away from the wall, grout may crack, and wood panels may expand or shift. Over time, small issues turn into costly repairs. You also reduce safety since drywall is not made to handle constant heat exposure.
Materials That Perform Well In Humid Climates
Concrete backer board, cement board, and fiber cement panels work well in Florida homes. These materials resist swelling and moisture damage while holding up to the heat from your fireplace. They create a stable base for tile, stone, and sealed wood, making them reliable choices for long-term durability. Look for brands known for high moisture resistance so your surround stays solid through seasonal humidity changes.
A strong base sets the stage for a clean and lasting fireplace surround. Taking the time to install a proper backer board helps you avoid repairs, keeps your design stable, and gives your finished surround a more polished look.
Install The Surround Material
Choosing the right surround material shapes both the look and performance of your fireplace. Florida homes deal with steady humidity and heat, so each option comes with its own strengths. The goal is to pick a material that fits your style, stays durable, and holds up under daily conditions. Below are the details you need to make an informed choice.
Wood Surround
Best Wood Types For Florida Homes
Wood can bring warmth and character to a fireplace, but not all wood handles moisture well. Homeowners in Florida often choose hardwoods like oak, maple, or teak because these options resist swelling and hold a smooth finish. Engineered wood also works well because it stays stable when the humidity rises. If you like a more rustic look, cedar can be a good option because it stays firm and ages nicely without losing shape.
How To Attach Panels Or Trim
Start by building a solid frame so your panels sit level. Attach your pieces using quality construction adhesive and finish nails for a secure hold. Take your time lining up each panel, as gaps become more noticeable once the finish is applied. If you’re adding trim, pre-cut each piece and test-fit before attaching. This makes the final layout look clean and prevents uneven edges.
How To Seal Wood Against Humidity
Sealing is important in a humid state like Florida. Use a high-grade primer to block moisture, then follow with a durable interior sealant or polyurethane. Apply thin, even coats and allow proper drying time. This keeps the wood from absorbing moisture and helps prevent warping, peeling, or discoloration. A simple sanding between coats can also keep the finish smooth.
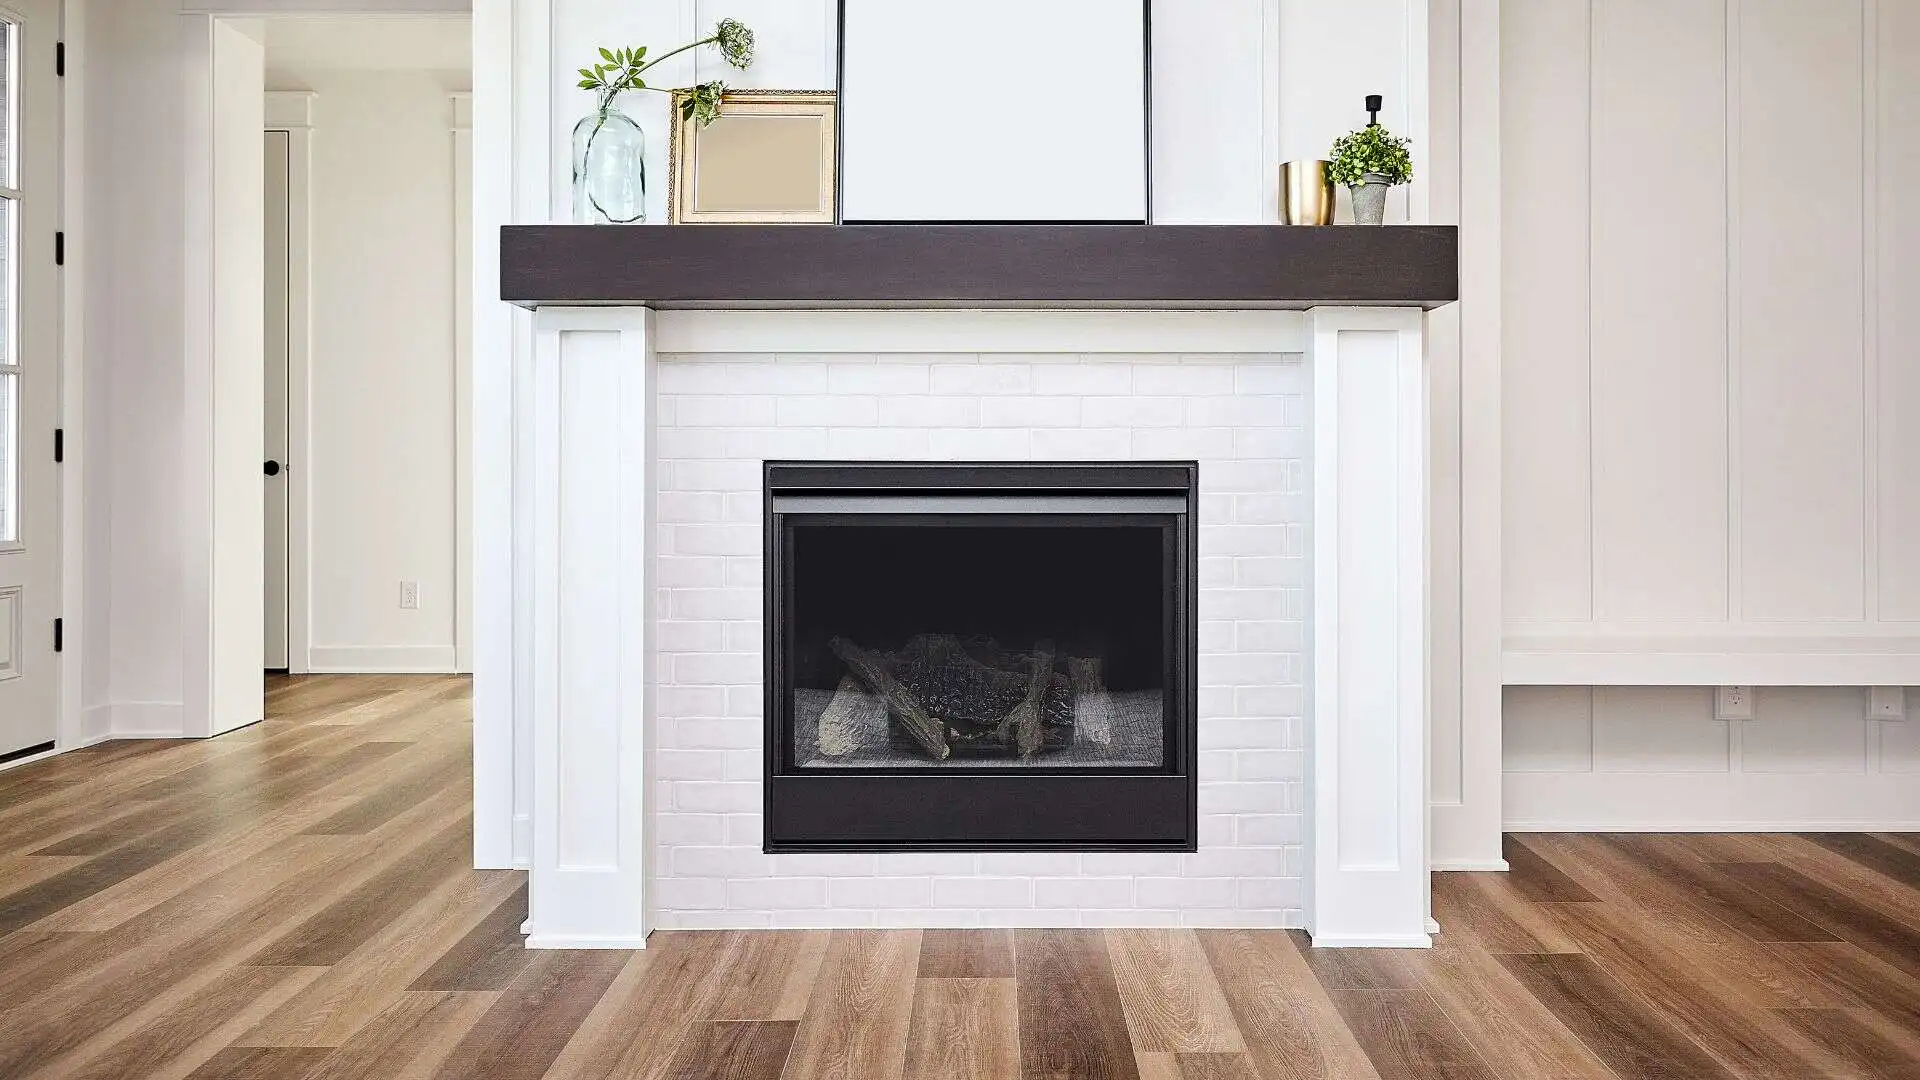
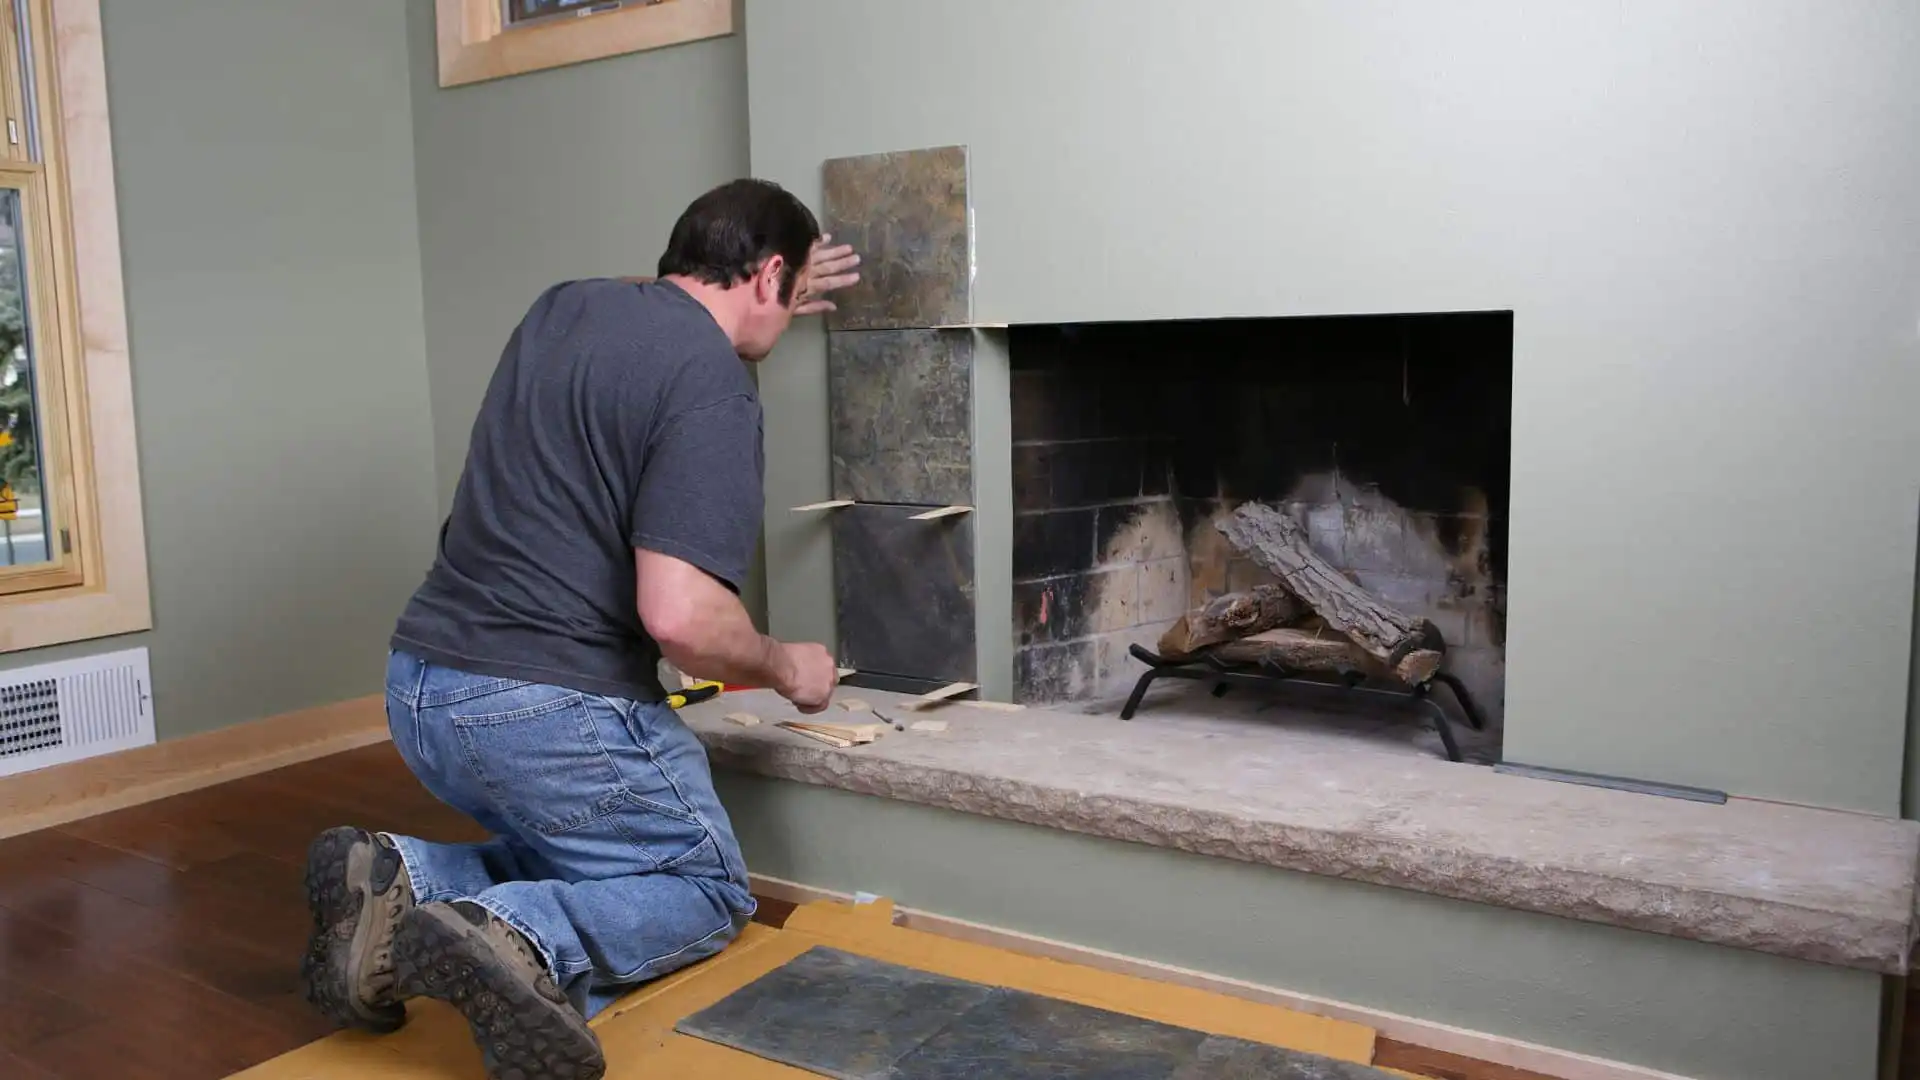
Tile Surround
Tile Patterns That Look Clean
Tile gives you a polished look without a lot of maintenance. Florida homeowners often choose simple subway patterns, stacked layouts, or large-format tiles because they look clean and easy to maintain. Neutral tones blend well with most interiors, while textured tiles add a soft visual detail without overwhelming the space.
How To Lay And Grout Tile
Start by installing a heat-safe backer board so your tiles have a stable base. Spread a thin layer of mortar with a notched trowel and place each tile carefully. Use spacers to keep the lines straight. After the tiles set, apply grout slowly and press it into each joint. Wipe extra grout off the surface before it dries. Once everything cures, seal the grout to protect it from moisture.
How To Keep Tile From Cracking Under Heat
To reduce the chance of cracking, use heat-resistant mortar and select tiles rated for fireplace use. Make sure your surface is even before installation because uneven spots can create stress points. Keeping proper clearance from the firebox is also important. These simple steps help your tile look good for years without damage.
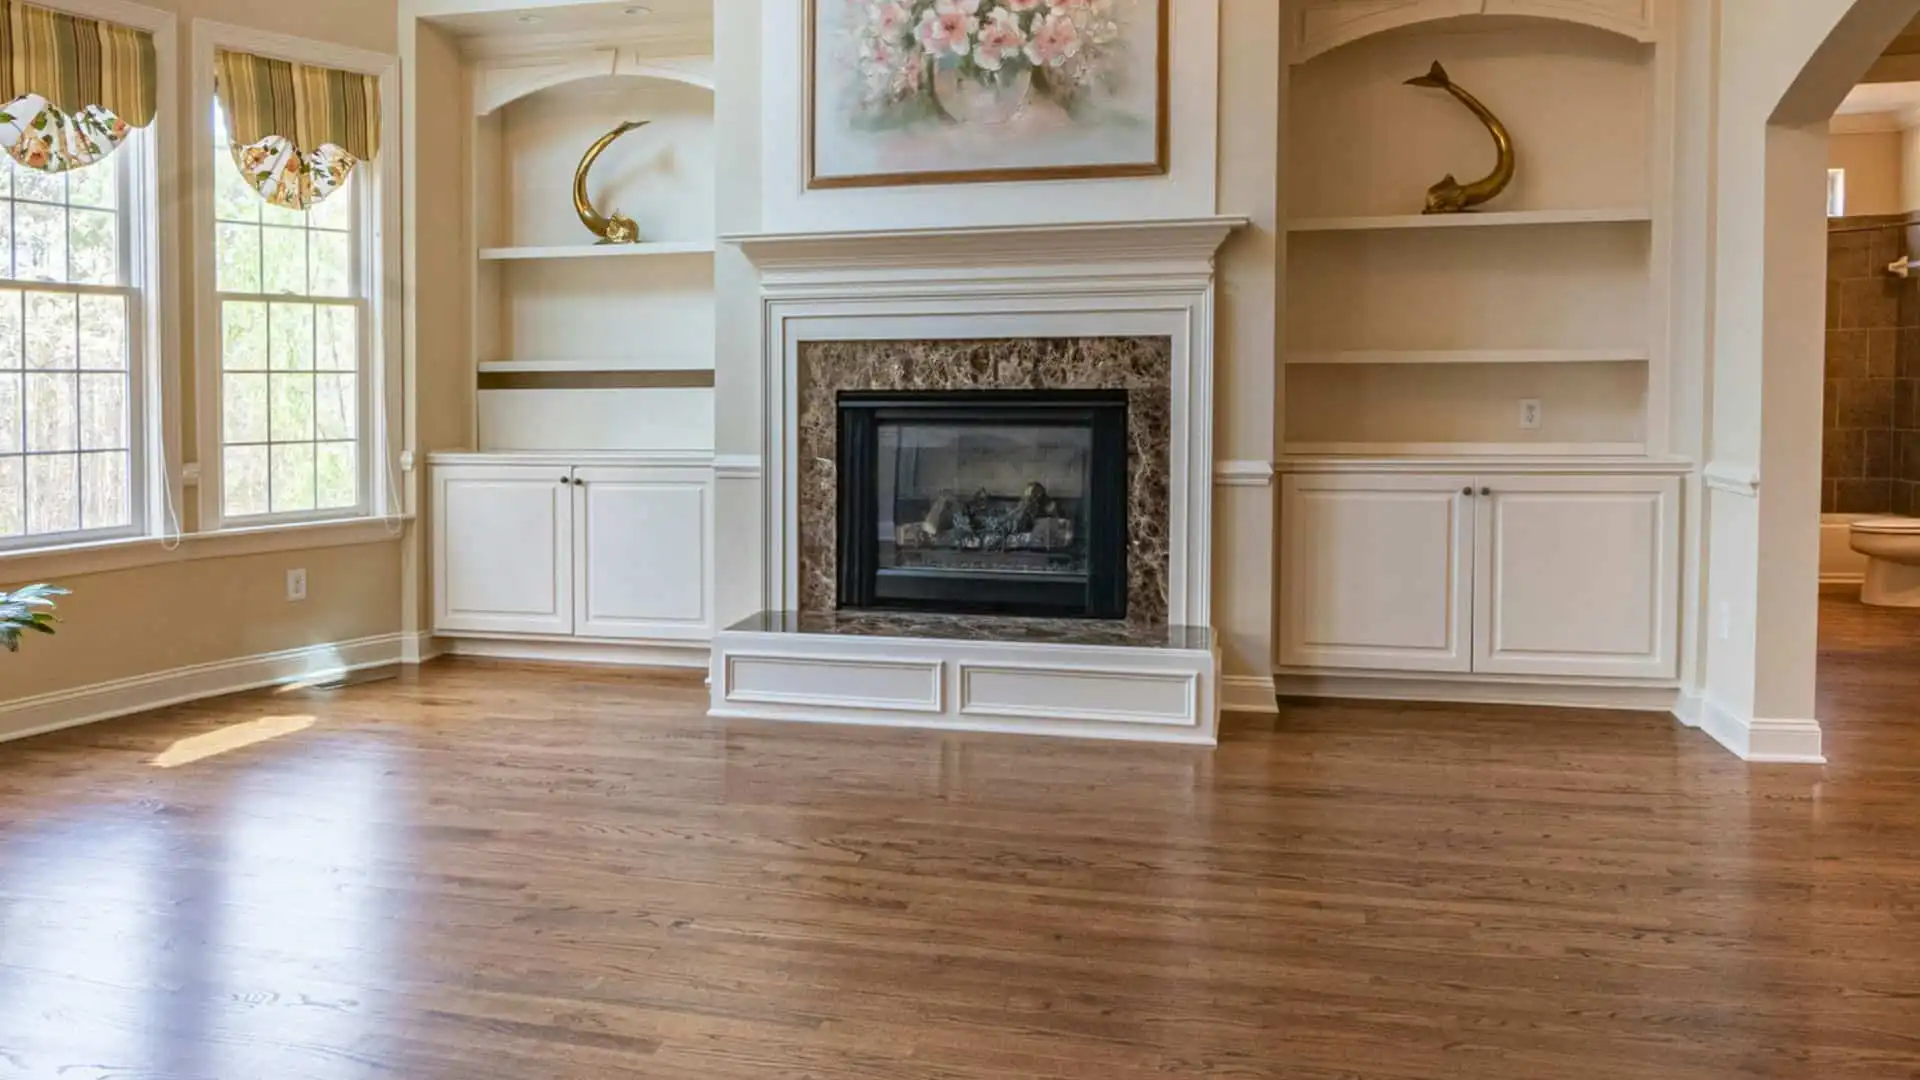
Stone Surround
Pros And Cons
Stone brings strength and a natural look that works well in Florida homes. It holds up under heat and adds visual depth. On the other hand, stone weighs more and often takes extra time to install. It also costs more than wood or tile, but many homeowners feel the long lifespan makes the higher price worth it.
How To Handle Weight
Stone requires a strong frame. Before starting, check the structure behind the wall to make sure it can support the load. Use a sturdy backer and make sure the stone pieces sit level. When placing heavier pieces, press firmly so the adhesive bonds well. Work slowly and check alignment as you go.
When To Call A Pro
You may want a professional if you’re using large stone pieces or building a tall surround. A pro can help with weight support, alignment, and code requirements. This can save you from repairs later and ensures the installation stays secure.
Each material brings something different to your fireplace, and choosing the right one depends on the look you want and the conditions in your home. When you match your design with the right installation steps, your surround will stay clean, safe, and sturdy for years.

Build Or Mount The Mantel
Choosing the right height and design for your mantel matters because it affects both safety and appearance. A well-placed mantel helps frame your fireplace, keeps the area safe from excess heat, and gives the room a focal point that fits your home’s style. When you follow the right steps, the project feels far more manageable and the final result looks intentional instead of rushed.
How High The Mantel Should Sit
A good mantel height keeps the surface safe from heat and makes the fireplace feel balanced. Most homeowners place the mantel around 54 to 60 inches from the floor, but the actual height depends on your firebox size, wall layout, and the style you want. You should always measure the distance from the top of the firebox before deciding. The goal is to prevent heat from damaging the mantel while keeping the design visually centered.
Ask yourself which height makes your room feel comfortable. Do you want the mantel higher to display larger decor, or lower to make the fireplace feel more connected to your seating area?
Safe Clearances
Clearances protect your home from heat damage. Mantels should sit at least 12 inches above the firebox opening, and deeper mantels may require even more space. You also want to keep side trim and decorative pieces at safe distances to avoid charring or discoloration. Double-check the guidelines for your specific fireplace, especially if you have a gas unit, because requirements vary by model.
When you follow safe spacing, your mantel lasts longer and stays in good shape even after years of use.
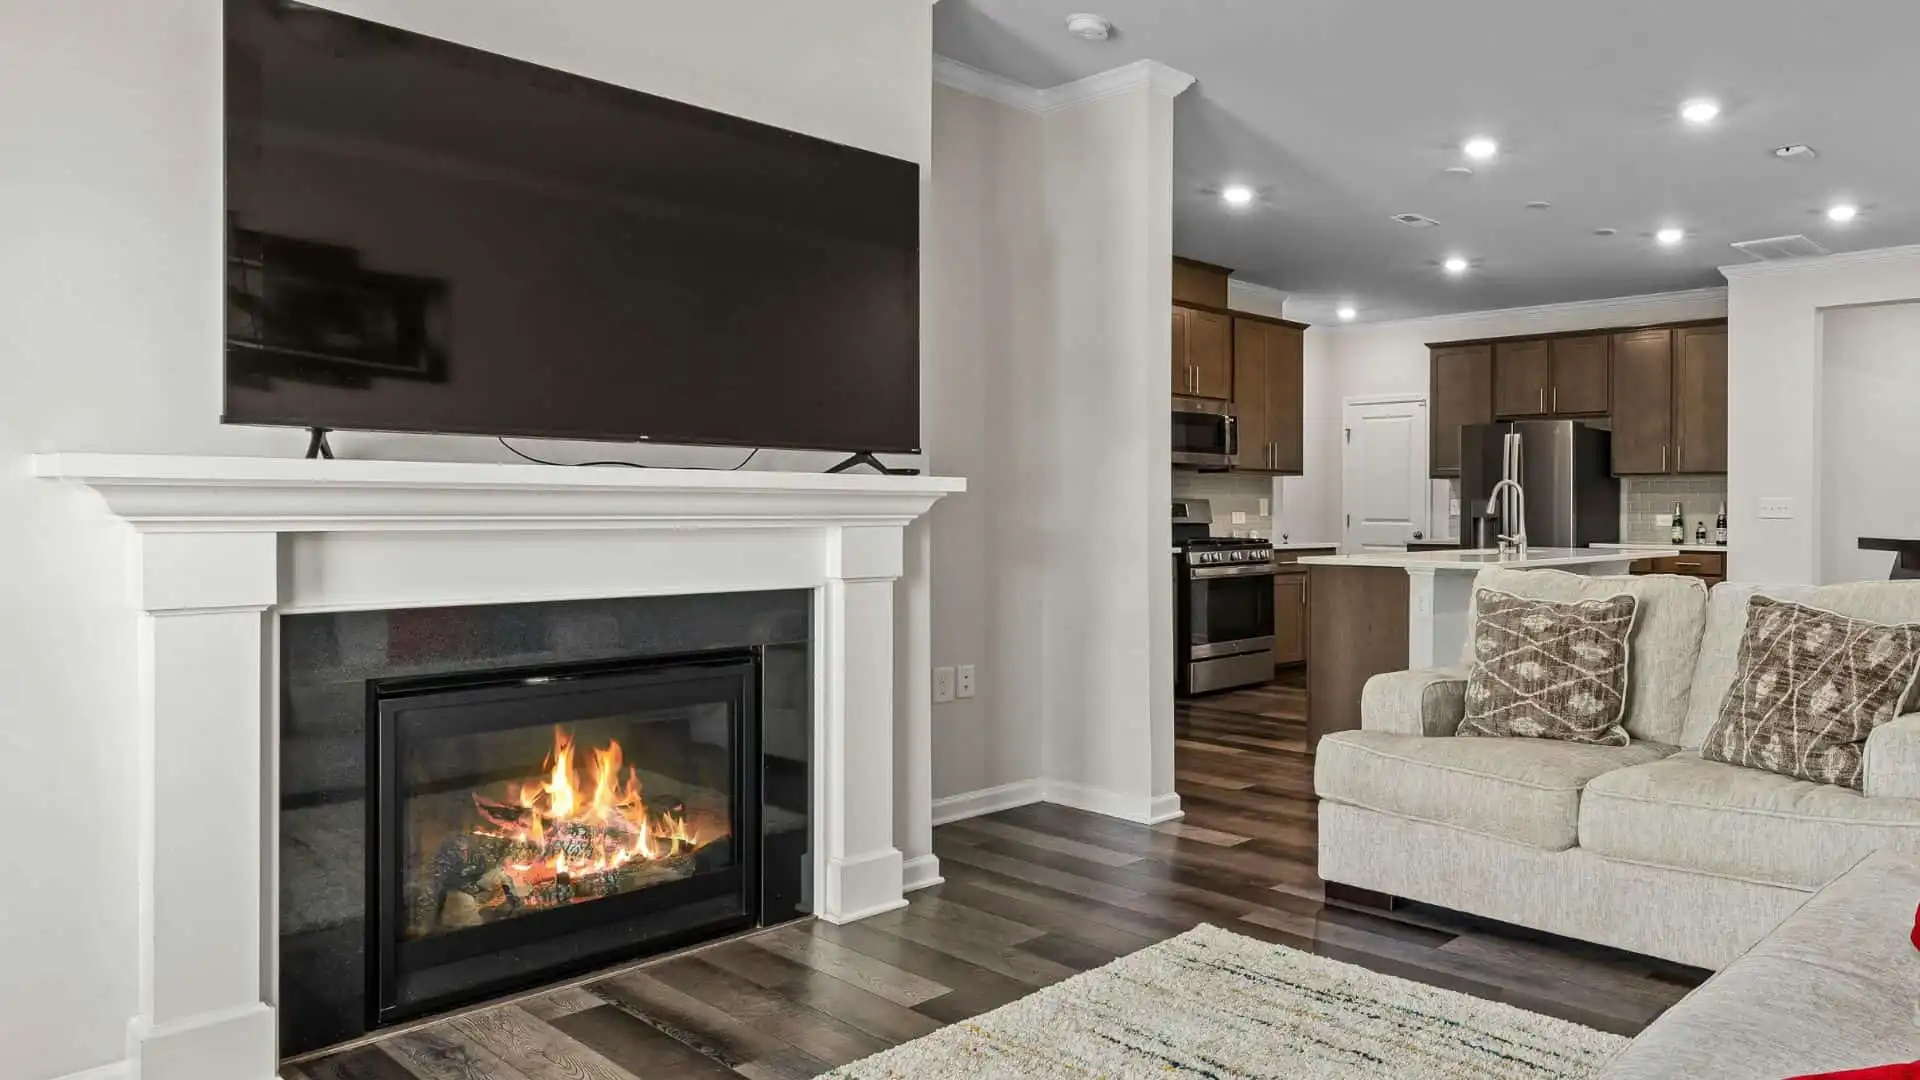
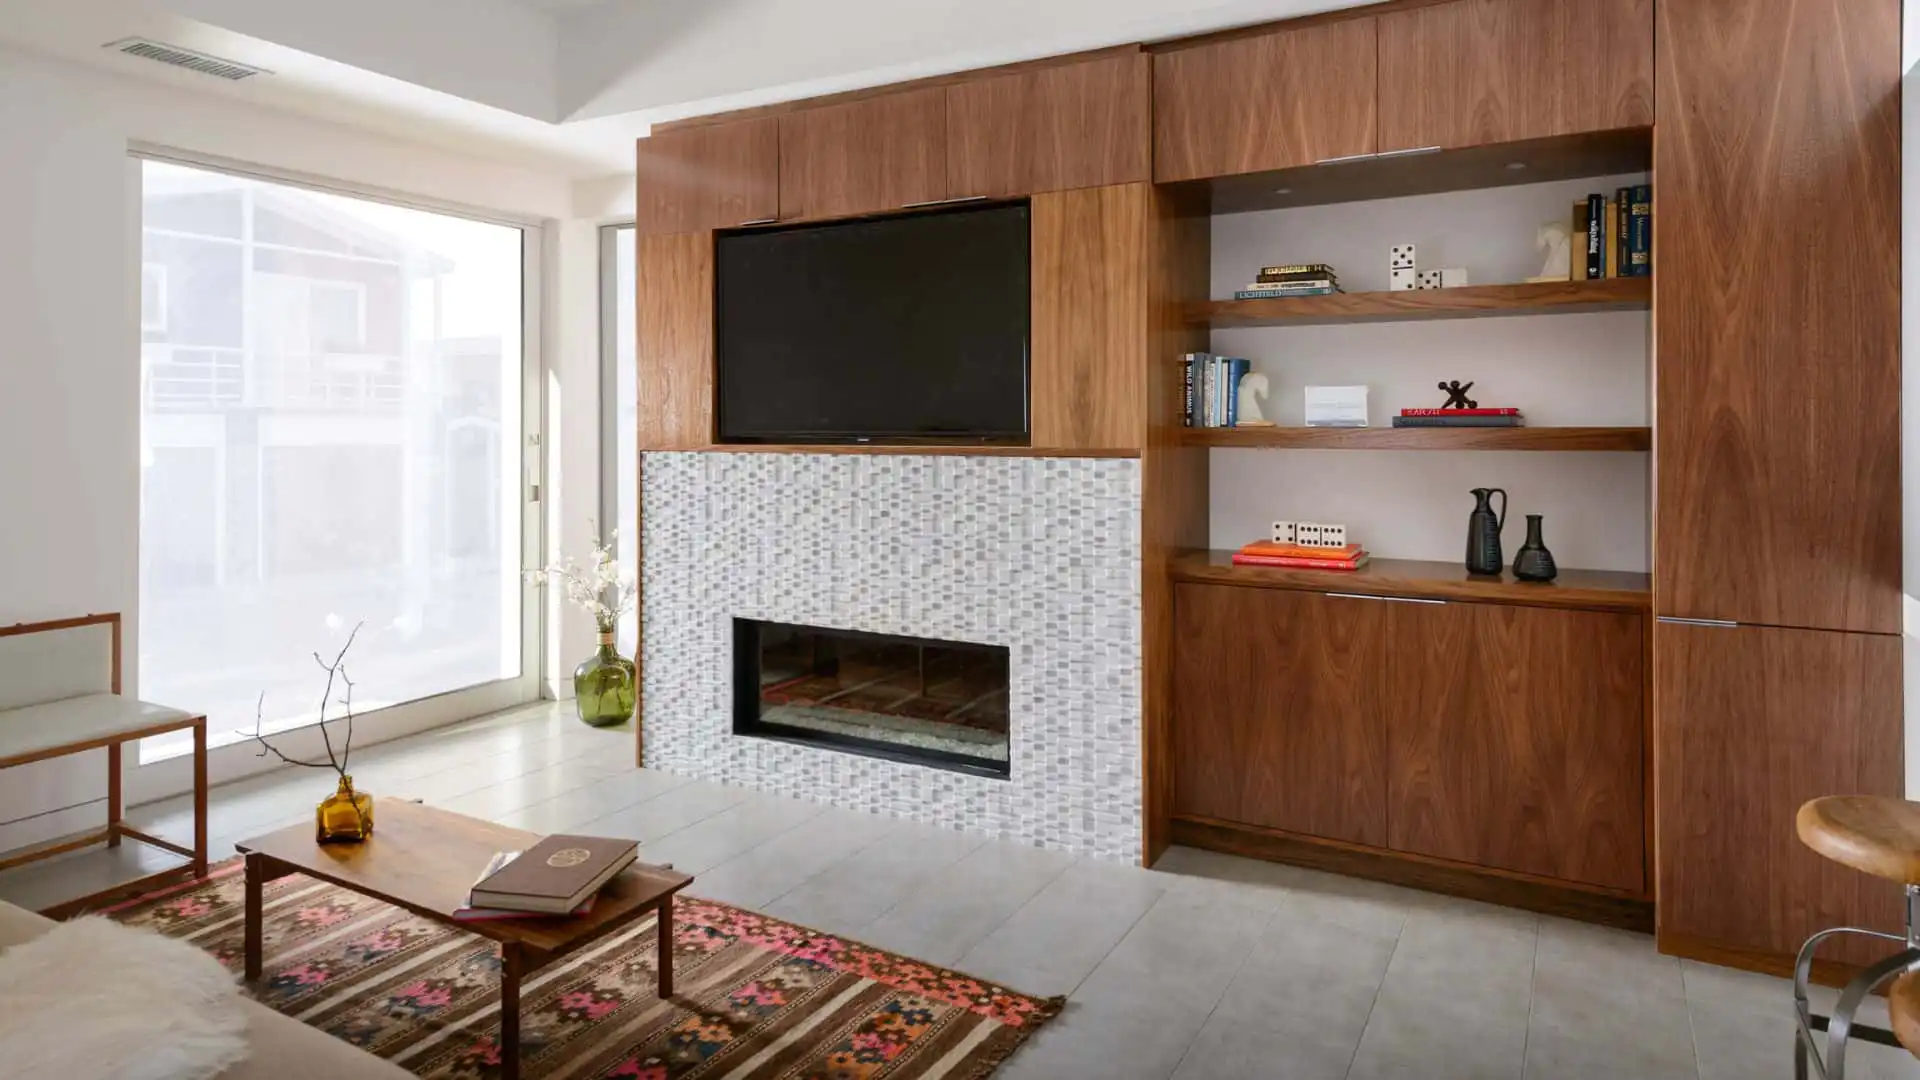
Mantel Designs That Blend With Florida Interiors
Florida homes often favor clean lines, light tones, and relaxed finishes. A simple wood mantel with a soft stain works well in many living rooms, while white or lightly colored mantel frames bring a bright, coastal touch. Stone mantels offer a classic look, and tile surrounds can make the space feel modern without overpowering the room.
Humidity also matters when choosing materials. Sealed wood, durable stone, and treated surfaces help prevent swelling, warping, or moisture marks in Florida’s climate. The key is choosing a look that feels natural with your existing decor.
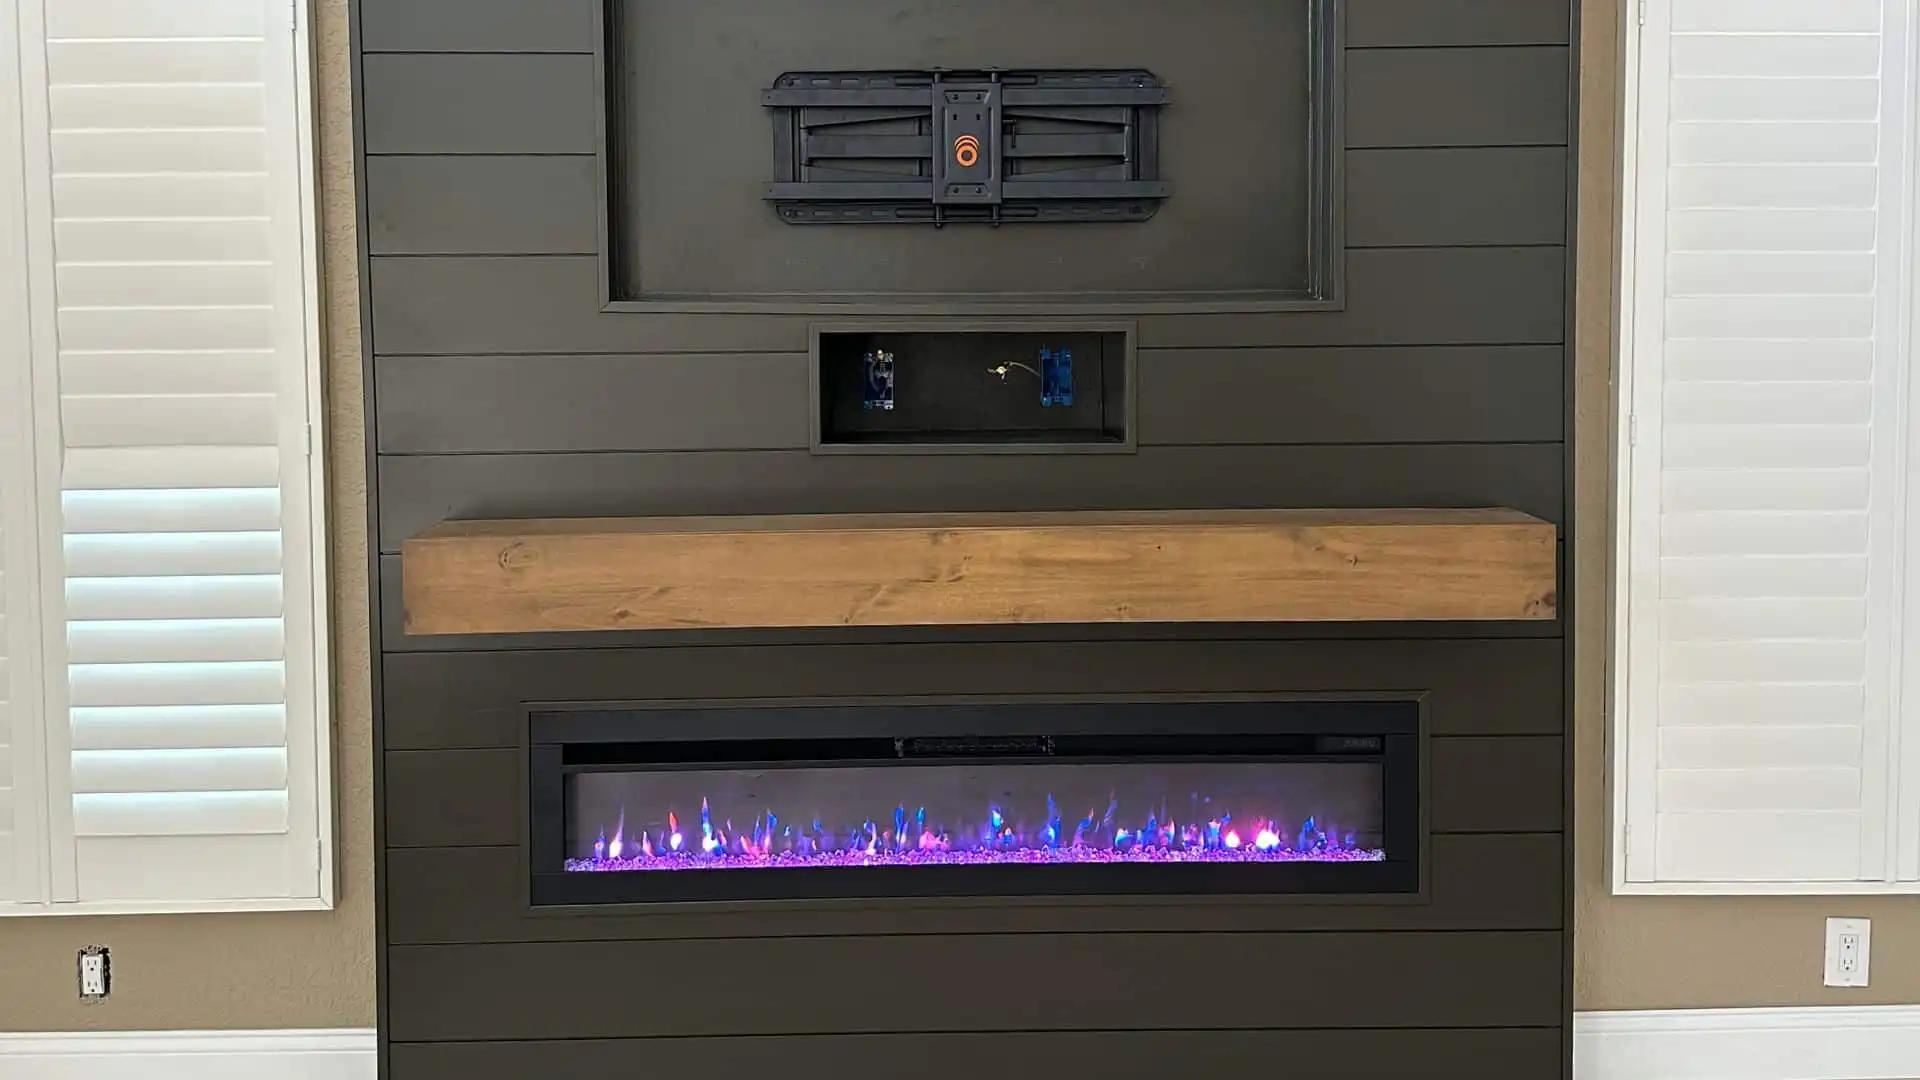
Example Of A DIY Mantel Built From Reclaimed Wood
A reclaimed wood mantel adds warmth without feeling heavy. One homeowner in coastal Florida used a salvaged beam from an old barn, sanded it until smooth, and sealed it with a clear coat to protect it from moisture. After securing hidden brackets inside the wall studs, the beam slid into place and created a clean, rustic focal point without needing complicated tools.
A solid mantel can change the look of your fireplace with a single upgrade. When you take time to measure, plan, and choose materials that match your Florida home, you end up with a feature that feels both safe and welcoming.
Finishing Touches
Giving attention to the final steps is what makes your fireplace surround look clean and well built. These small tasks help the structure last longer and keep the design consistent with the rest of your living space. Each action below adds to the finished look, so take your time and work through them with care.
Sanding Or Smoothing
Start by sanding any rough spots on wood or uneven edges on the frame. A smooth surface helps paint or stain settle evenly and keeps the surround from looking rushed. Use fine grit sandpaper and move slowly over corners, edges, and any area where two materials meet. This is also the best moment to check for scratches, dents, or uneven lines before you move forward.
Painting Or Staining
Choose a finish that blends with the rest of your living room. Paint gives you a clean and solid color, while stain brings out the natural grain of the wood. Apply thin coats and let each coat dry fully before adding another. A careful approach helps the finish look consistent and prevents drips or patchy areas. Use a high quality brush or roller for the best result.
Caulking Joints
Caulk any small gaps where materials meet. This step creates a tight seal and helps the surround look more unified. Run a steady bead along seams, then smooth it with a damp finger. Caulking also reduces the chance of moisture slipping behind the surface, which is helpful in humid Florida homes.
Adding Decorative Trim
Trim pieces give your surround a finished appearance and help cover edges or seams. Choose trim that fits the style of your room, whether simple lines or something more detailed. Attach each piece securely and check that all corners match up cleanly. Trim can transform a plain structure into something that looks custom built.
Checking For Gaps Or Loose Pieces
Walk around the surround and check every section for movement. Tighten any loose screws, press down raised edges, and fill small openings you may have missed earlier. This final inspection helps you catch problems before they become noticeable. It also gives you confidence that the surround is stable and ready for everyday use.
This wraps up the final steps that bring your project together. Taking care with these finishing touches gives your fireplace surround a polished, long lasting result.
Safety And Florida-Specific Compliance
Understanding safety rules and local requirements helps you build a fireplace surround that stays secure, follows guidelines, and avoids future problems. Florida homes face heat, humidity, and strict building expectations, so it helps to know what matters before you begin. The points below walk you through the areas that homeowners often overlook.
Heat-Resistant Spacing
Heat from the firebox can damage materials if the surround sits too close. Leave enough space between the opening and anything that can warp, crack, or burn. Many Florida homes use sealed wood or tile, and both need proper clearance to stay safe. If you ignore spacing, the surface can discolor or separate from the wall. Check the manufacturer guidelines for distance recommendations and follow them closely. Ask yourself if the material you chose can handle the heat long-term.
Fire Codes
Local rules protect your home and keep the structure safe. Some areas in Florida expect homeowners to use specific materials near the firebox, such as concrete board or rated stone. You may also need approved spacing between the surround and the fire opening. These codes exist to stop fires from spreading into the wall cavity or surrounding areas. Before you start cutting or installing, check your local office or website to verify what applies to your home.
When You Must Involve A Certified Contractor
Some projects require a licensed contractor, especially when gas lines, electrical components, or structural changes come into play. If you plan to adjust the firebox, add electrical outlets, or modify framing that supports weight, bring in a certified pro. They understand how Florida codes work and can help prevent costly mistakes. A contractor also ensures the final setup can pass inspection.
What Inspectors Usually Look For
Inspectors check for safe clearance, proper backer boards, heat-safe adhesives, and any signs of moisture damage. They want to see solid framing, secure fasteners, and materials that meet local guidelines. If you added tile or stone, they also look at how it’s supported and whether it can handle long-term heat exposure. Their goal is simple: make sure the surround can perform safely under real conditions.
Simple Mistakes That Can Create Fire Risks
Small errors can lead to bigger problems later. Using regular drywall behind the surround, skipping a heat-safe backer, choosing the wrong adhesive, or placing wood too close to the opening can create serious risks. Many homeowners also forget about Florida humidity, which can weaken materials if they aren’t sealed or installed correctly. Always double-check your measurements, choose products rated for heat, and avoid rushing the finishing stage.
A safe fireplace surround in Florida takes planning, the right materials, and attention to local rules. Taking the time to understand these factors helps you create a setup that looks clean and stays secure for years.
Common Mistakes To Avoid
Building a fireplace surround in Florida comes with a few challenges that can turn a simple project into a costly fix if you’re not careful. Paying attention to measurements, materials, moisture, and finishing details helps you avoid problems that can show up days or even months later. Here are the mistakes most homeowners run into and how you can prevent them.
Poor Measuring
Many homeowners start cutting materials without double-checking their numbers. This leads to frames that don’t line up with the firebox or trim that sits unevenly on the wall. Always measure multiple times before making any cuts. A homeowner in Tampa once had to rebuild an entire frame because the surround came out an inch too narrow and didn’t fit the mantel brackets.
Using Non-Heat-Safe Adhesive
Some adhesives are not designed to handle high temperatures. When they fail, tile or stone pieces loosen and shift. Choose a heat-safe adhesive or mortar made for fireplace projects. One DIY builder used regular construction adhesive and saw the tile start slipping only a week later once the fireplace was running again.
Choosing Materials That Warp In Humidity
Florida’s humidity can damage unsealed wood or low-quality composite materials. These options swell, bend, or separate from the frame. Pick sealed wood, concrete board, tile, or stone that can handle moisture. A homeowner in Jacksonville found their surround panels bowing outward during the summer because the material wasn’t suited for a humid environment.
Forgetting Moisture Checks
Moisture behind the wall or near the firebox causes rot or mold over time. Always check for damp spots, leaks, or soft sections before you start building. One homeowner installed a new surround only to discover hidden moisture a month later, forcing them to remove everything and fix the issue.
Rushing The Finishing Stage
Finishing work is where the project comes together. If you skip sanding, sealing, caulking, or proper drying times, you end up with visible flaws. A common example is grout that cracks because it wasn’t allowed to set long enough, leaving gaps that weaken the entire surface.
Taking your time and avoiding these mistakes helps you build a fireplace surround that looks clean, stays sturdy, and holds up well in Florida’s climate. Let me know if you want the next section written.

When To DIY And When To Hire A Pro
Taking on a fireplace surround project can feel rewarding if you enjoy hands-on work, but it helps to know when the job fits your skill level and when it calls for a trained contractor. Florida homes have added factors like humidity and safety rules, so the choice you make affects the strength and safety of the finished surround.
Signs You Can Handle It Yourself
You can move forward with a DIY approach if you feel comfortable using basic tools and enjoy step-by-step projects. Simple frames, light materials, and clear layouts often work well for someone who likes to follow measured plans. If you have installed trim, shelves, or wall features before, you’ll likely manage the early stages with confidence. Another good sign is having a clean and dry wall without hidden moisture problems, since that removes extra challenges.
Think about your own habits. Do you stay patient with detailed cuts and repeated measuring? If you do, building a surround on your own can give you a result you feel proud of without needing outside help.
Signs You Should Call In A Contractor
A contractor becomes the better choice when the job involves heavy materials, old structures, or parts of your home that have hidden issues. If you see cracking, warping, or moisture around the fireplace, it’s safer to let a pro inspect the area before any work begins. You may also want help if the project involves cutting stone, adjusting a gas line, or setting a mantel that needs exact weight support.
Hiring a contractor also saves time if you aren’t sure how to keep the frame square or how to mount a surround so it stays stable through Florida’s humidity. A skilled installer can spot problems early and guide you through choices that match your home.
Situations Where Code Compliance Becomes Complex
Some projects require specific spacing, clearances, or heat-safe materials under local rules. If your fireplace uses gas or if you plan to change the opening size, the code requirements can get detailed fast. This includes vent changes, insulation guidelines, and rules that protect the wall from heat. These areas often confuse homeowners because the details vary by county in Florida.
If you find yourself unsure about clearances, permits, or heat rating labels, letting a pro take over helps you avoid mistakes that could lead to safety risks or a failed inspection.
A careful approach makes sure your surround looks clean, stays safe, and fits your home. Let this guide help you choose the option that matches your comfort level and the needs of your space.
Ready to upgrade your fireplace with a clean, durable surround that fits your home and meets Florida standards? Visit us to book our fireplace remodeling service and let our team handle the work with skill, care, and clear communication from start to finish.
FAQs: About How To Build a Fireplace Surround in FL
- What is the first step in building a fireplace surround in FL?
Start by checking local guidelines, measuring the wall, and making sure the area is safe and clear before you begin. - What materials work best for fireplace surrounds in Florida?
Tile, sealed wood, concrete board, and stone handle humidity and heat well in Florida homes. - Do I need a permit to build a fireplace surround in FL?
Some areas require permits based on structure and fuel type, so it’s best to check with your local building office. - Can I use regular wood for a fireplace surround in a humid climate?
You can use wood if it’s sealed and installed with safe clearances to keep it from warping or absorbing moisture. - How long does it take to build a fireplace surround?
Most DIY projects take one to two days depending on materials, prep work, and finishing details. - What tools do I need for this project?
You’ll need a measuring tape, level, saw, drill, adhesive, concrete board, safety gear, and your chosen finish materials. - How do I keep the surround safe from heat damage?
Use heat-safe materials, follow clearance rules, and add a proper backer board to shield the wall. - Should I hire a professional for this project?
Hire a pro if you’re unsure about heat safety, framing, or local code requirements. - Can I install tile directly over drywall?
No. You need a heat-safe backer board to protect the wall and give the tile a solid base. - What style fits Florida homes best?
Clean tile, light stone, sealed wood, and simple modern trims work well with the coastal and contemporary look found in many Florida homes.
Conclusion
Florida homes need materials that can handle moisture, so choosing options that stay strong in humid conditions is a smart way to keep your fireplace surround looking clean and steady over time, and you’ll avoid problems that often show up when non-treated wood or poorly chosen adhesives start to warp or loosen. Careful measuring also plays a big role in getting a balanced look, because even small mistakes can throw off the frame or make the finish harder to install, and checking your numbers more than once helps you stay on track. Take your time with each step so the project feels manageable instead of rushed, and let the process unfold at a pace that lets you spot issues early. Once you’re ready to move forward, pick a design that fits your living space, choose the tools you’ll need, and map out the order of tasks so you start with a clear plan that leads to a solid result. This section wraps up the key points you can use to move confidently into the next phase of your project.
Home Upgrades That Pair Well With Your Fireplace Project
- Full Home Remodeling – A full home remodel gives you the chance to bring a consistent style to every room, especially if your new fireplace surround becomes the centerpiece of your living space. This service works well for homeowners who want a clean, updated look throughout their interior.
- Kitchen Remodeling – A kitchen remodel can complement your fireplace upgrade by tying together colors, finishes, and layout choices. Many homeowners choose to refresh both areas to create a more balanced and modern flow between shared living spaces.
- Bathroom Remodeling – Upgrading your bathroom adds comfort and value, especially when paired with improvements in other parts of the home. New tile, fixtures, and storage can create a clean and organized space that matches the quality of your main living area.