Welcome to the part of renovation most homeowners underestimate. Preparing your home before work begins shapes your budget, your timeline, and your sanity. When you plan ahead, you reduce delays, avoid damage, and make daily life easier while work is underway. This guide shows you how to prepare your home for renovation with clear steps, real examples, and practical decisions you can make before the first tool arrives.
To prepare your home for renovation, define the project scope, build a realistic timeline, and create a renovation preparation checklist. Clear and protect affected spaces, plan how you will live through the remodel, and set expectations with your contractor. Proper preparation reduces delays, limits damage, and lowers stress during the renovation process.
Before You Touch Anything, Get Clear On The Scope
Before you start packing boxes or choosing finishes, you need a clear scope. Scope is the simple, practical definition of what work will happen, where it will happen, and what needs to change to make it possible. When you lock this in early, you prevent budget surprises, timeline blowups, and half-finished decisions that stall your contractor mid-project.
What Rooms Are Affected
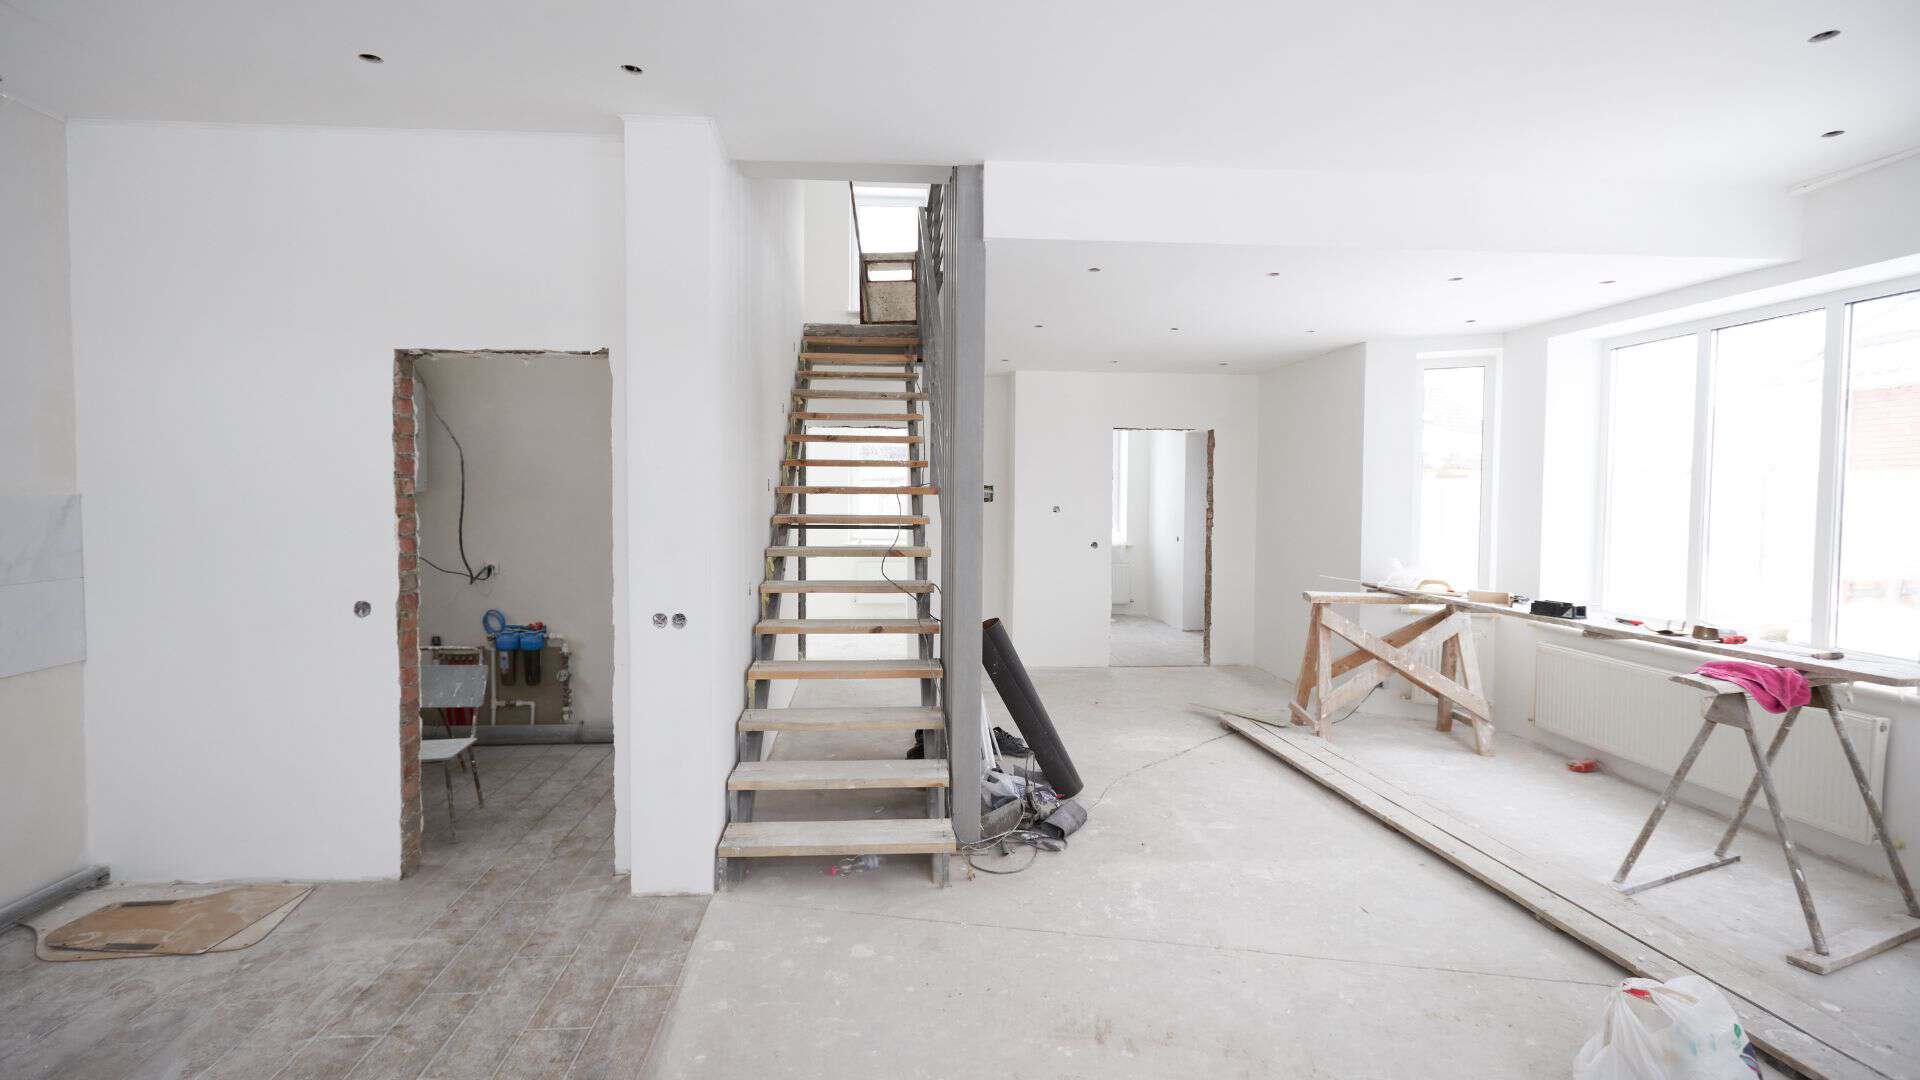
Start by listing every space the renovation will directly impact, then add the spaces it will affect indirectly. Most homeowners only think about the “main” room, like the kitchen, and forget the connected areas that become construction pathways.
- Primary work areas: The rooms where demolition, building, and installation will happen, like your kitchen, bathroom, or bedroom.
- Adjacent spaces: Rooms that share walls, floors, or doorways with the work zone, such as a dining room next to a kitchen or a hallway outside a bathroom.
- Contractor pathways: Entry points and walk routes workers will use to move tools and materials, often through a garage, living room, or stairwell.
- Storage and staging zones: Areas where cabinets, tile, drywall, and tools will sit, which can take up more space than you expect.
Practical example: A kitchen-only renovation still affects your dining area if it becomes the staging zone for cabinets, and it affects your living room if that is the only path from the entry to the kitchen. If you plan for those “secondary” spaces now, you avoid daily frustration later.
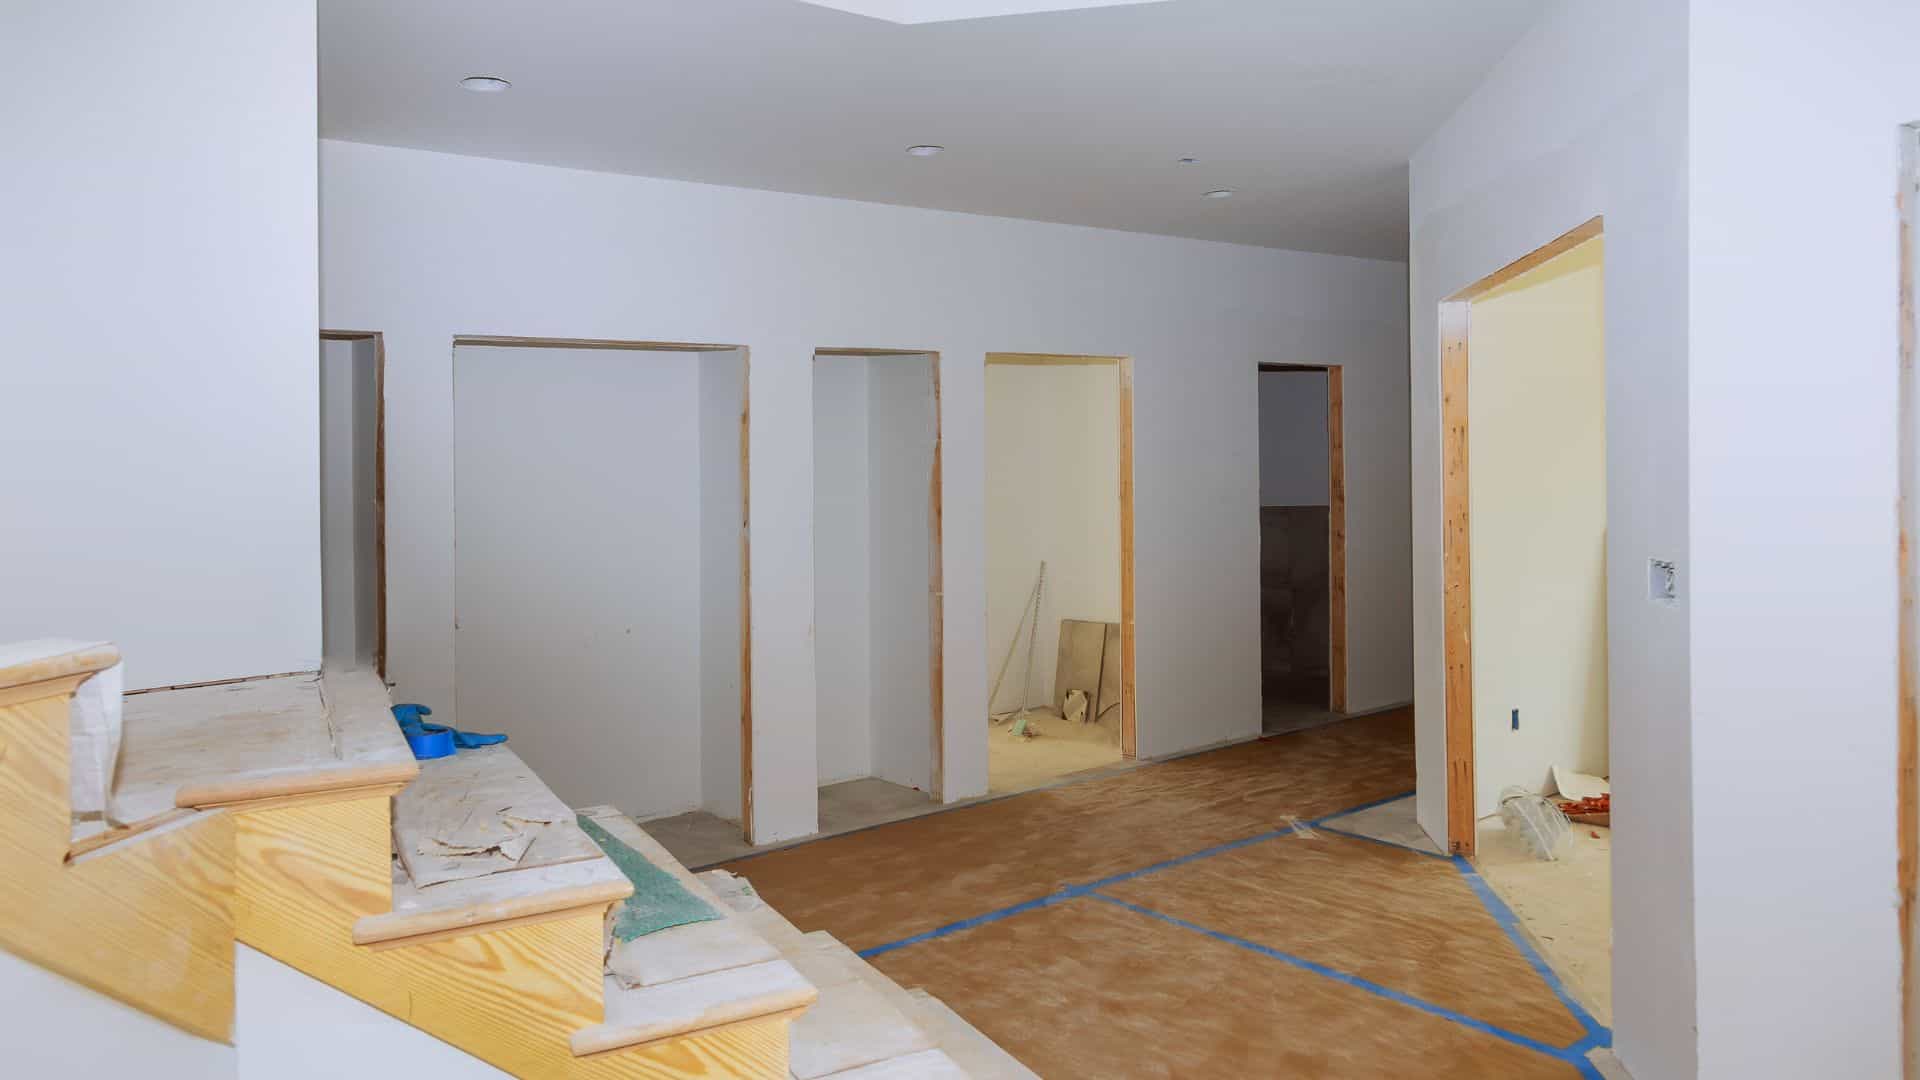
What Systems Are Touched
Scope is not just rooms. It is also the systems behind the walls and under the floors. These determine cost, inspections, scheduling, and how disruptive the project will feel day to day. A remodel that touches plumbing, electrical, or structural elements tends to require more coordination and has more points where delays can happen.
- Electrical: Outlet placement, lighting changes, panel upgrades, or moving circuits to match a new layout.
- Plumbing: Relocating sinks, adding fixtures, replacing supply lines, or upgrading drains to meet code.
- HVAC: Moving vents, replacing duct runs, adding returns, or adjusting airflow after walls change.
- Structural: Removing walls, adding beams, reframing openings, or changing load paths.
- Waterproofing and moisture control: Shower systems, underlayment, ventilation, and any work that protects against mold and leaks.
Real-world tip from experience: If you plan to move a sink or stove, assume electrical and plumbing are part of the scope even if your first vision is “just new cabinets.” Those two decisions alone can trigger permit needs, inspection timing, and extra trades on site.
How Long It Will Last
A scope that lacks a timeline is incomplete. You do not need an exact finish date on day one, but you do need a realistic range so you can plan your life. Duration depends on three things: how much you are changing, how many trades are involved, and whether materials are readily available.
- Project duration range: A reasonable start-to-finish estimate, plus buffer time for delays.
- Phasing plan: Whether the work happens in one push or in stages, like doing a bathroom first, then the kitchen.
- Decision deadlines: The dates you must choose tile, paint, fixtures, and hardware so the schedule stays intact.
- Inspection points: The moments the job must pause for approvals, such as rough electrical or rough plumbing.
Example: A cosmetic bathroom refresh might run two to three weeks if you are not moving plumbing and materials are in stock. A full bathroom remodel that changes the layout can stretch to six to eight weeks once demo, rough-ins, waterproofing, tile work, and inspections are included.
Kitchen-Only Vs Whole Floor
This is one of the biggest scope misunderstandings. “Kitchen renovation” sounds contained, but the practical impact can feel like a whole-home disruption depending on layout and lifestyle.
Kitchen-only scope usually includes:
- Demo of cabinets, countertops, and sometimes flooring
- Electrical updates for lighting and outlets
- Plumbing for sink and dishwasher
- Appliance delivery scheduling and installation
Whole-floor scope adds:
- Continuous flooring and transitions between rooms
- Broader dust control needs and furniture relocation
- More time without access to multiple rooms
- Higher coordination demands across trades
A clear decision you can make early: If you plan to replace flooring, decide whether you want a patch in the kitchen only or a continuous run across the whole floor. Many homeowners regret “just the kitchen” flooring when the new floor does not match the old, or when thresholds look awkward.
Cosmetic Update Vs Structural Work
Cosmetic updates and structural work are not just different in price. They are different in risk, complexity, and timeline. If you treat a structural project like a cosmetic one, you will feel blindsided by permits, engineering, and delays that are normal for that level of work.
Cosmetic updates often involve:
- Painting, trim, and surface finishes
- Cabinet refacing or replacing without layout changes
- New fixtures in the same locations
- Updating lighting without moving wiring paths much
Structural work can include:
- Removing or altering walls
- Enlarging doorways or windows
- Changing room layouts
- Reinforcing framing or adding beams
Practical example: Swapping cabinets and countertops in the same footprint is usually straightforward. Shifting the kitchen sink to a new island introduces plumbing routes, venting, possible slab cuts, and more inspections. That is a scope change, not a minor preference.
Do You Know What Stays And What Goes
This is the self-check that prevents expensive mid-project changes. You want a clear “keep or replace” list before demo starts, because demo is the point where mistakes become costly and irreversible.
- Keep list: Items that stay as-is, such as existing appliances, a pantry wall, or original hardwood floors you plan to protect.
- Replace list: Items that will be removed and upgraded, like cabinets, plumbing fixtures, lighting, and tile.
- Modify list: Items that stay but change around them, such as repainting existing baseboards, relocating outlets, or refinishing floors.
- Non-negotiables: The must-haves that define success for you, like keeping a tub for kids or preserving a load-bearing wall.
When you get clear on scope, you give your contractor fewer guesses to make, and you give yourself fewer surprises to manage. Next, you will want to turn that scope into a realistic timeline that accounts for permits, material lead times, and the day-to-day realities of living through the work.

Build A Realistic Renovation Timeline
A renovation timeline is not a promise. It is a working plan that shifts as real conditions show up. Many homeowners assume the schedule they hear at the start will hold from day one to final cleanup. In practice, timelines move because construction depends on people, materials, and approvals that are often outside your control. Building a realistic timeline means planning for those variables instead of being surprised by them.
Why Contractor Timelines Shift
Contractors estimate timelines based on ideal conditions. Real projects rarely follow ideal paths. Weather changes, subcontractor availability, and unexpected site issues can all affect progress.
- Labor coordination: Trades such as electricians, plumbers, and inspectors do not work in isolation. One delay can ripple into the next phase.
- On-site discoveries: Opening walls often reveals outdated wiring, plumbing issues, or structural repairs that were not visible during planning.
- Client decisions: Late changes to finishes or layouts slow ordering and installation, even when the change seems small.
Understanding this upfront helps you stay calm when adjustments happen.
Common Causes of Renovation Delays
Delays usually come from predictable sources. Planning for them makes your timeline more resilient.
- Permit processing: Approval timelines vary by location and workload at the local office.
- Material availability: Backorders, shipping delays, and damaged deliveries are common.
- Inspection scheduling: Inspectors may not be available the moment work is ready for review.
- Scope changes: Adding or changing work after construction begins almost always extends the schedule.
These delays are not signs of poor planning. They are part of how renovation works in real homes.
Buffer Time Planning
A realistic renovation timeline includes space for things to go wrong without causing panic. Buffer time protects you from rushing decisions or cutting corners to stay on schedule.
- Built-in flexibility: Add one to two weeks of buffer for each major phase of the project.
- Decision deadlines: Make finish selections earlier than required to avoid holding up work.
- Living arrangements: Plan temporary solutions assuming the project runs longer than expected.
This buffer is not wasted time. It is insurance for your sanity and your budget.
Permits and Inspections
Permits and inspections often set the pace of a renovation, not the contractor.
- Permit approval timing: Some permits take days, others take months, depending on the scope and jurisdiction.
- Inspection sequencing: Certain work cannot continue until an inspection passes, even if crews are ready.
- Reinspection delays: Failed inspections require corrections and rescheduling, which adds time.
Ask your contractor which permits are required and when inspections typically happen in your area.
Material Lead Times
Materials rarely arrive as fast as expected, especially for custom or specialty items.
- Custom cabinetry: Cabinets often take several weeks or months to arrive after ordering.
- Special-order finishes: Tile, fixtures, and appliances may ship from different locations with different timelines.
- Shipping issues: Delays, damage, or missing parts can stop installation until replacements arrive.
For example, cabinets arriving late can pause work for weeks because other tasks depend on them being installed first.
Inspection Gaps
Inspection gaps happen when work finishes but the next inspection cannot be scheduled right away.
- Limited inspector availability: Inspectors often cover large areas and manage full schedules.
- Strict sequencing rules: Some phases cannot proceed until approval is granted.
- Holiday and weather delays: Offices may close or limit inspections during certain periods.
These gaps are common and should be expected when planning your renovation timeline.
A realistic timeline does not remove delays, but it prepares you for them. When you understand why schedules shift and plan for buffer time, you stay in control even when plans change. Next, it becomes important to create a renovation preparation checklist that supports this timeline and keeps every step organized.

Create A Renovation Preparation Checklist
A renovation preparation checklist keeps the project grounded before work begins. It turns vague plans into clear actions and helps you prepare your home for renovation without scrambling at the last minute. When homeowners skip this step, problems tend to surface mid project when fixes cost more and stress runs higher. This checklist works as your control center, covering decisions that affect timing, cost, safety, and daily life.
Administrative Prep
Administrative preparation sets the legal and logistical foundation for your renovation. These steps protect you from fines, delays, and disputes that can stop work entirely once it starts.
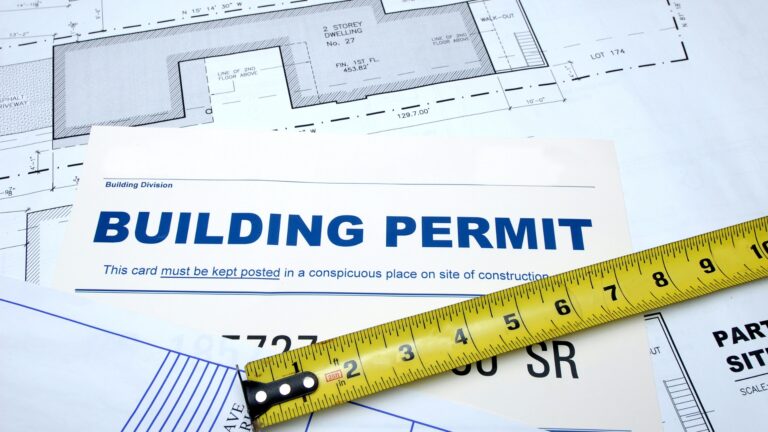
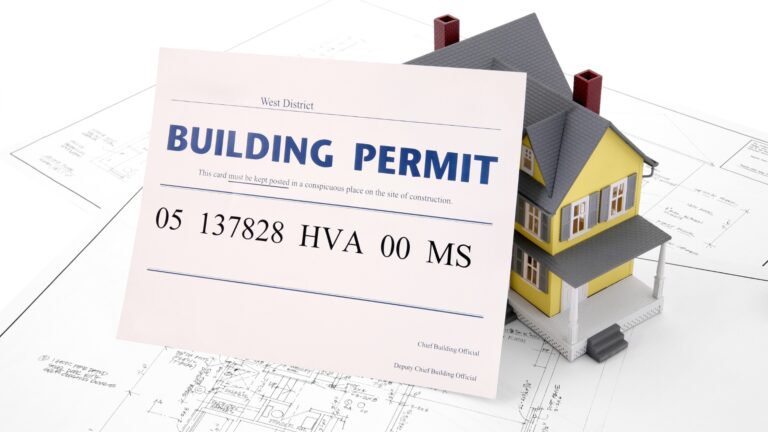
- Permits approved: Confirm all required permits are approved and posted before demolition begins, since unpermitted work can trigger stop work orders and costly rework.
- HOA rules reviewed: Review HOA guidelines early to avoid violations related to work hours, material delivery, parking, or debris removal that can delay progress.
- Insurance updated: Notify your home insurance provider about the renovation so coverage reflects increased risk, added materials, and contractor activity.
- Contractor contract signed: Ensure the contract clearly defines scope, payment milestones, timeline expectations, and responsibility for cleanup and damage.
Administrative prep is not exciting, but it prevents problems that are hard to fix once walls are open and crews are scheduled.
Financial Prep
Financial preparation protects your renovation from stalling halfway through. Even well planned projects encounter surprises, and having financial clarity allows you to make decisions without panic.
- Budget with contingency: Set aside an extra ten to twenty percent of your total budget to cover hidden issues like outdated wiring, plumbing problems, or material changes.
- Payment schedule: Align payment milestones with completed work rather than calendar dates to keep accountability clear for both you and the contractor.
- Emergency reserve: Keep a separate cash reserve untouched by the renovation budget in case the project impacts income, housing, or unexpected repairs elsewhere in the home.
This part of the renovation preparation checklist gives you flexibility when plans shift, which they often do.
Home Prep
Home preparation focuses on protecting your space and making it functional while work is underway. This is where preparation directly affects your daily comfort and stress level.
- Clear rooms and closets: Remove furniture, decor, and personal items from work areas so crews can move efficiently and nothing valuable gets damaged.
- Protect floors and stairs: Cover floors, staircases, and walk paths with durable protection to reduce scratches, dents, and tracked dust.
- Seal off work zones: Use plastic barriers and temporary doors to contain dust, noise, and debris and protect rooms not being renovated.
Home prep is essential for anyone planning to live through a remodel, especially when projects last weeks or months.

Declutter Before the Remodel Starts
Decluttering is one of the simplest ways to protect your time, your budget, and your belongings during a renovation. When work begins, every extra item becomes an obstacle. Clear spaces help contractors move faster, reduce damage, and keep your home safer while construction is underway.
Why Clutter Slows Renovation Work
A crowded home creates friction at every stage of the project. Crews work around obstacles instead of focusing on the job, and small delays add up fast.
- Limited Work Space: Contractors need open floor space to stage tools, materials, and equipment. Furniture and boxes force them to work slower and reposition items repeatedly.
- Dust Exposure: Renovation dust spreads quickly through stacked items, open shelves, and stored belongings. Once dust settles, cleaning takes far longer than prevention.
- Lost Time and Items: When personal belongings stay on site, they get moved, buried, or misplaced. Workers stop to ask questions, and you spend time searching for items you need.
How to Declutter Before the Remodel
Start earlier than you think. Decluttering always takes longer than expected, especially when emotions are involved.
- Keep: Items you use daily and need during the renovation should be limited to essentials only.
- Store: Seasonal items, decor, books, and spare furniture should be removed from active work areas.
- Donate: Items you have not used in the past year rarely belong back in the space after the remodel.
Work room by room. Finish one space fully before moving to the next to avoid spreading clutter elsewhere.
Temporary Storage Options That Make Sense
Not all storage solutions work the same for renovation projects. Choose based on access, duration, and value of items.
- Off Site Storage Units: Best for long remodels or whole home renovations where space is limited.
- Portable Storage Containers: Useful when you want access to items without daily clutter inside the house.
- Friends or Family Storage: Works for short term storage of low value items but can become inconvenient if delays occur.
Label everything clearly. Future you will thank you when it is time to move back in.
What Not to Store On Site During a Remodel
Some items should never remain in a home under construction, even if they are out of the way.
- Valuables: Jewelry, important documents, and collectibles risk damage or loss.
- Electronics: Dust and vibration can damage screens, drives, and internal components.
- Sentimental Items: Items with emotional value should be removed entirely to avoid regret.
If losing or damaging something would upset you, it does not belong on site.
A Question Worth Asking Before Work Begins
What would you hate to see damaged, covered in dust, or accidentally thrown away?
Answering that question honestly helps you decide what must leave the house before the remodel starts.
Decluttering sets the tone for the entire renovation. Once your space is clear, it becomes easier to protect what stays and manage daily life during construction. With fewer obstacles in the way, you are better prepared to focus on the next challenge, keeping the rest of your home protected while work moves forward.

Protect The Parts Of Your Home Not Being Renovated
When you prepare your home for renovation, protecting untouched areas matters as much as planning the work itself. Dust, noise, and constant movement spread fast when construction starts. A few smart barriers and clear paths help you keep the rest of your home livable while the remodel moves forward.
Control Dust Before It Spreads
Dust is the biggest threat to the rest of your home during a renovation. It travels through air, settles into fabrics, and finds its way into rooms far from the work zone.
- Work zone containment: Close off renovation areas fully before demolition begins to stop dust at the source.
- Daily cleanup habits: Ask your contractor how debris and dust will be handled at the end of each day.
- Surface protection: Cover furniture, shelves, and floors even in rooms that seem far away.
One unsealed doorway can coat your house in dust within hours.
Use Plastic Barriers The Right Way
Plastic barriers only work when they are installed with care. Loose sheets taped halfway do very little once tools and people move through the space.
- Floor to ceiling sealing: Secure plastic tightly along walls, ceilings, and floors to block airflow.
- Zipper door access: Use zippered plastic doors to control entry without tearing barriers down.
- High traffic reinforcement: Double layer plastic where workers enter and exit often.
Check barriers daily. Small gaps grow fast once work picks up.
Protect Air Vents And Manage Filters
Your HVAC system can pull renovation dust into every room if it stays exposed. This turns a local mess into a whole house problem.
- Vent sealing: Cover supply and return vents near work zones with plastic and tape.
- Filter upgrades: Install high quality HVAC filters before work begins.
- Frequent replacements: Change filters more often during construction to keep air cleaner.
If dust reaches your vents, it will reach every room you use.
Plan For Noise Travel
Noise moves through walls, floors, and ceilings even when dust does not. Planning for it helps you protect your routine.
- Room selection: Choose living spaces farthest from the renovation area for work and rest.
- Schedule awareness: Ask for a heads up on loud tasks like demolition or cutting.
- Sound buffers: Close interior doors and use rugs or soft furnishings to absorb sound.
Noise fatigue builds quickly when you do not expect it.
Define Clear Foot Traffic Paths
Workers moving in and out all day increase wear on untouched areas. Clear paths reduce damage and stress.
- Designated entry points: Limit which doors workers use to enter and exit.
- Protected walkways: Cover floors with protective runners or boards.
- Clear zones: Remove personal items from hallways and stairs to prevent accidents.
The fewer paths used, the easier your home is to protect.
Protecting non renovated areas keeps your space usable and reduces cleanup once the project ends. With barriers in place and systems protected, you can focus on managing daily life during construction. Next, it helps to plan how you will actually live through the remodel day to day.

Plan How You Will Live Through The Remodel
Preparing your home for renovation is not only about protecting walls and furniture. It is also about planning how you will function day to day while work is happening around you. Living through a remodel affects routines, energy levels, and productivity. When you plan this early, you avoid burnout, missed work, and unnecessary stress. This section focuses on practical ways to stay functional while your home is under construction.
Set Up Temporary Living Zones
Creating defined living zones helps you keep some sense of normalcy while parts of your home are unavailable. These spaces should support your daily needs without interfering with construction work.
- Makeshift kitchen: Set up a small area with a microwave, coffee maker, electric kettle, and mini fridge. Choose a location far from dust and noise so you can prepare simple meals without constant cleanup.
- Quiet work space: Identify one room or corner where work calls and focused tasks can happen. This space should be off-limits to contractors and protected from noise as much as possible.
- Safe areas for kids and pets: Designate areas that remain free of tools, cords, and debris. Use gates or temporary barriers to prevent access to work zones and keep routines predictable for children and animals.
These zones should be planned before demolition starts so you are not making last-minute adjustments during active construction.
Adjust Daily Routines
Living through a remodel often means accepting that your normal schedule will not hold. Adjusting routines early helps reduce frustration and fatigue.
- Work hours: Find out when contractors arrive and leave each day. If you work from home, plan meetings outside the loudest periods or consider temporary coworking spaces.
- Sleep disruptions: Construction noise often starts early. Prepare by shifting sleep schedules, using white noise machines, or planning nights away when heavy demolition is scheduled.
- Meal planning: Simple meals save time and reduce cleanup. Plan weekly menus that rely on minimal prep or takeout options so food does not become a daily stress point.
These adjustments help you stay productive without fighting the realities of a working job site.
Decide When To Leave
Staying in your home during renovation is not always the best choice. Knowing when to step away can protect your health and sanity.
- Short-term stays: Plan hotel nights or stays with friends during high-impact phases like demolition, flooring removal, or major plumbing work. Even a few nights can reset your energy.
- Full relocation triggers: Consider moving out if the remodel removes essential utilities, blocks bathroom access, or creates safety concerns. Long projects often become harder to live through as weeks turn into months.
Living through a remodel is harder than most people expect. Noise, dust, and constant decisions add up quickly. Planning exit options before you need them gives you flexibility and peace of mind when the process becomes overwhelming.

Communicate Clearly With Your Contractor
Clear communication sets the tone for the entire renovation. When expectations stay visible and shared, work moves faster and problems shrink before they grow. This section explains how to set boundaries, avoid delays, and keep your renovation on track through simple, consistent communication.
Set Daily Start And Stop Times
Work hours affect your routine, your neighbors, and job progress. Do not assume your contractor follows the same schedule you expect.
- Start time: Confirm when crews arrive so you can plan mornings, meetings, or school drop-offs.
- Stop time: Agree on when work ends to avoid surprise noise or unfinished cleanup at night.
- Weekend work: Clarify whether weekends are allowed and under what conditions.
Clear work hours reduce friction and prevent confusion on day one.
Define Clean-Up Responsibilities
A clean job site protects your home and keeps work moving. Cleanup should never be implied or assumed.
- Daily cleanup: Confirm whether crews sweep, remove debris, and secure tools each day.
- Dust control: Agree on who seals off areas, covers vents, and manages dust spread.
- Trash removal: Decide who handles dumpsters, haul-away, and overflow waste.
When cleanup expectations stay clear, safety improves and damage risk drops.
Agree On Decision Turnaround Times
Renovations depend on fast decisions. Delays often come from waiting on approvals, not from the work itself.
- Decision deadlines: Set a standard response window for approvals on materials, changes, or fixes.
- Decision format: Decide whether approvals happen by text, email, or in person.
- Fallback choices: Identify default options if you are unavailable.
Slow decisions stall projects. Clear turnaround rules keep momentum.
Understand How Miscommunication Causes Rework
Rework costs time and money. Most rework starts with unclear instructions or assumptions.
- Unclear changes: Vague requests often lead to results you did not expect.
- Verbal-only instructions: Details get lost without written confirmation.
- Assumed understanding: What sounds obvious to you may not translate on site.
Clear instructions reduce errors and protect your budget.
Schedule Weekly Check-Ins
Regular check-ins prevent small issues from becoming major problems. They also build trust.
- Progress review: Confirm what was completed and what comes next.
- Upcoming decisions: Flag choices needed before the next phase begins.
- Concerns: Address issues early while fixes are simple.
Weekly check-ins keep everyone aligned and reduce last-minute surprises.
Strong communication does not require constant oversight. It requires clear expectations, fast decisions, and consistent touchpoints. When you and your contractor stay aligned, the renovation stays predictable.

Prepare for Safety and Access
Safety and access planning often gets overlooked during renovation, yet it affects every person and pet in the home from day one. Construction zones introduce hazards that do not exist in daily living, and limited access can quickly turn minor issues into serious problems. Preparing your home for renovation means setting clear boundaries, protecting vulnerable areas, and agreeing on responsibility before work begins.
Child Safety
Children are naturally curious, which makes renovation sites risky even during short work windows. Sharp tools, exposed wiring, and unstable surfaces require extra precautions.
- Restricted areas: Define which rooms are off-limits and communicate those boundaries clearly to both children and contractors.
- Temporary locks: Install door knob covers or temporary locks on rooms under construction to prevent unsupervised entry.
- Daily inspections: Check work areas each evening for loose nails, cords, or debris that could create hazards after contractors leave.
Pet Safety
Pets react differently to noise, unfamiliar people, and changing layouts. Without planning, they can become stressed or slip into unsafe areas.
- Safe zones: Create a quiet, enclosed area away from construction noise where pets can rest during work hours.
- Escape prevention: Use temporary gates or barriers to block open doors and unfinished spaces.
- Routine stability: Keep feeding and walking schedules consistent to reduce anxiety during renovation.
If your pet shows signs of distress, short-term boarding or staying with a friend can be a safer option during intense phases of the remodel.
Tool and Material Zones
Tools and materials need space, but poor placement can block access or create tripping hazards. Planning these zones early helps work move faster and keeps your home functional.
- Designated storage: Agree on where tools, ladders, and materials will be stored so they stay out of walkways.
- Clear labeling: Mark active work zones to prevent accidental entry by family members or visitors.
- End-of-day cleanup: Confirm that tools and debris are secured or removed at the end of each workday.
This approach protects both your household and the renovation timeline.
Maintain Clear Walkways and Exits
Access routes matter for daily movement and emergencies. Renovation should never block essential pathways.
- Clear walkways: Keep hallways, staircases, and main paths free of cords, debris, and stacked materials.
- Emergency exits: Ensure at least one exit remains accessible at all times in case of fire or urgent evacuation.
- Lighting support: Add temporary lighting in dim areas where flooring or walls are removed.
Walkthroughs with your contractor help confirm these paths stay open throughout the project.
Define Responsibility and Liability
Renovation introduces shared risk, and assumptions often lead to disputes. Clear responsibility protects everyone involved.
- Damage accountability: Confirm who pays if personal property, flooring, or fixtures are damaged during work.
- Insurance coverage: Verify contractor insurance and understand what your homeowner policy covers during renovation.
- Written agreements: Document safety expectations, access rules, and liability terms in your contract.
Before work begins, ask one direct question and get a clear answer in writing. Who is responsible if something breaks?
Expect Stress And Plan For It
Renovation stress is normal, even when a project is well planned and well funded. Preparing your home for renovation is not only about physical spaces but also about managing the mental load that comes with ongoing disruption. Homeowners who expect stress and plan for it upfront tend to make better decisions, communicate more clearly, and recover faster when things do not go exactly as planned.
Common Sources Of Renovation Stress
Understanding where stress comes from helps you address it before it builds up and affects the project or your daily life.
- Noise fatigue: Constant drilling, hammering, and equipment noise can wear you down faster than expected, especially if you work from home or have children or pets. The lack of quiet time often leads to irritability and reduced focus.
- Decision overload: Renovations require many small decisions in a short time frame. Choosing finishes, approving changes, and answering contractor questions can become mentally exhausting when decisions stack up daily.
- Budget anxiety: Even with a solid estimate, unexpected costs can surface. Material changes, hidden issues behind walls, or timeline extensions often trigger stress around spending and financial control.
Practical Ways To Reduce Renovation Stress
You cannot eliminate stress during a remodel, but you can reduce its impact by setting up systems that protect your time, energy, and focus.
Simplify Daily Decisions
Reducing the number of choices you make each day helps prevent burnout during long projects.
- Create decision windows: Agree with your contractor on specific times when decisions will be needed instead of responding to questions throughout the day.
Set Clear Priorities Early
Knowing what matters most helps you stay calm when trade-offs appear.
- Identify non-negotiables: Decide which outcomes you care about most, such as layout, durability, or timeline, so compromises elsewhere feel intentional rather than stressful.
- Accept minor imperfections: Not every detail will be perfect. Letting go of low-impact issues reduces emotional strain and keeps the project moving.
Know What Can Wait
Not every choice or improvement needs to happen during this renovation.
- Defer optional upgrades: If a feature is not essential to functionality, it can often be added later without affecting the core project.
- Separate must-haves from nice-to-haves: This clarity protects your budget and reduces pressure when unexpected costs arise.
Planning for stress is part of preparing your home for renovation, not a sign of pessimism. When you expect challenges and build in mental breathing room, you stay in control and make decisions that support both the project and your well-being.

Final Walkthrough Preparation
The final walkthrough is the last step before your renovation is officially complete. This is where you confirm that the work matches what you agreed to and that nothing important was missed. A strong walkthrough helps you catch problems while the contractor is still responsible for fixing them and ensures you leave the project with the right information for future care and repairs.
What the Final Walkthrough Is and Why It Matters
The final walkthrough usually happens when the contractor believes the project is complete or very close to it. You walk through the renovated areas together and review every detail against the original scope of work. This is not a formality. It is your chance to protect your investment before making final payment.
- Timing: The walkthrough should happen after major work is finished but before final payment is released.
- Scope check: Every item in the contract should be reviewed during this step.
- Accountability: Any issues identified here remain the contractor’s responsibility to correct.
Creating and Managing Punch Lists
A punch list is a written list of items that need to be corrected, adjusted, or completed before the project is considered finished. This list keeps feedback clear and prevents disagreements later.
- Surface issues: Look for paint drips, uneven finishes, chipped tiles, or gaps in trim.
- Function checks: Test doors, drawers, appliances, outlets, lights, and fixtures to make sure everything works.
- Missed details: Confirm hardware placement, alignment, and finishes match what was approved.
Write everything down, even small issues. Minor fixes are easier to address now than after the crew leaves the site.
Reviewing Fixes and Touch-Ups
After the punch list is created, the contractor should address each item before final sign-off. Some fixes happen quickly, while others may require follow-up visits.
- Correction timeline: Ask when each punch list item will be resolved and document the schedule.
- Reinspection: Walk through the space again once fixes are completed to confirm they meet expectations.
- Final acceptance: Only approve completion when all agreed fixes are done properly.
Do not feel pressured to rush this step. A careful review prevents long-term frustration.
Collecting Project Documentation
Proper documentation helps you maintain your renovated space and protects you if issues arise later. This information is often overlooked but becomes valuable months or years after the work is finished.
- Warranty info: Request written warranties for labor, materials, and installed products.
- Product manuals: Collect manuals for appliances, fixtures, HVAC systems, and any new equipment.
- As-built notes: Ask for updated drawings or notes if changes were made during construction.
Store these documents in one place so they are easy to find when needed.
Handling Final Payments Correctly
Final payment should only happen after the walkthrough is complete and punch list items are resolved. This step gives you leverage and ensures the project closes cleanly.
- Payment timing: Release final payment only after all work meets contract terms.
- Lien releases: Request lien waivers if required to confirm subcontractors and suppliers have been paid.
- Completion confirmation: Get written confirmation that the project is complete and closed.
A careful final walkthrough protects your renovation investment and gives you confidence that the work was done right. Taking the time to review details, collect documentation, and manage final payments helps you move forward without unresolved issues or uncertainty.
Common Preparation Mistakes to Avoid
Most renovation problems do not come from bad design or poor materials. They come from weak preparation. Homeowners often focus on finishes and layouts while overlooking the everyday realities of construction. Avoiding the mistakes below helps you stay in control, protect your home, and reduce stress once work begins.
Underestimating Timelines
Renovation timelines almost always stretch beyond the original estimate. Many homeowners plan around best-case scenarios and get caught off guard when delays appear.
- Hidden conditions: Walls and floors often reveal plumbing, wiring, or structural issues that cannot be predicted during planning.
- Material delays: Cabinets, tile, fixtures, and appliances can arrive weeks later than promised.
- Inspection gaps: Missed inspections or failed approvals can stop progress until corrections are made.
Build buffer time into your schedule. If the contractor estimates eight weeks, plan your life around ten to twelve. Preparation means expecting disruption, not hoping to avoid it.
Skipping Permits
Permits feel like paperwork until they become a problem. Skipping them can cause delays, fines, or forced rework.
- Code compliance: Permits ensure electrical, plumbing, and structural work meets safety standards.
- Resale impact: Unpermitted work can surface during inspections and reduce buyer trust.
- Project stoppage: Cities can issue stop-work orders that freeze progress mid-renovation.
Good preparation includes confirming which permits are required and who is responsible for pulling them. Never assume a contractor has handled this unless it is clearly stated.
Keeping Too Much Stuff
Trying to work around furniture and personal items slows everything down. Contractors need space to move, stage materials, and work safely.
- Increased damage risk: Dust, tools, and foot traffic raise the chance of broken or stained items.
- Slower progress: Workers lose time navigating obstacles instead of completing tasks.
- Mental clutter: Living among boxed and half-moved items adds daily frustration.
Clear more than you think you need to. If an item would upset you if damaged, remove it from the house before renovation starts.
Not Planning Daily Life
Many homeowners prepare the house but forget to prepare themselves. Daily routines change fast once work begins.
- Cooking disruptions: Kitchens under renovation require temporary food plans or alternate spaces.
- Noise and work hours: Early starts and loud tools affect sleep and work schedules.
- Family and pet safety: Construction zones introduce hazards that need clear boundaries.
Preparation means planning how you will live through the remodel, not just how the space will look after. When daily life is accounted for, stress drops and decisions feel manageable.
Ready to move forward with confidence instead of guesswork? Visit our website to get clear renovation planning guides, real preparation checklists, and practical advice from people who understand the process end to end. You will know what to plan, what to avoid, and how to prepare your home the right way before work begins.
FAQs: About Prepare Home For Renovation
- What does it mean to prepare a home for renovation?
Preparing a home for renovation means planning the scope, clearing spaces, protecting surfaces, and setting up daily life before construction starts so work runs smoother. - How early should I start preparing before renovation begins?
Start preparation four to six weeks before work begins. This gives you time for permits, storage, and decisions without rushing. - What should be included in a renovation preparation checklist?
A checklist should cover permits, budget buffer, clearing rooms, protecting floors, planning living spaces, and setting contractor expectations. - Should I move out during a renovation?
It depends on the scope. Small projects allow you to stay. Major remodels involving kitchens, bathrooms, or utilities often require temporary relocation. - How do I protect my home from dust during renovation?
Seal doorways with plastic, cover vents, replace air filters often, and keep work zones closed off from living areas. - What items should I remove before renovation starts?
Remove furniture, wall decor, rugs, electronics, and personal items from affected areas to prevent damage and delays. - How can I prepare for living through a remodel?
Set up temporary spaces for cooking, working, and relaxing. Adjust routines and plan for noise, dust, and limited access. - How do I communicate expectations with my contractor?
Agree on work hours, cleanup standards, access points, and response times for decisions before work begins. - What are common mistakes homeowners make before renovations?
Common mistakes include underestimating timelines, skipping permits, keeping too much on site, and failing to plan daily life. - How does preparation reduce renovation stress?
Preparation limits surprises, speeds up work, protects your home, and helps you stay in control while construction is underway.
Conclusion
Preparation controls outcomes more than any design choice or material upgrade because it determines how smoothly the entire renovation unfolds. You cannot remove disruption from a remodel, but you can manage it by planning for delays, noise, dust, and changes to your daily routine before they happen. When your home is prepared, contractors work faster, decisions feel less overwhelming, and small problems stay small instead of turning into costly setbacks. A prepared home does not make renovation easy, but it makes it survivable by protecting your time, your budget, and your peace of mind.
Services To Support Your Home Renovation Journey
- Full Home Remodeling: Our team manages complete renovation projects from planning through finish, making it easier to prepare your home for a major remodel by coordinating schedules, budgets, and protection plans around your daily life.
- Kitchen Remodeling: We help homeowners turn outdated kitchens into functional spaces while guiding you through preparation, storage solutions, and timing so your household routines stay more predictable during construction.
- Bathroom Remodeling: Planning is crucial for bathroom work; this service includes support for temporary access strategies, fixture selection, and minimizing disruption in your most used areas.
- Water Damage Restoration: When unexpected issues arise during preparation or demolition, we handle water damage repairs and restoration so your renovation stays on track and your home stays protected.
- Floor Contractor Services: Upgrading or replacing floors is a key part of many renovation projects; we plan installation around other work to reduce overlap, protect existing surfaces, and keep your space usable where possible.
- Roofing Contractor: Preparing your home sometimes starts at the top; our roofing services ensure structural protection before interior work begins and reduce the risk of leaks or damage mid-project.
- Interior & Exterior House Painting: Painting is often a last step in renovations; we plan paint work to fit your project sequence so fresh walls don’t get damaged by later tasks.
- ADU Builders & Garage Conversions: If you’re converting or adding living space before a main remodel, we help you prepare adjacent areas and utilities so the overall renovation proceeds without utility conflicts or delays.
- Outdoor Kitchen Contractor: Preparing outdoor areas matters when interior work affects outdoor access; we plan installations so outdoor living remains functional and transitions smoothly with indoor renovations.
- Remodel Financing: To make renovation planning easier, we offer financing options that help you budget for preparation costs like temporary storage, permits, and interim living needs before construction starts.