

If your subfloor got wet during a flood, storm surge, or pipe failure, drying alone is rarely enough. Once the wood fibers swell, the internal glues delaminate, or rot sets in, the structural strength is gone and the panel must be cut out and replaced. This flood damaged subfloor replacement guide walks you through every stage: inspection, removal, material selection, installation, and final verification.
Act now if any of these apply:
- The floor feels soft, bouncy, or spongy underfoot — a walk-test failure indicates the decking has likely lost load-bearing capacity
- You can see visible delamination, edge swelling, or buckling in the panel surface
- A moisture meter reads above 19% after several days of drying attempts
- You smell a persistent musty odor even after the surface appears dry
Stop and call a licensed restoration contractor immediately if the water source was sewage, floodwater, or any Category 2/3 contamination; if you see mold on framing; or if the floor is sagging structurally. Those conditions are not safe for DIY work.
Table of Contents
- What should you inspect first after subfloor water damage?
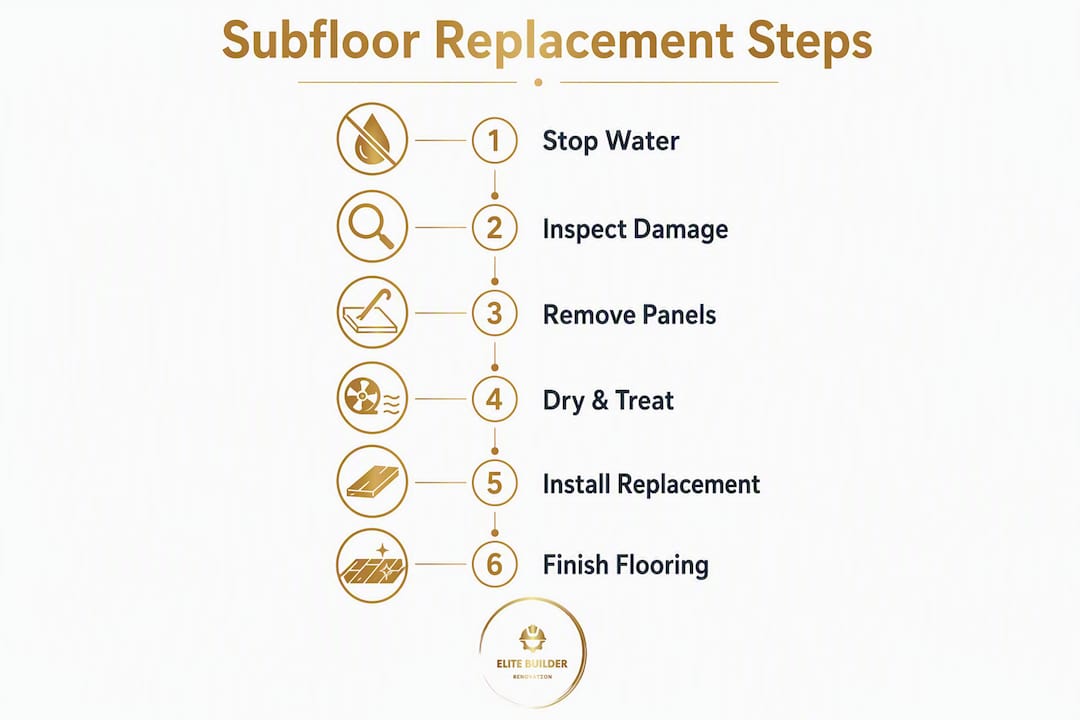
- Step 1: Stop the water source and start safe mitigation
- Step 2: How do you expose and map moisture in a flood-damaged subfloor?
- How do you assess joists and decide when to sister or replace them?
- Step 3: How do you remove water-damaged subfloor panels safely?
- Choosing replacement materials and prepping the deck for new panels
- Step 4: How do you install new subfloor panels correctly?
- When is it safe to reinstall finish flooring after subfloor repair?
- What does flood-damaged subfloor replacement cost and how long does it take?
- How do you document flood damage for insurance and when do you need a permit?
- When should you stop DIY and hire a licensed contractor?
- What moisture thresholds and materials do professionals actually use?
- Key Takeaways
- Elite Builder Renovation handles flood-damaged subfloor replacement in Tampa Bay
- Useful sources and further reading
- FAQ
What should you inspect first after subfloor water damage?
A fast, methodical inspection tells you whether you are dealing with a localized repair or a full-room replacement — and it protects your insurance claim.
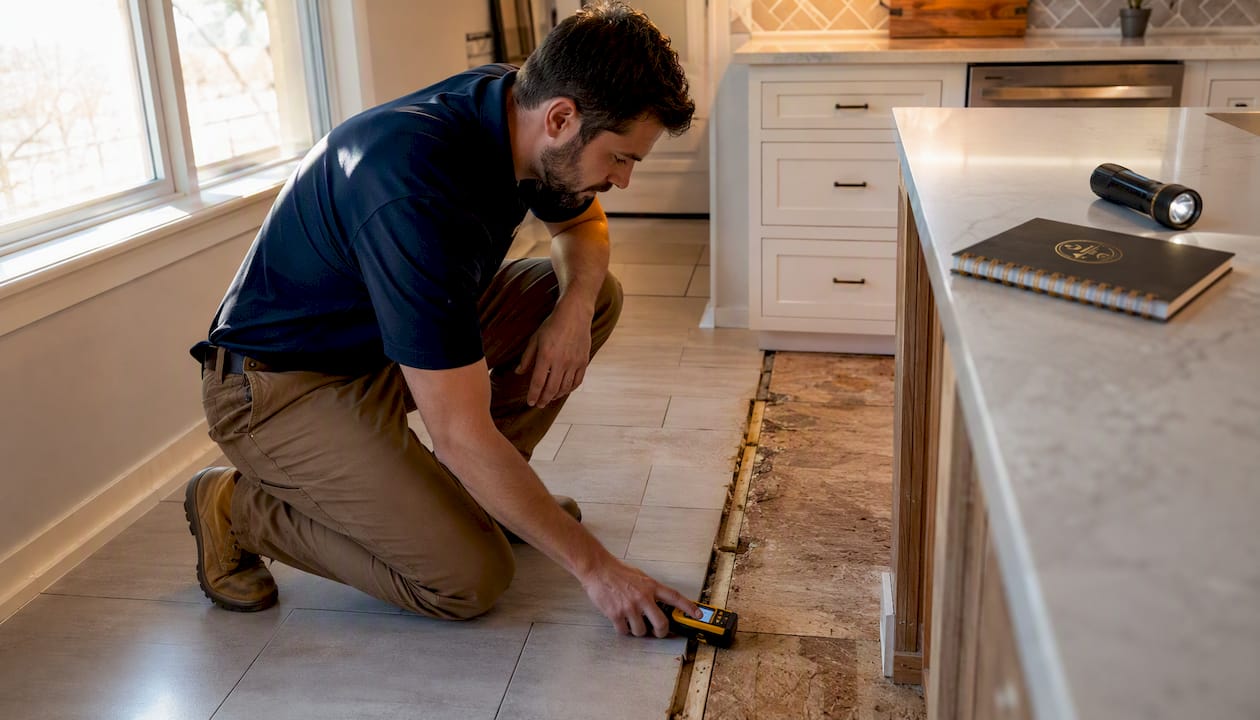
The walk-test and visual checklist
Walk every square foot of the affected area slowly. Press down with your heel at each step. A floor that deflects, bounces, or feels spongy underfoot has almost certainly lost structural integrity, even if the surface looks intact. Professionals treat bounce as a primary diagnostic because it reveals fiber failure that no amount of drying will reverse.
Beyond the walk-test, look for:
- Delamination: Layers of plywood separating at the edges or face, often visible as bubbling or peeling
- Edge swelling: Panel edges rising above the surface plane, especially at seams
- Cupping or crowning in the finish flooring above, which signals moisture movement in the subfloor beneath
- Musty odor: Persistent even after ventilation, indicating active microbial growth
Repair vs. replace decision flow
Localized staining with no structural softness and a moisture reading below 15% may be addressed with targeted drying and surface treatment. Any panel showing delamination, bounce, or readings above 19% after drying should be replaced. When damage spans more than one joist bay or crosses multiple rooms, a full-room replacement is usually more cost-effective than piecemeal patching.
What to photograph for your insurance claim
Document everything before you touch a single panel. Use your phone camera with timestamps enabled and capture:
- Wide shots of the entire affected room from each corner
- Close-ups of delamination, swelling, and any visible mold
- Moisture meter screen showing the reading, with the probe location visible in the frame
- Any finish flooring damage (buckled hardwood, lifted tile, saturated carpet)
- The water source itself (burst pipe, failed appliance, storm entry point)
Keep a flashlight and moisture meter on hand for the inspection. If you do not own a meter, most hardware stores rent them, and a basic pin-type model is sufficient for initial assessment.
Step 1: Stop the water source and start safe mitigation
Before any subfloor work begins, the water must stop and the environment must be controlled. Skipping this step means replacing panels into a still-wet system.
- Shut off the water source. Turn off the supply valve to the affected fixture or the main shutoff if the source is unclear. For storm intrusion, seal the entry point temporarily with plastic sheeting and tape.
- Move furniture and belongings out of the affected area to prevent secondary damage and give yourself full access.
- Extract standing water immediately using a wet/dry vacuum or a submersible pump for deeper pooling. Do not let water sit on the subfloor longer than necessary.
- Set up drying equipment. Place axial air movers (one per roughly 50 sq. ft. of wet surface) blowing across the floor at a low angle. Add a commercial-grade dehumidifier rated for the room size. In Florida’s humidity, a standard box fan is not sufficient — you need equipment that actively removes moisture from the air.
- Add a HEPA air scrubber if mold is visible or suspected. This captures airborne spores before they spread to adjacent rooms or your HVAC system.
- Document before you dry. Take your timestamped photos and moisture readings now, before equipment changes the readings. Insurance adjusters need the pre-mitigation condition on record.
Insurance photo checklist:
- Room overview (4 corners)
- Subfloor surface close-ups
- Moisture meter readings at multiple points
- Drying equipment placement (shows you acted promptly)
- Any structural damage visible from below (crawl space or basement)
On Category 2/3 water: Floodwater, sewage backflow, and water from outside sources are classified as contaminated. Porous materials saturated by Category 2/3 water — including subflooring, carpet padding, and engineered wood — must be treated as biohazardous. Do not attempt to dry and salvage them. Stop work and contact a licensed remediation contractor.
Step 2: How do you expose and map moisture in a flood-damaged subfloor?
Once mitigation is running, you need to get eyes on the actual subfloor surface. That means removing the finish flooring carefully and taking a grid of moisture readings before making any cut decisions.
Removing finish flooring safely
- Hardwood and engineered wood: Score the perimeter with a utility knife, then use a floor scraper or pry bar to lift boards starting from the wall. Work with the grain direction to minimize splitting.
- Laminate: Pop up the first row at the wall, then click-disconnect each plank. Laminate is usually salvageable if removed quickly and dried flat.
- Vinyl plank (LVP): Similar click-lock removal. Sheet vinyl requires scoring and pulling in sections; adhesive residue stays on the subfloor.
- Tile: Use a cold chisel and hammer or an electric chisel to break and remove tiles. Expect some subfloor surface damage — factor this into your replacement scope.
- Carpet: Cut into manageable strips with a utility knife, roll and bag each strip. Remove tack strips carefully to avoid puncture injuries.
Moisture measurement: where to read and what the numbers mean
Dry wood typically reads 8%–12% moisture content (MC). Readings above 15% indicate active mold risk. Readings above 19% after professional drying efforts generally mean the panel should be replaced, not dried further.
Take readings in a grid pattern: every 2–3 feet across the room, along the perimeter, and directly over joist tops (where moisture concentrates). Log every reading with its location and timestamp.
Moisture log template
| Location | Reading (% MC) | Date/Time | Action |
|---|---|---|---|
| Center of room | ___ | ___ | Dry / Replace |
| NW corner | ___ | ___ | Dry / Replace |
| SE corner | ___ | ___ | Dry / Replace |
| Joist top (bay 1) | ___ | ___ | Dry / Replace |
| Joist top (bay 2) | ___ | ___ | Dry / Replace |
| Perimeter (N wall) | ___ | ___ | Dry / Replace |
Copy this table into a notes app or print it. Your contractor or insurance adjuster will want these records.
How do you assess joists and decide when to sister or replace them?
The subfloor panels sit on top of the joists. If the joists are compromised, new panels will fail just as quickly. Verifying joist moisture before reinstalling panels is critical — if they are still wet or structurally weakened, sistering or replacement must happen first.
Signs of joist compromise
- Mold on joist surfaces: — Black, green, or white growth requires EPA-registered antimicrobial treatment before any new material goes in.
Sistering: how it works
Sistering means attaching a new, full-length joist alongside a damaged one to restore load capacity. The key practical requirements:
- The sister joist must run the full span of the damaged member, or at minimum extend 3 feet past the damaged zone on each side.
- Fasten with structural screws or bolts (typically 3/8-inch carriage bolts at 12-inch spacing) through both members.
- The sister must bear on the same support points (beam, sill plate) as the original joist.
- Use pressure-treated lumber if the sister will contact concrete or be in a high-moisture zone.
Fastener reference for subfloor and sistering work
| Application | Fastener type | Spacing | Notes |
|---|---|---|---|
| Subfloor to joist | #8 or #10 coarse-thread screw | 6" at edges, 12" in field | Use construction adhesive under panel |
| Sister joist to original | 3/8" carriage bolt or structural screw | 12" on center | Stagger top and bottom rows |
| Blocking to joist | 3" structural screw | 2 per connection | Install where panel seams fall between joists |
Permit note for Tampa Bay homeowners
In Tampa, St. Petersburg, Clearwater, and across Pinellas and Hillsborough counties, replacing more than a few joists or making any structural framing repair typically triggers a building permit. The threshold varies by jurisdiction, but any work that affects load-bearing members generally requires inspection. Contact your local building department before sistering more than two or three joists, and always before replacing a joist entirely. A structural engineer’s sign-off may be required for load-bearing repairs.
Step 3: How do you remove water-damaged subfloor panels safely?
Surgical extraction protects the joists beneath, keeps utilities intact, and prevents mold spores from spreading through the house.
Tools and PPE checklist
- Circular saw with a carbide-tipped blade
- Reciprocating saw for tight cuts near walls
- Pry bar and hammer
- N95 or P100 respirator (not a dust mask)
- Safety glasses or goggles
- Heavy work gloves
- Knee pads
- Plastic sheeting and tape for containment
Removal sequence
- Locate joist centers using a stud finder or by probing with a finish nail. Mark joist center lines across the full removal area with a chalk line.
- Set saw depth to the exact panel thickness, typically 3/4 inch. Setting the depth precisely prevents cutting into joists or any utilities running beneath.
- Make perimeter cuts along joist center lines so the new panel will have full bearing on each edge.
- Score around pipes and wires before prying. Use the reciprocating saw for cuts within 6 inches of a wall or obstruction.
- Pry up panels starting from the center of the cut section, working toward the edges. Avoid levering directly against a joist.
- Inspect the joist tops immediately after panel removal. Look for rot, mold, and fastener holes that may need treatment.
Pro Tip: Before making any cut, use a voltage detector along the cut line. Subfloor panels in kitchens and bathrooms frequently have electrical conduit or plumbing running just below the surface. A two-second scan prevents a dangerous and costly mistake.
Waste handling and disposal
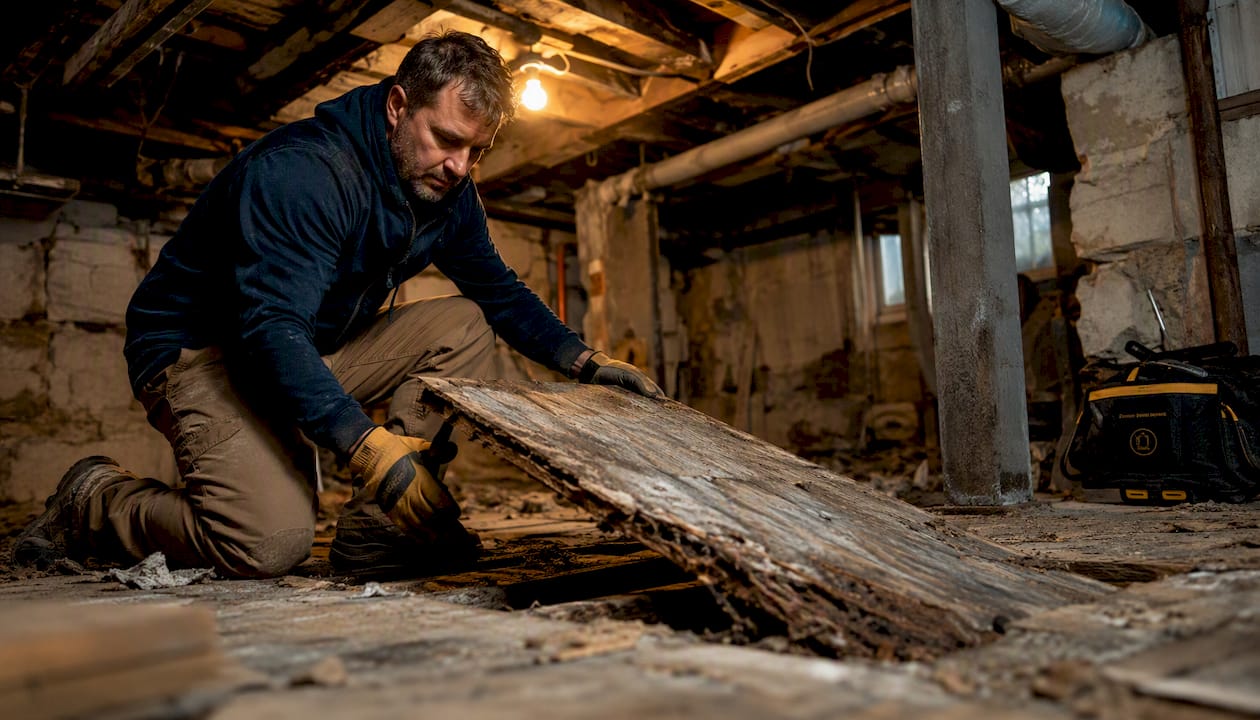
Flood-damaged subfloor panels are porous materials that have absorbed contaminated water. Double-bag each panel section in heavy-duty contractor bags before carrying it through the house. For Category 2/3 water scenarios, contact your local waste management authority — many municipalities in Hillsborough and Pinellas counties have specific protocols for biohazardous construction debris. Do not place contaminated materials in standard curbside recycling.
Choosing replacement materials and prepping the deck for new panels
The right panel material depends on the room’s moisture exposure, the finish flooring going on top, and the joist spacing below.
Plywood vs. OSB vs. moisture-resistant panels
Plywood is the preferred choice for most flood-repair scenarios. It resists permanent swelling better than standard OSB, holds fasteners more reliably, and is specifically recommended for tile installations because OSB edge swelling can telegraph stress upward and crack grout or tile. In Florida’s high-humidity environment, plywood’s dimensional stability is a meaningful advantage.
Standard OSB costs less and performs adequately in dry conditions, but it retains water longer than plywood and is more prone to edge swelling and decay after moisture exposure. For a flood repair, standard OSB is a short-term economy that often leads to repeat problems.
Moisture-resistant OSB (products with a sealed edge treatment and moisture-resistant resin) performs better than standard OSB in damp conditions, but still falls short of plywood for tile applications. Use it only where tile is not the finish flooring and where the moisture risk has been fully resolved.
Recommended thickness and grade
- 3/4-inch tongue-and-groove plywood (Exposure 1 or Exterior grade) for 16-inch on-center joist spacing — the standard for most residential floors.
- 7/8-inch or 1-inch panels when joist spacing is 19.2 or 24 inches on center, to meet deflection limits for tile.
- For tile installations, NTCA guidance and most tile manufacturers require plywood or a specialty underlayment such as cement board or an uncoupling membrane over the subfloor.
Preparation checklist before installation
- Clean joist tops with a stiff brush to remove debris, old adhesive, and any dried mold treatment residue.
- Install blocking (2x lumber between joists) wherever a panel seam will fall between joist centers.
- Apply a borate-based wood preservative to joist tops and blocking if any mold was present.
- Acclimate new panels in the room for 24–48 hours before installation, especially important in Tampa Bay’s humidity.
- Confirm joist moisture readings are at or below 12% MC before panels go down.
Step 4: How do you install new subfloor panels correctly?
A properly installed subfloor is flat, fastened without gaps, and verified dry before any finish flooring goes on top.
- Plan the layout. Start from the longest straight wall. Stagger panel seams by at least one joist bay (typically 4 feet) so no two seams align across adjacent rows.
- Apply construction adhesive. Run a 3/8-inch bead of construction adhesive along each joist top before setting the panel. Using adhesive with subfloor screws significantly reduces the chance of squeaks developing over time.
- Set the first panel. Position it so the long edge lands on a joist center. Press firmly into the adhesive before fastening.
- Fasten with screws. Drive #8 or #10 coarse-thread screws at 6-inch spacing along panel edges and 12-inch spacing through the field, into every joist. Smooth-shank nails are not recommended for replacement work — they back out over time.
- Leave expansion gaps. Leave a 1/8-inch gap between replacement panels and existing subfloor or walls. Skipping this gap causes buckling and can telegraph stress into the finish flooring above.
- Shim or plane high spots. Use a belt sander or hand plane to bring any proud edges flush with the surrounding subfloor. A level or straightedge across the repair area will reveal any high points.
- Final inspection before finish flooring:
- Walk the entire repair area and listen for squeaks or movement
- Verify all fasteners are countersunk flush or slightly below the surface
- Take a final moisture reading grid — all points should read 12% MC or below
- Confirm the repair area is level with the surrounding floor to within 3/16 inch over 10 feet (the standard tolerance for most finish flooring)
When is it safe to reinstall finish flooring after subfloor repair?
Reinstalling finish flooring too soon is one of the most common mistakes in subfloor repair after flooding. The finish material traps residual moisture and the problem restarts from beneath.
Per-flooring-type moisture thresholds
- Solid hardwood: Subfloor must read 8%–12% MC. Hardwood is highly sensitive; even slightly elevated readings cause cupping after installation.
- Engineered wood: Slightly more tolerant, but still requires subfloor readings below 14% MC and a minimum 24-hour acclimation period for the flooring itself.
- Ceramic or porcelain tile: Subfloor must be fully dry (below 12% MC) and flat. Use a cement board or uncoupling membrane underlayment in bathrooms or areas with ongoing moisture exposure.
- Luxury vinyl plank (LVP): Most LVP manufacturers allow installation over subfloors reading up to 14%–15% MC, but always check the specific product’s installation guide.
- Carpet: Subfloor should read below 12% MC. Installing carpet over a marginally wet subfloor is a common cause of mold recurrence in Florida homes.
Transition and trim tips
Where the repaired section meets existing flooring, use a T-molding or reducer strip to bridge any height difference. If the new subfloor panel sits slightly higher or lower than the original, a feathered self-leveling compound can blend the transition invisibly before the finish flooring goes down. For hardwood, matching the stain and finish to the existing floor is a separate trade skill — factor that into your contractor scope if the repair is visible.
Basement and slab notes
For concrete subfloors, perform a calcium chloride test or an in-situ relative humidity (RH) probe test before installing any adhesive-down flooring. Concrete slabs in Florida can wick ground moisture for weeks after a flood event. A liquid-applied vapor barrier or an uncoupling membrane system (such as Schluter DITRA for tile) adds a critical moisture break between the slab and the finish material.
For flooring options suited to Florida’s humidity, the choice of finish material matters as much as the subfloor preparation beneath it.
What does flood-damaged subfloor replacement cost and how long does it take?
Realistic expectations on cost and timeline help you plan the project and decide whether DIY or hiring a contractor makes more sense for your situation.
Typical timelines
Small localized repairs can be completed in 1–3 days. Larger rebuilds involving joist sistering, mold remediation, or multiple rooms commonly extend to 3–7 days or longer, with drying time being the variable that most often pushes projects past the initial estimate. In Tampa Bay’s summer humidity, drying a saturated subfloor system to 12% MC can take 3–5 days of continuous equipment operation even with commercial-grade dehumidifiers.
Cost estimate table: DIY vs. professional
| Scenario | Estimated cost range | Major cost drivers |
|---|---|---|
| DIY small repair (1–2 panels, no joist work) | — | Panel cost, adhesive, screws, rental equipment |
| DIY full-room replacement | — | Panel quantity, underlayment, disposal fees |
| Pro small repair (1–2 panels) | — | Access, containment, disposal |
| Pro full-room replacement | — | Joist repair, mold remediation, permit, waste disposal |
| Mold remediation (add-on) | — | Extent of growth, containment, air scrubbing |
These ranges reflect general U.S. market conditions. Tampa Bay pricing can run toward the higher end during hurricane season when demand for licensed restoration contractors spikes and material lead times extend.
Budgeting for contingencies
Plan for at least 15%–20% above your initial estimate. Hidden joist damage is the most common surprise — it is rarely visible until panels are removed. Permit costs in Tampa, St. Petersburg, and Clearwater vary by scope but typically run $75–$250 for a structural repair permit. Upgraded materials (exterior-grade plywood over standard, cement board underlayment for tile) add cost but reduce the risk of a repeat repair.
How do you document flood damage for insurance and when do you need a permit?
Getting the documentation right from the start protects your claim and keeps the project on the right side of local code.
Insurance documentation checklist
- Before mitigation: Wide and close-up photos with timestamps, moisture meter readings logged by location, photos of the water source
- During removal: Photos of delaminated panels, joist condition, mold if present, and any utilities exposed
- After removal: Joist moisture readings, photos of the cleaned deck before new panels go in
- Receipts and estimates: Keep every receipt for equipment rental, materials, and contractor invoices; get at least two written contractor estimates with itemized scopes
- Supplemental documentation: If structural repairs are added after the initial claim, your contractor should submit a written supplemental scope with photos to the adjuster before proceeding
Coverage basics to check with your insurer
Sudden accidental water damage (a burst pipe, appliance failure) is typically covered under standard homeowners policies. Gradual leaks that developed over time are frequently excluded. Flood damage from storm surge or rising water requires a separate flood insurance policy (NFIP or private). Review your policy declarations page before assuming coverage, and call your adjuster before beginning any permanent repairs.
When permits apply in Tampa Bay
- Replacing more than a few joists or any load-bearing framing: permit required in Tampa, St. Petersburg, Clearwater, and most Pinellas and Hillsborough County jurisdictions
- Electrical or plumbing work exposed during subfloor removal: separate trade permits required
- Structural engineer involvement: Required when joist replacement affects a load-bearing beam or when the building department requests engineered drawings
Contact your local building department directly. Tampa’s Building Services Division, St. Petersburg’s Development Services, and Clearwater’s Building Department all have online permit portals where you can confirm scope requirements before work begins.
When should you stop DIY and hire a licensed contractor?
Some conditions make DIY subfloor work genuinely unsafe or legally problematic. Recognizing these early saves money and prevents health risks.
Red flags that require a licensed contractor
- Structural sagging visible from below or a floor that has dropped more than 1/4 inch from its original plane
- Mold visible on joists or framing — disturbing mold without proper containment spreads spores through the HVAC system
- Category 2/3 water contamination — sewage, floodwater, or any water with visible debris or odor
- Joist failure — a joist that has cracked, split, or separated from its bearing point
- Electrical or plumbing exposure — wiring or pipes running through the affected area that must be moved or protected
- Inability to get moisture below 15% MC after 5–7 days of continuous drying equipment operation
Contractor vetting checklist
- Verify active Florida contractor license at the DBPR license lookup
- Confirm general liability insurance and workers’ compensation coverage
- Ask for at least two local Tampa Bay project references with contact information
- Request a written scope of work that specifies materials, fastener schedule, moisture verification method, and warranty terms
- Confirm the contractor pulls permits when required and does not ask you to pull them yourself
Questions to ask during estimates
- What moisture verification method do you use, and what threshold do you require before installing new panels?
- How do you handle mold found on joists after panel removal?
- What is your containment strategy to prevent cross-contamination?
- How do you dispose of contaminated materials?
- What warranty do you provide on the completed subfloor installation?
When joist replacement or load-bearing repairs are in scope, ask whether a structural engineer’s review is included or whether the building department will require one. In Pinellas and Hillsborough counties, inspectors sometimes require stamped drawings for structural framing repairs in older homes.
For water damage restoration in Tampa, working with a contractor who handles both the structural repair and the finish flooring under one contract eliminates the coordination gaps that cause delays and cost overruns.
What moisture thresholds and materials do professionals actually use?
The numbers and material choices in this guide are grounded in industry practice, not marketing copy.
Moisture thresholds in practice:
Wood subfloor panels read 8%–12% MC when dry. A reading above 15% signals active mold risk and means drying must continue. Above 19% after sustained professional drying, the panel is not recoverable and must be replaced. These thresholds apply to both plywood and OSB panels measured with a calibrated pin-type penetrating meter.
For concrete slabs, the equivalent test is an in-situ RH probe (ASTM F2170) or a calcium chloride test (ASTM F1869). Most adhesive-down flooring manufacturers require slab RH below 75%–80% before installation.
Material recommendations:
Plywood (Exposure 1 or Exterior grade, 3/4-inch T&G) is the professional standard for flood repair scenarios. Standard OSB retains water longer than plywood and is more susceptible to edge swelling and decay after moisture exposure. For tile installations specifically, tile manufacturers and the NTCA advise against standard OSB as a tile substrate because edge swelling transmits stress that cracks grout and tile. Use plywood or a cement board underlayment over the subfloor for any tile application.
For contaminated water scenarios:
Porous materials saturated by Category 2/3 water must be treated as biohazardous waste. This includes carpet padding, engineered wood flooring, and subflooring. Attempting to dry and salvage these materials spreads microbes and can contaminate your HVAC system. A licensed remediation contractor with EPA-registered antimicrobials and proper containment is the only safe path forward.
Exterior drainage in Florida: Solving the water intrusion source is as important as the repair itself. Poor grading, clogged gutters, and high ambient humidity are common contributors to repeat subfloor problems in Tampa Bay homes. Address exterior drainage before closing up the floor.
Key Takeaways
Replacing a flood-damaged subfloor requires stopping the water source, documenting the damage, verifying moisture levels, removing compromised panels, repairing joists, and installing new plywood panels before any finish flooring goes back down.
| Point | Details |
|---|---|
| Replace, don’t just dry | Once panels delaminate or fibers rot, drying alone cannot restore structural strength — cut out and replace affected sections. |
| Moisture thresholds matter | Subfloor must read 8%–12% MC before new panels are installed; above 19% after drying means replacement is required. |
| Plywood over OSB for flood repairs | Plywood resists swelling better, holds fasteners more reliably, and is required for tile applications per NTCA guidance. |
| Permits apply in Tampa Bay | Joist replacement and structural framing repairs typically require a building permit in Tampa, St. Petersburg, and Clearwater. |
| Elite Builder Renovation | For full subfloor replacement and water damage restoration across Tampa Bay, Elite Builder Renovation handles every stage from moisture verification to finish flooring. |
Elite Builder Renovation handles flood-damaged subfloor replacement in Tampa Bay
When the damage goes beyond a single panel, or when mold, joist failure, or contaminated water is involved, the project needs a licensed contractor who can manage every stage without handoffs. Elite Builder Renovation has completed over 375 restoration and remodeling projects across Tampa, St. Petersburg, Clearwater, Largo, Safety Harbor, and surrounding Pinellas and Hillsborough County communities. The team handles water damage restoration, subfloor removal and replacement, joist sistering, and finish flooring installation under one contract, with moisture verification at every stage.
Every project includes a free consultation, a written scope, and a 100% satisfaction guarantee. Financing options are available for homeowners managing unexpected restoration costs. To get a written estimate for your flood damaged subfloor replacement or water damage restoration project, contact Elite Builder Renovation today.
Useful sources and further reading
The following resources provide authoritative guidance on subfloor repair, mold safety, and material selection. Save this page and consult these sources alongside your contractor’s recommendations.
- EPA Mold Resources: The U.S. Environmental Protection Agency’s guidance on mold in homes, including health risks, remediation protocols, and when to hire a professional. Essential reading before any mold-adjacent subfloor work.
- UMass Amherst BCT — OSB vs. Plywood: Academic comparison of OSB and plywood performance, including moisture behavior and tile underlayment suitability. Supports the material recommendations in this guide.
- InterNACHI — OSB vs. Plywood: Home inspector association’s technical comparison, covering stiffness, moisture retention, and fastener holding strength. Useful for understanding why plywood is preferred after flood exposure.
- LP Building Solutions — How to Repair a Water Damaged Subfloor: Manufacturer-level guidance on identifying and repairing water-damaged subflooring, with practical removal and installation steps.
- Elite Builder Renovation — Water Damage Restoration Tampa: Local service page covering drying, remediation, and structural restoration for Tampa Bay homeowners.
- Elite Builder Renovation — Structural Inspection Before Remodeling: Covers visual and physical warning signs of subfloor and framing failure — a useful companion read before beginning any inspection.
- Elite Builder Renovation — Water Damage Restoration Tips: Practical homeowner-focused drying and mitigation guidance for the immediate post-flood period.
Contact Elite Builder Renovation for site-specific guidance on your property’s subfloor condition and repair scope.
FAQ
Does a water-damaged subfloor always need to be replaced?
Not always, but once panels show delamination, bounce underfoot, or moisture readings above 19% after sustained drying, replacement is required. Drying alone cannot restore structural strength once wood fibers or internal glues have failed.
Can you replace just a section of subfloor?
Yes. Localized damage confined to one or two joist bays can be cut out and replaced surgically, provided the surrounding panels are structurally sound and read below 15% MC. Cut lines must land on joist centers so the new panel has full bearing on each edge.
Will homeowners insurance cover a rotted subfloor?
Coverage depends on the cause. Sudden accidental water damage (a burst pipe or appliance failure) is typically covered under standard homeowners policies. Gradual leaks, long-term moisture intrusion, and flood damage from storm surge generally require separate coverage or are excluded. Review your policy and contact your adjuster before beginning permanent repairs.
How long does subfloor replacement take?
Small localized repairs typically take 1–3 days. Larger rebuilds involving joist sistering, mold remediation, or multiple rooms commonly extend to 3–7 days or longer, with drying time being the primary variable.
How do you know when the subfloor is dry enough to install new flooring?
Use a calibrated pin-type moisture meter. The subfloor must read 8%–12% MC before solid hardwood or tile goes down. Most luxury vinyl plank products allow up to 14%–15% MC, but always confirm with the specific product’s installation instructions.